|
Expanding the Bridgehead Fall of France 1 #12 |
||
|---|---|---|
| (Attacker) Germany | vs | France (Defender) |
| Formations Involved | ||
|---|---|---|
| France |  |
18e Division d'Infanterie |
| France |  |
1er Groupe de Reconnaissance de Division d'Infanterie |
| France |  |
1er Régiment de Chasseurs à Cheval |
| France |  |
1re Division Légères de Cavalerie |
| Germany |  |
5th Panzer Division |
| Germany |  |
7th Panzer Division |

| Total | |
|---|---|
| Side 1 | 3 |
| Draw | 1 |
| Side 2 | 5 |
| Overall Rating, 10 votes |
|---|
|
3.7
|
| Scenario Rank: 258 of 913 |
| Parent Game | Fall of France 1 |
|---|---|
| Historicity | Historical |
| Date | 1940-05-14 |
| Start Time | 05:30 |
| Turn Count | 26 |
| Visibility | Day |
| Counters | 218 |
| Net Morale | 0 |
| Net Initiative | 1 |
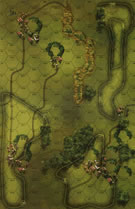
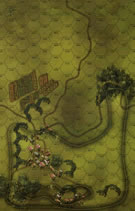
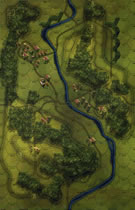
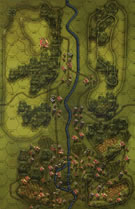
| Maps | 6: 26, 27, 29, 30, 31, 33 |
| Layout Dimensions | 86 x 84 cm 34 x 33 in |
| Play Bounty | 170 |
| AAR Bounty | 147 |
| Total Plays | 9 |
| Total AARs | 5 |
| Battle Types |
|---|
| Inflict Enemy Casualties |
| Rural Assault |
| Urban Assault |
| Conditions |
|---|
| Off-board Artillery |
| Reinforcements |
| Terrain Mods |
| Scenario Requirements & Playability | |
|---|---|
| Fall of France 1 | Base Game |
| Introduction |
|---|
|
The day had well begun for the French: Their successful early morning counterattack at Haut-le-Wastia had endangered the whole German bridgehead on the Meuse. But 5th and 7th Panzer Divisions had been ordered to merge their two separate toeholds on the left bank and expand their control to the west. The German engineers had worked all night and thrown two pontoon bridges across the Meuse: one to the south of Houx and another one at Bouvignes. But neither bridge was strong enough to support heavy panzers, so the main burden of expanding the bridgehead fell to the poor, bloody infantry. |
| Conclusion |
|---|
|
The French were in high spirits due to their successful counterattack that morning, and several French units attacked the narrow German bridgehead aggressively. But coordination between them was poor, and one battalion of the 39th Infantry Régiment was encircled and crushed after retaking the Surinvaux woods on the heights above the river. Meanwhile, the Germans send 2nd Battalion of 7th Schützen Regiment toward Onhayne, a village four kilometers to the west of Dinant. The battalion met little resistance, so Rommel followed them with the main body of his force. Riding in a tank, he was lightly wounded when his column came under anti-tank fire after pushing too far into the area held by 5th Régiment de Dragoons Portés. But the Germans took Onhaye along with all the other hastily formed French strongpoints in the area. By evening, the German advance was running wildly ahead of schedule and the shattered French XI Corps had to be dismantled. |
| AFV Rules Pertaining to this Scenario's Order of Battle |
|---|
|
| 6 Errata Items | |
|---|---|

|
In 1940: Fall of France, the units show Direct Fire. All units are Indirect Fire. (rerathbun
on 2015 Jun 06)
|

|
This is actually another ½track vehicle, simiar to the AMR33 & AMR35. It used the mechanized movement rate. (plloyd1010
on 2013 Apr 20)
|

|
Two 105mms (ID#s 1204, 1205) have "16-31" fire values in black (direct fire), when they should be in white (indirect fire). (Shad
on 2010 Dec 15)
|

|
The reduced direct fire value of the Heer HMG became 5-5 starting with Fall of France. (plloyd1010
on 2015 Jul 31)
|

|
The morale and combat modifiers of German Sergeant #1614 should be "0", not "8". (Shad
on 2010 Dec 15)
|

|
All SPW 251s have an armor value of 0. (Shad
on 2010 Dec 15)
|
| Rough day for the Wehrmacht |
|---|
|
A reinforced German regiment struggled mightily to make any headway against a much weaker but determined French defense. German company-sized groups moved out to secure 4 small towns to protect the flanks of two larger battalion sized forces that would seize the central city. Two mechanized exploitation forces waited to punch into the Frenh rear areas. The small towns refused to capitulate so the larger assault forces launched their attack and were pitilessly ground down by Frenh artillery and more fruitless town assaults. Now hours into the failing operation, the German exploitation forces drove deep into French territory only to be stood up by reservists and Dragoons waiting for them. The Germans were forced to conduct a general retreat in order to preserve any of their force. Major French victory. |
| 0 Comments |
| A long hard grind ( but not in a nice way) | ||||||||||||||
|---|---|---|---|---|---|---|---|---|---|---|---|---|---|---|
This 26 turn 6 mapper was played against old Treadhead himself, has large German mixed arms force trying to expand the bridgehead over the Meuse. The French forces are mainly low quality French INF and RES seasoned with better morale CAV. The VC's are slightly complicated but basically the Germans have to take town and hill hexes without losing too many steps. The battle started with a general advance by the German forces which although successful in the short term actually dispersed the German Schwerpunkt, as the German forces hit the first towns the attack faltered and almost ground to a halt. FOW had very little effect apart from a four turn blitz which saw several short turns. As the scenario descended into vicious hand to hand fighting the attack slowed to a crawl, some small turns holding up to 17 turns. During the latter stages of the game the DR's were very much against the poor hapless German commander and losses began to mount significantly, particularly as he had to throw in unsupported armour into urban combat. Finally on GT23 the German commander called of the attack have suffered tremendous losses. **Good balanced scenario even more balanced if the German commander grasps the nettle quicker and firmer than myself, you have to keep focused on the VC and recognize that a major victory is probably not an option for the Germans. Do not waste time bring across fairly useless INF guns over the river get into combined ops (INF,ENG and TANK) battlegroups earlier to assault the town.* |
||||||||||||||
| 0 Comments |
| Hold Back the German Tide, Mon Ami! | ||||||||||||||
|---|---|---|---|---|---|---|---|---|---|---|---|---|---|---|
This was a 8-session play-through with the cunning and tenacious, Wayne Baumber, as the attacking German Commander. I played the weaker & thinly-spread – but intrepid – French side. We played with the defense-favoring FOW, and with the smoke, consolidation and excess initiative optional rules as well. We should have also used the strategic movement rule. Our first session (game turns 1-5) consisted of three, separate German approach marches and movements-to-contact, with the associated counter moves and short-range OBA & DF provided by the thin crust of the French defense. The Germans northern (right flank) and center prong quickly made contact in the limited visibility of early dawn and the center prong decisively engaged the French garrison by close assault in town hex 33-0504. This turned out to be a very fierce close assault that was still in process by game turn 14! By the end of the session, there were already 5 French step losses, and none for the Boche. A combined SEVEN combat 7-die rolls were thrown. The 2nd session (game turns 6-7) was a rather grim slog for the fragile French defenders with an additional 7 step losses, compared to a single German step loss. The determined German Commander kept up the pressure on a broad front, though still focused on his 3-pronged attack. A break through occurred in the northern sector, while the French barely managed to hold off German advances in the center. In the south (left flank), the Germans were able to decisively engage two French positions in wooded areas. Finals step losses at the end of turn 7 stood at: 12 French, and 1 German. Our third session (game turns 8-9) comprised another thorough bashing of the defending French, and 7 more step losses, compared to just a single step lost by the advancing Germans. In the north, the right flank German advance widened the existing breach and eliminated a platoon of wayward French AMR-35 light tanks. In the center, an attritional stalemate continued, but German mobile reserves and AT guns began to reinforce the existing German push. In the south, a series of successful close assaults pushed back the French defenders and began creating a more substantial breach. By the end of the session, step losses for the Germans stood at 4, to the French loss of 19. A new personal record was set in this session when I managed to throw a total of TEN, utterly futile, combat 7-die rolls! After an extended hiatus in September, our 4th session (game turns 10-11) was a bloody one with a combined 11 step losses (5 German and 6 French) in only two game turns! In the north, the Germans widened the breach in French lines. In the center, the French defenses centered around the contested 20-meter hill and town in Hex 33-0504 became decisively-engaged. Accurate long-range AT fire eliminated a section of French P-178 armored cars. In the south, the 2-pronged, Boche onslaught continued as the breach in the French lines expanded, and a second AT gun platoon was eliminated by accurate German mortar fire in the 6-hex town on Map 31. Surprisingly, there were only a combined FIVE futile combat 7-die rolls (4 French, 1 German) in this session. The fifth session (game turns 12-13) was another grim encounter for the now-mostly-retreating French defenders with an additional 7 step losses, and only two more for the rapidly advancing German side. The northern prong of the Boche attack moved into more open ground on the edge of Map 26-29, but was still mostly stalemated as they approached the vicinity of the easternmost 3-hex town on Map 26. In the center, the French defense collapsed as the Germans overran the much-contested, 20-meter hill and initiated a headlong dash to the west in the open, though the garrison in the hilltop village in Hex 33-0504 continued to hold. In the south, the German wave moved inexorably west on Map 31 assisted by accurate OBA and fine die rolls. They were slowed by heavy defensive fire in their approach to the 6-hex town, but had more success to the southwest to the vicinity of the 2-hex village, where their ENG units easily led the way through a pair of enemy minefields. Another highlight from this session was a lengthy pursuit of a sprinting German leader who managed to escape from a very eager DRG unit that chased him over 1,200 meters and failed to capture him! This same unit’s strength was halved by effective German opfire at the end of this foolhardy episode. Once again, I tied my personal record with TEN, futile combat 7-die rolls and generally dismal luck across the board. Only 3 combat 7s were rolled by the Boche. By the end of the game turn 13, total step loses were 11 for the German invaders, and 33 for the heroic French defenders. The 6th session (game turns 14-15) was a very bloody and grim one for the defending French! Their step losses were another 8, to only 4 for the German side. The north, south and central Teutonic attacks continued mercilessly forward, held up slightly in the south as the 2nd echelon of German troops became engaged in the vicinity of the 5-hex town on Map 31. Accurate Nazi OBA & direct fire, coupled with close assaults accounted for the bulk of French losses in this session. These were concentrated in the south and north flanks of the German tidal wave. As has been the case for most of this scenario, most French artillery missions were ineffective. At the end of the session, total step losses were 15 for the Boche, and 41 for the heroic French defenders. The German initiative level final fell to 2 during game turn 14. The seventh session (game turns 16-18) was a another grim one for the Boche invaders in which they lost an additional 7 steps in their relentless assaults in the central and southern sectors of the battle map. In the north the two German assaults continued, but in a diminished state, and an additional section of French armored cars was lost defending the northern 3-hex town on Map 26. In the center, the village on the 20-meter hilltop, Hex 33-0503 was finally occupied by the Germans after a bitter, 18-turn siege! This substantially strengthened the Boche’s central thrust and they quickly surrounded and besieged the single-hex village 33-0716 on the west side of the same cratered & blood-soaked hill. In the south, the Germans onslaught on the 6-hex town in the northeast quadrant of Map 31, met with stiffened French resistance that resulted in multiple step losses, demoralizations & disruptions that derailed the attack in game turn 18. Further south on the same map, the 2-hex town and the dug-in French infantry on the adjoining 20-meter hill continued to hold out and even struck back at their attackers, when their supporting artillery gradually registered their targets in the southern portion of the battle map. By session’s end, total step losses were 22 for the Boche, and 44 for the hard-pressed French defenders. The 8th session (game turns 19-23 ) was a very grim one for the Boche invaders in which 13 more steps were lost, mostly in the center and southern portions of the battle map, due to accurate OBA and multiple fierce close assaults. The northernmost town on Map 33 finally was taken by the Germans after an 18-turn siege. In the south, a series of fiercely-contested close assaults yielded little for the attacking Germans. In this 26-turn, decently balanced scenario, there were 11 FOW-shortened game turns. I rate this scenario and enthusiastic 4. By session’s end, total step losses were 35 for the Boche, and 48 for the hard-pressed, but victorious French defenders. By mutual agreement, we called the game during game turn 23, and declared it a major French victory. |
||||||||||||||
| 0 Comments |
| Designers need to watch those Victory Conditions |
|---|
|
Another scenario with, what I call, "All or Nothing" victory conditions. In this case, to win all town and hill hexes on four boards need to be free of un-demoralized enemy units. "All or Nothing" victory conditions are easy to "game". Designers should be wary of them. This time the Germans had to clear the four boards. The French dug-in units behind minefields across a broad hill in the southwest portion of the four boards and deployed their fast armored cars out of sight to the north. This required the Germans to clear 17 hexes of town and dug-in units AND keep garrisons ready to counterattack the French armored cars. The Germans engaged the dug-in French and began the long-painful multi-hex assault. Running up hill into French HMGs isn't recommended. Slowly the Germans advanced across the hill. With about 5 turns left it seemed possible that the hill might be cleared and a thin grey line was forming to the north to block the impending armored car sprint. With four turns left the French cars bolted. The first platoon was reduced by a 37mm AT but this allowed the second platoon to continue. The German 105mm fired a long-range shot from the next hill. It reduced the armored car platoon, but didn't disrupt it and it continued to safety in a wooded hill hex. The thin grey line broke to chase down the reduced armored car while it drove deeper into the wooded hill. The Germans cleared a couple more hexes on the southwest hill but, if it can't eliminated that one reduced armored car, all is lost. And in the end that is what happened. The entire German advance was thwarted (major German loss) because a single reduced armored car was able to maneuver away from a battalion of advancing Germans. Now that's "gamey". |
| 0 Comments |
| Surviving the Onslaught | ||||||||||||
|---|---|---|---|---|---|---|---|---|---|---|---|---|
Battle: At daybreak on May 14, 1940, units from both the 5th and 7th Panzer Divisions were up bright and early to continue their westward push. They had crossed the Meuse and set up a couple of pontoon bridges for their anticipated reinforcements. As dawn broke, they encountered fire French units of the 1st Groupement de Reconniassance de Division d’Infanterie. An exchange of artillery barrages did little damage in the dim light, but by 0630 artillery was taking a toll on both sides. The Germans probed the French left and center with some success, but the right was untested in the early fighting. At 0715, German troops cleared a village that anchored the north end of the French line, while the 18th Division d’Infanterie moved to reinforce and stem the German move to the south. By 0900, French dragoon units were moving to provide support to the units in the south woods, and the Germans were pressing the French on both flanks of their front line. The French center was anchored in the central village by both the 18th Division d’Infanterie (artillery, HMG and dragoon units) and the 1st Chasseurs a Cheval, 1st Division Legere de Cavalerie. The French continued to hold the center, although the Germans had eliminated both of their 47mm APX anti-tank groups by 1100 hours. Hostilities subsided shortly before noon with the French still holding a battered center surrounded by German units. Analysis: This scenario is a 6-map, 26-turn scenario with VP’s based on enemy unit elimination for the French and hill & town hex control for the Germans. The scenario begins at dawn with limited visibility, but after a few turns, LOS is up 12 and further with the elevated terrain. There are a lot of woods to work around for firing lanes, so it takes a few turns for High FP exchanges. Both sides have enough units to establish a broad front across the map from north to south. The German setup had enough units west of the Meuse to move west and eventually assault the French on both flanks. The weak FP of the French infantry and the morale advantage of the Germans eventually favored the latter in these encounters. The Germans also have an OBA advantage that allows them to soften up the French line before assaulting. However, the French have enough units, particularly the cavalry and dragoon units with their higher morale and mobility, to slip through any holes in the German line as the latter attempt to hold hills & towns. It is an interesting scenario that gives both sides a chance to win, although the French may do so via legerdemain rather than actual success in their skirmishes. This seems a bit gamey as the Germans would probably not have worried very much about a single platoon that was hiding in the woods as they moved forward in their blitzkrieg mode, but it can cost them a victory in this scenario. This situation would be particularly true if it were played double-blind, as a single French unit in the woods on a hill could prevent a German victory. In this playthrough, the French had a couple of units on one of the wooded hills and still held five of the town hexes. Step losses were 26 for the Germans and 49 for the French, which gave the French a Minor Victory. |
||||||||||||
| 0 Comments |

 FaoF011


