
|
The Bridge Eastern Front #39 |
||
|---|---|---|
| (Defender) Germany | vs | Soviet Union (Attacker) |
| Formations Involved | ||
|---|---|---|
| Germany |  |
126th Engineer Battalion |
| Soviet Union |  |
2nd Tank Corps |
| Soviet Union |  |
85th Guards Rifle Division |

| Total | |
|---|---|
| Side 1 | 8 |
| Draw | 0 |
| Side 2 | 0 |


| Overall Rating, 9 votes |
|---|
|
3
|
| Scenario Rank: 715 of 913 |
| Parent Game | Eastern Front |
|---|---|
| Historicity | Historical |
| Date | 1941-07-14 |
| Start Time | 15:00 |
| Turn Count | 16 |
| Visibility | Day |
| Counters | 41 |
| Net Morale | 0 |
| Net Initiative | 1 |
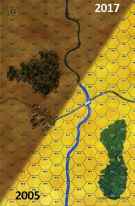
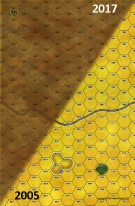
| Maps | 2: 3, 8 |
| Layout Dimensions | 56 x 43 cm 22 x 17 in |
| Play Bounty | 68 |
| AAR Bounty | 165 |
| Total Plays | 8 |
| Total AARs | 2 |
| Battle Types |
|---|
| Bridge Control |
| Rural Assault |
| Conditions |
|---|
| Reinforcements |
| Scenario Requirements & Playability | |
|---|---|
| Eastern Front | Base Game |
| Introduction |
|---|
|
As the German advanced deeper into the Soviet Union, their units often became strung out and dispersed. Fresh Soviet divisions from STAVKA reserves could take advantage of this overconfidence, catching the invaders unaware and inflicting defeats on them. Near the city of Orsha, the 118th Rifle Division joined with a few small armored detachments in on such attack. |
| Conclusion |
|---|
|
The Soviets failed to achieve surprise, and German artillery drove off their tank support. On the following morning German reinforcements drove back the 118th Rifle Division, and by late August the unit had lost all effectiveness after less than two months of combat. |

|
|
|---|
| AFV Rules Pertaining to this Scenario's Order of Battle |
|---|
|
| Heer |
|---|
|


| Army (RKKA) |
|---|
|


| 4 Errata Items | |
|---|---|

|
Two 105mms (ID#s 1204, 1205) have "16-31" fire values in black (direct fire), when they should be in white (indirect fire). (Shad
on 2010 Dec 15)
|

|
The reduced direct fire value of the Heer HMG became 5-5 starting with Fall of France. (plloyd1010
on 2015 Jul 31)
|

|
The morale and combat modifiers of German Sergeant #1614 should be "0", not "8". (Shad
on 2010 Dec 15)
|

|
The reduced direct fire value in Kursk: Burning Tigers is 4-4. (plloyd1010
on 2015 Jul 31)
|
| A Fine Training Action | ||||||||||||
|---|---|---|---|---|---|---|---|---|---|---|---|---|
I wish I would have found this scenario when I was looking for my very first one to play. At a time when five minutes of pushing counters meant ten minutes of thumbing through the rulebook, this action would have been ideal. There are enough of the major concepts of the system that come into play as well as a small, manageable amount of forces, and a short enough time span to make this a valuable training action. Also, the random entry point for the Soviet forces is an interesting twist. However, the very same things that make this a good action for the recruit might keep it from being a challenge to the more experienced. Even with my highly limited experience, it tended to get a little tedious. In this play, the Soviet forces entered on the north edge of Board 8. The Germans sat in their dug-in emplacements on the other side of the river. They continually chewed up the Soviet forces forming up for assault with DF and 105's. At the end of the action, the bridge remained in German hands. Lack of Soviet leaders meant that much of their force was dissipated as demoralized units fled and had to rally on their own. |
||||||||||||
| 2 Comments |
| A scenario with a randomly determined difficulty level | ||||||||||||
|---|---|---|---|---|---|---|---|---|---|---|---|---|
A single die roll at the start of this scenario will determine the difficulty level of the Soviets being able to acheive their VCs. The entry points are determined randomly; 1 through 3 /D6 -north edge of board 8; 4 -east; and 5-6 -south. If the Soviets enter from the east (easiest) then they will have the advantage of using the road which could allow a stack combined of KV-1 and KV-2s to drive straight down within DF range of the German units at the bridge before they can dig-in and before the artillery reinforcements arrive from the west. If they enter from the south (intermediate) then the advance will be slow but at least there will be some immediate cover from the woods for the foot units but the Germans will have time to dig-in before contact is made. And if the Soviets enter from the north (very difficult) the advance will not only be slow but there will be no cover for advancing units. The Soviet objective is to take control of the bridge hex on board 3 and either eliminate or drive back German units from a 3 hex radius of the bridge as well; all in the course of just 16 turns. The Germans have a small but efficient force of ENG units and a few support weapons; enough to contest three hexes and really only need to cover 3 hexes. On turn 3 the Germans also get 3x105mm guns for support and will have to decide whether or when to use them for AT fire or indirect fire -neither side has any OBA. In my play I rolled a "5" which brought the Soviets in from the south so I ended up with the intermediate difficulty setting. Without the road available the advance was slow; half of the Soviet foot units approached through the woods with the KVs lugging behind and the other half of the foot units went around north of the woods. The Germans had plenty of time to dig-in and by the time the Soviets had made significant contact the 105mms had already arrived and begun to unlimber in the town across the river -no chance of surprise. Surprisingly enough German opportunity fire did not phase the Soviet advance initially and there was a morale booster when the combined fire of the KV-1 and KV-2s emerging from the woods was able to take out one of the 105mms before being spotted and targeted. This early success was short-lived as a KV-2 platoon was quickly reduced and demoralized by a 105mm's AT fire, reducing the total combined KV direct firepower by half. The remaining KV-1s would knock out another 105mm but the third one would survive the battle. As for the Soviet foot units, steps of INF were cut down but Soviet leadership remained intact. However, no amount of Soviet DF managed to weaken the dug-in defenders to ready an easy assault on the bridge. The overall German morale was boosted by one SGT with a 2 morale modifier so M and M1 results were easily shrugged off. Turns passed very quickly; the Soviets were getting nowhere and their initiative had had been dropped from losses so the order was given to move in for the assault. Again, German opportunity fire, even firing on the 30 and 45 column did not deliver as expected and the Soviets have a good amount of units adjacent to the bridge. Then, again, even at such close quarters Soviet DF was still highly ineffective at keeping German units down. A few more Soviet steps are lost but there is still just enough strength to make a single, last-ditch but futile assault before time runs out. The German HMG unit at the bridge becomes disrupted from mortar fire and the assault is made. The Germans get the first-fire advantage but there is still enough Soviet strength left afterwards to roll on the 9 column. Both of the German leaders and a platoon of ENG are demoralized afterwards. However, there is only one more turn left to go and even if the bridge did get taken there were still three more German controlled hexes within three hexes of the bridge -no chance for a Soviet win regardless of the outcome of this one assault. The last turn the Germans get the initiative. Both Demoralized German leaders in the assault recover back to disrupted but the ENG unit flees. However the Soviet assault flounders and the bridge remains contested at end of turn 16. This scenario had a few things going for it but really believe that even if the Soviets get lucky and are able to enter from east and utilize the road it will still be a tough going for them. If the objective was just taking control of the bridge hex then they may of had a better chance to win but clearing the entire German force from three hexes of the bridge as well was asking too much with the short amount of time given. Because of that it only gets a "2" rating from me for being too much to accomplish for the Soviets given the timeframe. I think I got lucky enough with the Soviets to actually mount an adequate assault before having the whole force cut to ribbons and pushed back into the woods. I can only imagine how much worse it would of been had the attack come from the north. If I were to revisit this one I would maybe forget rolling for the Soviet entry points and just let them arrive from the east to try to even the odds. |
||||||||||||
| 0 Comments |
Love your AARs, Phil. Keep it up!
Thanks for the kind words, Shad. I enjoy writing 'em, and am glad they're useful.