
|
Bridge Across the Dniepr Eastern Front #35 |
||
|---|---|---|
| (Attacker) Germany | vs | Soviet Union (Defender) |
| Formations Involved | ||
|---|---|---|
| Germany |  |
Grossdeutschland Division |
| Soviet Union |  |
110th Rifle Division |

| Total | |
|---|---|
| Side 1 | 5 |
| Draw | 0 |
| Side 2 | 2 |


| Overall Rating, 7 votes |
|---|
|
4
|
| Scenario Rank: 86 of 913 |
| Parent Game | Eastern Front |
|---|---|
| Historicity | Historical |
| Date | 1941-07-11 |
| Start Time | 05:00 |
| Turn Count | 36 |
| Visibility | Day |
| Counters | 120 |
| Net Morale | 1 |
| Net Initiative | 2 |
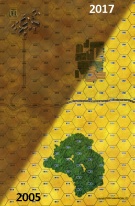
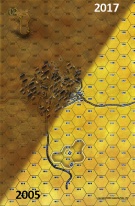
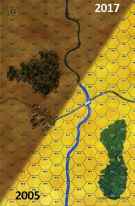
| Maps | 3: 1, 2, 3 |
| Layout Dimensions | 84 x 43 cm 33 x 17 in |
| Play Bounty | 102 |
| AAR Bounty | 159 |
| Total Plays | 7 |
| Total AARs | 3 |
| Battle Types |
|---|
| River Crossing |
| Rural Assault |
| Urban Assault |
| Conditions |
|---|
| Off-board Artillery |
| Randomly-drawn Aircraft |
| Smoke |
| Scenario Requirements & Playability | |
|---|---|
| Eastern Front | Base Game |
| Introduction |
|---|
|
Attached to the 10th Panzer Division for the crossing of the Dniepr, Infantry Regiment Grossdeutschland assembled the 1st and 3rd Battalions on the west bank of the river in the early morning hours off the 11th of July. |
| Conclusion |
|---|
|
Despite furious resistance, the German invaders forced their way over the river. Tenth Panzer moved forward rapidly, covering dozens of kilometers over the next two days, while Grossdeutschland held the bridgehead for supply trains and follow-up units to cross. |

|
|
|---|
| AFV Rules Pertaining to this Scenario's Order of Battle |
|---|
|
| Heer |
|---|
|


| Army (RKKA) |
|---|
|


| 7 Errata Items | |
|---|---|
| Scen 35 |
The river crossing numbers in EFD are incorrect and based on the 1st version, which used a single die. For EFD, the crossing numbers should be Foot 9, wheeled 5, Tracked 4. (campsawyer
on 2011 Jul 31)
|
| Scen 35 |
There are only 4 full strength German HMG's and 1 reduced HMG (campsawyer
on 2011 Aug 01)
|

|
The reduced direct fire value of the Heer HMG became 5-5 starting with Fall of France. (plloyd1010
on 2015 Jul 31)
|

|
The morale and combat modifiers of German Sergeant #1614 should be "0", not "8". (Shad
on 2010 Dec 15)
|

|
All SPW 251s have an armor value of 0. (Shad
on 2010 Dec 15)
|

|
The StuG IIb appearing in the original Panzer Grenadier game had an Anti tank value of 4-7. As of Eastern Front Deluxe (2005), continuing onward through the 3rd and 4th edition games, the anti-tank value has been 4-4. (plloyd1010
on 2022 Jul 21)
|

|
The reduced direct fire value in Kursk: Burning Tigers is 4-4. (plloyd1010
on 2015 Jul 31)
|
| All or nothing; the IRGD takes all | ||||||||||||
|---|---|---|---|---|---|---|---|---|---|---|---|---|
This scenario pretty much has it all; tanks, air-support, pontoon bridge building, smoke rounds, plenty of limiting terrain, ample space, a reasonable turn length and a 100+ counter density. The IRGD have a very specific task, to effectively eliminate all Soviet opposition or at least all units on the easternmost map. Nothing less than that will suffice for victory. The Soviets have a sizable force to defend with and a wide variety of deployment options along with up to ten units already dug-in. The Soviets set up first and are allowed to deploy up to eight units on the western map near the existing bridge. In this area all three 45mm AT guns were placed to cover all areas of the river along with one 82mm mortar and a combination of HMG and INF units set-up as a roadblock. In the center map area were more INF units supported by a triple-stack of T-26s hidden in the fields, poised to ambush any units that made it through the intial roadblock. On the eastern map the two other platoons of T-26s were deployed with the remaining mortar units on the northernmost hill while the 76.2mm batteries were located on the higher hill south of the town supported by a few foot units. All the other rabble hunkered down in the town itself bracing for the inevitable urban assault. The Germans selected one ENG unit paired with an INF unit to begin constructing the pontoon bridge at the northern portion of the map, just out of DF range of the AT gun deployed across the river from them. Meanwhile, the main battleforce not loaded on transport began to send units piecemeal across the river to take on the roadblock but taking care not to leave any units behind on river hexes as the SSR #8 gives a +1 DF and indirect fire bonus against them. German OBA is highly deadly with 2x24 and 4x16 available and this is used to clear away the AT gun threat rather than use 2x16 of it for smoke rounds. The IRGD takes some light casualties early on going at the roadblock right away braving opportuntiy fire and an assault is made on it immediately. The intial assault takes a while to complete but other units work their way around it and keep pressing east. Whatever the case I made a point of keeping the Germans constantly on the move as time was of the essence; the advance was a bit scattered to begin with but units did manage to eventually link-up enough in force to continue the drive effectively. At 06:30/turn 7 the roadblock had been dispersed and German units had begun to make contact with the Soviets hiding out in the fields. By this time the panzers and StugIIIB had made their way ahead to support the INF units and briefly engaged the T-26s. Once one step of T-26s were quickly eliminated the panzers kept driving on ahead to track down the other T-26s which had dug-in on the hill further east, leaving the rest in the fields to the infantry. The German assaults in the fields go quite well and instead of supporting the Soviet INF units there the remaining T-26s begin to make a slow retreat towards the other, higher hills south of the town. A vacancy on the 40mm hill opened up after the 76.2mms were eliminated by German OBA. Soon German units begin to gather and assemble outside the main town, slowly filling in the ranks. All this time the designated ENG platoon contiued to construct the pontoon bridge across the river unscathed by Soviet OBA or DF and by 08:00/turn 13 it was completed. It was never contested as German units were managing to move units quite efficiently already across the main bridge and Soviet OBA had more threatening targets to contend with. Around 08:45/turn 16 the fields in the central area have been cleared out of all Soviet opposition; in fact, by that time, no Soviet units were left on either the western or central map except for one lone and disrupted Lieutenant that had lingered around in the woods to spot for OBA if needed. Now most of the German assault force had gathered for an assault on the main town with more mobile reinforcements trailing behind safe from any AT fire. Simultaneously the panzers and StugIIIB prepare to engage the T-26s dug-in on the northern hill. Just before the first urban assault takes place a German "change in orders" random event occurs resulting in a shell shortage! This was right when I was considering using the smoke rounds for the first time to give the panzers some cover before taking on the Soviet tanks. Instead the panzers battle the T-26s without smoke cover or being able to set-up crossfire; though those T-26s do eventually get wiped out it is at the cost of a whole platoon's worth of PzIIIGs. Despite a few minor setbacks the Germans are keeping a very decent timetable. A good deal of units in the rearguard were slowed down after the German LT-COL perished after a whole platoon of HMGS was wiped out by Soviet OBA but that did not phase the ongoing urban assault. Once the first town hex was cleared German units swarmed in all around it and the defenders began to break very rapidly though the first town hex that was assaulted on the west end held out a lot longer than most of the rest. It seemed inevitable that it would only be a short amount of time before the entire town was cleared. The panzers had managed to flank around eastern edge of town to support the the foot units and cordon off escape areas for fleeing Soviet units. Soon the town was almost entirely encircled forcing fleeing units to move towards the southeast corner, by the last refuge of the hills there. Things continued to to go like clockwork for the IGRD. The last of the T-26s that had dug-in on the 40m hill found themselves not only in AT gun AND panzer crossfire but were also threatened by an INF assault team. The Soviet tankers were doomed; either use DF against adjacent INF units or use AT fire against the panzers? Either option didn't look good but they chose to use DF fire and did manage to demoralize the leader leading the potential assault. Too bad that the panzer's AT crossfire got them anyway! So the battle wraps up with the last Soviet INF platoon having to flee to the southeast corner of the map with nowhere else to go. Defiantly it does manage to recover while a horde of both armored and foot units begin to mass and converge upon it. In a last act of defiance the sole remaining Soviet leader calls down a last burst of OBA that manages to demoralize the German Major and wipe out an SPW 251 unit but then the panzers gang up to finish off that last INF step and rolls over the Soviet Lieutenant squish in the corner with no hex to escape to. At 13:00/turn 33 there is not one soviet unit or leader left on the entire battlefield with 3 turns left to go; a complete and decisive German victory. I have rated this one a "5" as it has to have been one of the most rewarding EF scenarios yet. I think it will challenge both the German and Soviet player alike. I'm sure I could of deployed the Soviets better, perhaps set-up more roadblocks? But what I think really worked for playing the Germans was keeping them constantly on the move, no matter what. Even when the urban assaults got bogged down I managed to keep units moving around and flanking constantly. This really challenged my unit management and organization along with keeping a rigid timetable. The one thing I regret was not being able to use the smoke rounds before the shell shortage eliminated the German OBA, as this is the first scenario that I've played using smoke. Then again, not being able to use the smoke rounds gives it even more of a replay value. Also would like to revisit this one again to see if I could repeat what I accomplished with the Germans, as many things that actually went right could of gone far more wrong. Usually I struggle with large attacking forces with a high counter density but this time I may have learned something after more than a few failures. |
||||||||||||
| 1 Comment |
| Sometimes You've Got to Do It Your Way |
|---|
|
Now and then the OOB attempts to give you hints of what strategy to use. A lot of OBA and you know bombing is going to be something decisive. A bunch of APVs and you know you will probably have to move quick at some point of the game. Sometimes the OOB makes no sense (to me). And sometimes you see the implied strategy is foolish and go another way. That was this scenario. Germans have to cross a river from the west and eliminate all the Soviets on the eastern board. The Soviets set up a dug-in AT and HMG roadblock at the only bridge, several small arms and AT along the route to the eastern town (excellent cross-fire set-up), a forward mortar base and located the remaining forces in the eastern town. The Germans have a pontoon bridge that takes twelve turns (a third of the game) to set up. I didn't even bother. Just blasted the Soviet roadblock and started crossing the river in the fourth turn. It didn't hurt that I had a leader with a combat rating of two, though. The Germans had a lot of trucks but knowing it's not a good idea to travel through an AT kill zone in trucks the cardboard Germans left them behind and just ran. The German OOB also included a bunch of smaller ATs. Not a lot of used when you have to run. Left those behind, too. Moving across the middle board my AFVs on the right flank cleared the Soviet AFVs in the southern town but got badly mauled. The infantry on the left flank ran into the woods and assaulted the forward mortar base. The remaining generally keep a wide/deep march (stacked only one high) and headed east with the HMGs on the road to keep up with the 3MA INF. The Soviets used their OBA and town based arty to flatten a few leaders and HMGs. But, by turn 12, the Germans began their assault of the town. If the Germans relied on the pontoon bridge they would be just be starting their march east. It was a grueling pile of assaults but the superior German moral played a key role in plowing forward (German 8/7, Soviet 7/5). Those 5s really hurt. By the 24th turn the remaining Soviets were almost surrounded so several raggedy leaders and INF broke free and ran north and south. Since ALL of the Soviets had to be eliminated for the Germans to win this was a gamey tactic. But using remaining German APVs and OBA these stragglers were eventually taken out. The game ended at turn 29. So pay attention to what the OOBs implys but don't be cemented to it. Use your own tactical judgement. |
| 0 Comments |
| Bridgehead to victory? | ||||||||||||
|---|---|---|---|---|---|---|---|---|---|---|---|---|
This solo action was very interesting and a good scenario, but very hard for the Germans to win. The victory conditions has the Germans clearing an entire board with the Soviets just needed to have one unit to win. But this is still has some very good SSR's for river crossings as well as aircraft and OBA smoke. As far as the forces the Germans have the edge with tanks, OBA and morale. The Soviets have the setup edge. With the leaders the Germans quality showed with many morale and combat modifiers, the Soviets did not have any leaders with modifiers. The Soviets setup with most unit on board 2, with some on road on board 1 and eight units covering the bridge an key areas of the river. The Germans start by crossing the river. The infantry move over from the ENG support while the tanks move across the bridge. Smoke covers the closest Soviet units and leaders. The Soviets quickly move there leaders to better spotting positions and open up with OBA on the river. One ENG group is hit and demoralized. Soviet mortars hit the crossing infantry disrupting them too. German tanks rush for the Soviet mortars and are hit by hidden AT guns. A PZ IIIG looses a step but the spotted AT's are destroyed by German OBA. The German infantry move to clear the dug in Soviet troops. Several German assaults clear the covering Soviet troops and establish the initial bridgehead. Moving up the road the German troops encounter the first roadblock and take it on. The Soviets try to disrupt the attack with OBA. Initially, disrupting the attack the tanks push forward and demoralize the INF's. An assault by German INF's finishes the job. The second roadblock is hit with OBA and destroyed. At this point it is turn 12 with the Germans across the river and across board 1. The Germans take 3 turns to reorganize and for an attack on board 2. Soviet airpower makes an appearance and goes after the German mortars. The mortars are hit and destroyed. The Germans move to attack the town on board 2. Heavy fire from the town slows the assault but the German armor moves to support the attack. The Stug pours fire into the town demoralizing key HMG's German INF's move to assault, but the Soviets reinforces the assault hex slowing the attack. Other German INF and ENG's move to the town edges for the assault. From this point on it became a assault vs counter assault in the town for the rest of the game. The Soviets succeed in keeping a single unit on board 2 while the Germans end up chasing them around the board. I would have give this a 5 for the river crossing and the dash up to the town, but trying to take the whole board 2 if very hard for the Germans. Possibly victory conditions change could help this one reach as 5. |
||||||||||||
| 1 Comment |
well done AAR