
|
Gorodischtsche Eastern Front #20 |
||
|---|---|---|
| (Defender) Germany | vs | Soviet Union (Attacker) |
| Formations Involved | ||
|---|---|---|
| Germany |  |
Grossdeutschland Division |
| Soviet Union |  |
4th Rifle Regiment |
| Soviet Union |  |
8th Tank Regiment |

| Total | |
|---|---|
| Side 1 | 11 |
| Draw | 1 |
| Side 2 | 6 |


| Overall Rating, 19 votes |
|---|
|
3.47
|
| Scenario Rank: 426 of 913 |
| Parent Game | Eastern Front |
|---|---|
| Historicity | Historical |
| Date | 1941-06-30 |
| Start Time | 13:00 |
| Turn Count | 20 |
| Visibility | Day |
| Counters | 84 |
| Net Morale | 0 |
| Net Initiative | 0 |
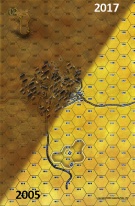
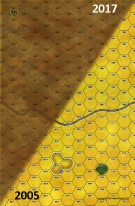
| Maps | 2: 2, 8 |
| Layout Dimensions | 56 x 43 cm 22 x 17 in |
| Play Bounty | 74 |
| AAR Bounty | 123 |
| Total Plays | 18 |
| Total AARs | 9 |
| Battle Types |
|---|
| Breakout |
| Conditions |
|---|
| Off-board Artillery |
| Scenario Requirements & Playability | |
|---|---|
| Eastern Front | Base Game |
| Introduction |
|---|
|
The invading German armies swept toward Moscow, trapping three Soviet armies west of Minsk. The rapid German advance confused the Soviet defenders, but did not rob them of their will to fight. Shortly afternoon on 30 June the Soviet 4th Tank Division struck the portion of the perimeter held by the Infantry Regiment Gross Deutschland. |
| Conclusion |
|---|
|
The 4th Tank Division had never really recovered from the opening air attacks of Operation Barbarossa, when a bombing raid killed the divisional commander. By 30 June the division had lost most of its tanks after they ran out of fuel and were abandoned in the retreat. Trapped in the Bialystok and Minsk pockets, the formation failed to break out and did not survive beyond the first few days of July. |

|
|
|---|
| AFV Rules Pertaining to this Scenario's Order of Battle |
|---|
|
| Heer |
|---|
|


| Army (RKKA) |
|---|
|


| 4 Errata Items | |
|---|---|

|
The reduced direct fire value of the Heer HMG became 5-5 starting with Fall of France. (plloyd1010
on 2015 Jul 31)
|

|
The morale and combat modifiers of German Sergeant #1614 should be "0", not "8". (Shad
on 2010 Dec 15)
|

|
The StuG IIb appearing in the original Panzer Grenadier game had an Anti tank value of 4-7. As of Eastern Front Deluxe (2005), continuing onward through the 3rd and 4th edition games, the anti-tank value has been 4-4. (plloyd1010
on 2022 Jul 21)
|

|
The reduced direct fire value in Kursk: Burning Tigers is 4-4. (plloyd1010
on 2015 Jul 31)
|
| So close but yet so far |
|---|
|
So this one ended with a German victory but only by the skin of their teeth. The Soviets threw everything they had at getting off the board towards the western side of the battle and were in position to do so when two quick turn ending fow rolls ended their battle. The German reserves were able to get into position and ultimately crush the escaping Soviet hordes. In addition, the leader situation of the Soviets became terrible as several were cut down as they attempted to cross the open ground. A very enjoyable scenario and one that can end quite quickly. The Soviets were 1/2 way to victory on Turn 6 before they had a bad stretch of luck. |
| 0 Comments |
| Slow and steady jack rabbits. | ||||||||||||||
|---|---|---|---|---|---|---|---|---|---|---|---|---|---|---|
Mods & condition notes: Fast mechanized movement, presumed crests on hills, Grossdeutchland troop counters, and AT/AA gun efficiency. Did not play double-blind. I had the Soviet side. Battle: I deployed spread across the center of my deployment area, mostly on the inner half of the 2 boards. The Germans deployed in 2 infantry groups, one behind the town, the other along the board 8 road, The German AT guns deployed on the hills, overlooking the infantry positions. I opened with a couple turns of split marching (to the right & left rather than the center). The heavy armor went to the right. The Germans moved into and occupied the town. The StuG also moved to support that force. The Germans along the road dug in. I pulled my left flank tanks back to the hill on board 2, and moved the 45mm AT guns in with them. The left flank troops began an oblique march around the Germans who had dug in. Artillery and long range HMG fire dogged me the entire way. There were some casualties and a fair amount of march disruption. Eventually, about 2/3rds of the expedition pulled about even with the Germans along the road, 4 to 6 hexes away. At the same time the left flank troops had reversed course and we following the path to the west-southwest. Just about now, my opponent realized the danger he was in. While the march along the west side of board 8 was slow, and sometimes erratic, it was determined. A second AT gun joined the first which was already on the board 8 hill. One AT gun each in hexes 613 & 714. These guns began to take potshots at my BT tanks. The left flank troops have been somewhat discombobulated by mortar from the town and long range HMG fire. The left flank BTs are joining their right flank compatriots. Everything was set. The BTs and T34 rushed to the west side of the hill (hexes 513 & 514). A 3rd German AT gun unloaded at the base of the hill, on the far side. I lost a BT to AT fire from the gun in front of the tanks. The second AT gun didn't have LOS due to the hill's crest. OBA suppressed the gun in hex 714, and I assaulted the one in 613, killing it. My KV kept a watchful eye on the now approaching StuG, forcing it to take a wide-arch approach. I retreated off the hill as the 3rd AT gun unlimbered. By now my infantry was parallel with the hill. My opponent tried to recover the situation by storming the hill with the lead elements of his infantry marching from the town. The infantry that reached to top of the hill were cut-down by OP-fire from my tanks, but he did get a captain up there to direct artillery. near the south side of the hill he assaulted a tank/infantry stack. He killed infantry, panicked the tanks, but otherwise lost due to my artillery fire directed at the hex. We call the game in my favor as I have 7 tank units and about 10 INF/HMGs within 5 hexes of the south edge. His emergency blocking force is dead or contained. All I need is time to win, and I have plenty. Observations: The fast mech rule is good for a quick run. Since my tanks outran their supporting infantry, they did end up in risky situation. I did this because felt I needed to keep the south-west pocket open. I had a very nervous turn, but it paid off. I was able to get around the hill before the AT guns were properly deployed (crest rule here). Demoralizing the AT gun in far hex allowed me to pop-up and kill the one in front of my tanks. If I had stayed to fight over the hill I would have been in for a world of hurt. The German deployment along the road took a turn way from my opponent's reaction. If he had been further back, I may not have made it. This was a game subtlety and calculation, followed by chaos and desperation. Probably the best way I like a game to go. Not strangely, my original battle plan went largely as intended. (I didn't think he would fall for it). |
||||||||||||||
| 0 Comments |
| Chaos |
|---|
|
This was a fun and chaotic battle that was quite quick to play. The Russians have a strong infantry/armor force that they need to exit from the far side of the map, past a weaker German infantry force. The Russians have only a few leaders, none above the rank of captain, so command is a challenge. The scenario didn't specify that the Germans could begin dug in, so that gave the Russians a two turn head start to close the distance between them. They approached the German line in a very dispersed formation, hard to control but easy to manage casualties. Their tank force flanked the German line on both sides, opening a possible path on either side. Moving to the east, they caused some German units to redeploy to meet the threat. At the same time, a Russian company on the west flank saw an opportunity and slipped past the German flank after enduring 45 minutes of close range German fire. At this point the whole German line fell back to join their 2nd line comrades, who were already engaged by a breakthrough force of light tanks. The Russian attack bogged down in assaults in the German center, with a handful of Russian units exiting on the flanks. A last desperate surge by Russian stragglers up the middle was hammered by HMG fire from two covered positions behind a small hill and a copse of trees. Only midway through the allotted time, the Russian advance was spent and the Germans had taken more casualties than they could stomach. The scenario ended in a draw. |
| 1 Comment |
| very solid scenario |
|---|
|
This is a very solid scenario, among the best in EFD so far. I didn't expect that since it appeared it would be a shoot-em-up for the Germans, but after time pondering different approaches I changed my tune. RKKA set up with a bulk behind the town, including the more fragile tanks. Heftier tanks were in the open ground away from the town. Their plan was to approach the Germans, soften them up, then look for opportunities to rush to the exit side of the map. The Germans set up spread across the boards closest to the Soviet exit side. They conceded the town to the Soviets. They were spaced to be sure to have adjacent shots at any infiltraing Reds. Mortars and StuGs set up in the middle for flexibility. The first two turns the Soviets advanced, including a bulk of their weaker tanks in the town, as well as mortars and AT batteries. The Germans dug in. At around turn 4 a lucky shot from two BT7 platoons in the town took out one of the German 37 mm AT batteries on top of the big hill. By turn 5 the Reds set up flanking shots on the StuGs, which were now dug in between the copse of trees and the larger hill. The StuGs opted to take one shot at the T-34 platoon, since it was unlikely the Reds would get any flanking shots in the next turn before the StuGs could pull back. Two significant things happened on turn 5. First, the Reds got the initiative with two activations. This enabled a flank shot on the StuGs, and one step was eliminated! Then Soviet OBA disrupted one platoon of three deployed on the German west flank. Consequently, a large formation of seven RKKA platoons who had up to then been biding their time outside of German direct fire range started moving in on that flank. On turn 6 the Reds rushed the left flank with mixed results, also setting up overruns by the KV1s and T34s to support. On the east flank they also set up a couple of overruns. The Germans shifted a few platoons to support the threats to the flanks. However, as things evolved over the next half dozen turns, the Soviet's fortunes declined. They started absorbing a disproportionate amount of step losses without meaningful progress. I pulled the plug in the German's favor after turn 12. It was interesting enough I gave it another try. This time their strategy would be to focus on the StuGs and AT guns first, then the HMGs. Meanwhile the infantry would hole up in the town to avoid German arty until an opportune time to make a run for the exit edge. This wasn't working effectively enough, but since the Germans ceded the large town to the Soviets, with about six turns to go I had the Reds advance en masse. It was very bloody, and they were making it close, but with about three turns left I called it in favor of the Germans. |
| 0 Comments |
| My first AAR |
|---|
|
Played Vince Hughes in this. My first game with an opponent. I feel this scenario would be best with an experianced player as the Soviets and the lesser experieanced player as the German's however it is a good work out on the command and attacking. I will be willing to come back to it but want more play of the system. I did learn more than I could solo playing. |
| 0 Comments |
| Germans Take Full Advantage Of Inexperienced Soviet Commander | ||||||||||||||
|---|---|---|---|---|---|---|---|---|---|---|---|---|---|---|
This battle was chosen in order to allow a new player to experience PG, albeit an experienced WW2 gamer. I believed it had enough of most 'things' PG, infantry, armour, OBA etc. The game was played over Skype with Keith Plyman (or Zaarin7 as shown here). The game represents Soviet attempts to break out from a 'Kessel' in one sector near Minsk in 41. On this occassion it was very one-sided, though previous results would suggest otherwise?. A decent learning scenario that allowed a new player to experience the 'travails' of trying to organise a co-ordinated attack under heavy fire. New players also be aware it is a 20 turn game. PG gives time in most cases to lay the preparatory tasks before attacks go in. This game was called after just 7 turns, meaning there were 13 more available. It gets a solid 3 from me. The Soviets needed to break out from the area and would therefore need to get past the German defenders. The Germans positioned their lines in order to create the best chance of contact with the enemy. In fact, the Germans were quite happy for the enemy armour force on their left to pass them, leaving all the German forces to pick off hapless Soviet infantry, As it happened, the enemy armour would be dealt with by German 37mm AT forces quite well. These Soviet forces were commanded by the very inexperienced K.Plymanko, a general that had yet to lead a force in the field. Plymanko placed his armoured troops to the west with his infantry forces supported by a lone KV1 platoon on the east side. Responding to this, the Germans placed a StG platoon and four batteries of 37mm AT guns to hold off the armour attack with the rest of the GD Regt to face the Russian foot troops. The Soviet attacked lacked finesse, going in without preparation or guile. Both their armour and foot troops headed straight at the German enemy, seemingly hopeful of bull-dozing their way through. Initial salvoes from German troops seemed more ‘range-finding’ as Soviet casualties proved light in the opening bursts. However, upon closing in to the German lines at 1400 hours, Soviet tanks and men become to become casualties very quickly. Worse still, those that did not become casualties were losing cohesion right in front of the enemy, whilst those Soviet troops following up behind, simply ‘piled’ in with their already disorganized comrades, making rich, thick targets for the invaders to fire into.This was exacerbated by the fact that the Soviet infantry attacked had channelled itself to the east of the main town and left little room for manouvre at all. The Soviet armour fared no better. A lead T34 platoon was picked off by cross-firing 37mm units whilst the German StGIII made little work of accompanying BT tanks. Soviet tanks were forced to pull back and very quickly too whilst all the time being shot at whilst retreating. Over the following hour on the German right flank, there followed the most awful carnage against the disorganized and crowded Soviet forces. These were shot at, bombarded and basically torn apart for a whole hour. They could not get forward in any strength. A sole under-strength infantry platoon made it into the German lines, but their cause was hopeless. They would not be able to do it on their own. Having seen enough in just 1 hour and 45 minutes of battle, Plymanko called off the attack and pulled back to his own lines. German casualties were basically nothing; Soviet losses amounted to 19 steps of a mixed bag of men and armour. |
||||||||||||||
| 0 Comments |
| The great proletarian turkey shoot | ||||||||||||
|---|---|---|---|---|---|---|---|---|---|---|---|---|
Perhaps the Germans learned a few lessons from Zelva in handling masses of Soviets attempting to break through their postions. In this case it looked easy enough for a combined force of infantry and armored units to get roughly a third of their numbers through and the Soviets had plenty of leaders to assist them; even the Soviet morale was better than usual at an 8/6 rating. Of course one of the problems was that a good deal of their force consisted of reduced units. This was not to be the same as Zelva though and the bumrush tactics would not work this time. The Infantry Regiment Gross Deutschland had sufficient forces covering the southern area of the maps and proved to be highly efficient. The Soviet units attempted to breakout in three different directions and all three advances were put in check. Very few units made it past the east-west road and once those did they were easliy picked off. In fact, by the time the slaughter was over only one reduced Soviet INF unit had escaped off the south edge and only after fleeing from a demoralization recovery failure. The Germans had very few activations spent where they weren't either using DF or AT fire, or engaged in some sort of assault; OBA helped out a lot too. Most fire was concentrated on full strength units and effective in reducing them, dropping their morale from 8 to 6 and once reduced there was no hope for those units. The Soviets spent just as much time attempting to rally units as they did attempting to move them off map. The German 75mm IG was placed just so that it kept fleeing demoralized units having to keep an 11 hex distance away from it, sending some units all the way back to the north edge. German casualties were very light and only lost two steps of INF; both of those from very lucky Soviet OBA shots. In short, the Soviets were all but decimated and by the conclusion of the "battle" most of the Germans had left their original defensive positions and were advancing north to pick of the very few remaining stragglers. Despite the rollover and knowing well before the first half that the Soviets had no chance of winning, this was an enjoyable play. Usually I don't do too well with preventing breakouts or on the defending side of an enter/exit scenario. This time everything clicked along with a lot of great dice rolls for the Germans when using every type of fire or attack. In one turn alone, either the 5th or 6th, at least 6 Soviet steps were eliminated. Fog of war very rarely occured either. I really thought before play that with so many Soviet units scurrying down the map that surely 10 units would be able to breakout and was literally dead wrong. I think on a good day however the Soviets could pull off at least a draw if they actually attempt to engage one portion of enemy in a few futile assaults to help make good the escape of others. Some of the faster moving Soviet tanks got close to breaking out, just a hex or two away from safety, before they were overrun. Surprisingly, the sluggish KV-1 platoon was the last armored unit to perish and with it's slow movement rate of 4 still managed to get just two moves away from an exit bfore it was annihilated. There were a lot of Soviet "almosts". Even scattering trucks loaded with weapon units got very close in their desperate escape attempts. In just about every case the Germans would smugly wait, yawn and stretch and then pick off units with ridiculous ease. This one gets an easy "3" from me and is definitely worth a future replay. One thing for sure is that in this case, the Soviet bumrush of the masses was not the way to go this time around; at least not up against the mighty IRGD. |
||||||||||||
| 0 Comments |
| Manovrando velocemente | ||||||||||||
|---|---|---|---|---|---|---|---|---|---|---|---|---|
Il sovietico si schiera su tutta la lunghezza del lato nord. Il tedesco si disponde in difesa con l'idea di bloccare l'avanzata nemica attraverso l'opportunity fire. Il problema del tedesco è che lo schieramento russo è vasto e pertanto deve coprire un vasto territorio. L'idea del russo è avanzare velocemente con le unità più veloci cercando di portarsi fuori dal lato sud prima possibile. Il sovietico intende abbandonare le unità lente, abbandonarle al proprio destino, ma vincere la partita. La strategia si rivelerà vittoriosa. Il tedesco non riesce a coprire tutto il fronte e le unità di carri e i camion russi si insinuano velocemente tra le linee nemiche. Dopo solo 5 turni il russo porta fuori 2 camion, un unita HMG, una unità mortai, 2 unita da 45mm, un ufficiale, 3 BT7, un BT5 e un T34. Il Russo Vince. |
||||||||||||
| 0 Comments |
| EF# 20 Gorodischtsche or If you can pronounce it, you deserve to win! |
|---|
|
The Allies launched their attack on a broad front. The lack of Armor leaders really hampered the Allied plan of manuver. As the Allies moved foward the Axis just picked them off as they came. This became the rule rather than the exception. With low morale the Allies had a hard time getting those units that did survive back in the fight, and when they did the advance was uncoordinated. By 1700 it was all over. Only four Allied units had exited. The rest were shot up. Only four Axis steps were lost. Major win for the Axis. |
| 0 Comments |