
|
The Crossing at Alytus Eastern Front #5 |
||
|---|---|---|
| (Attacker) Germany | vs | Soviet Union (Defender) |
| Formations Involved | ||
|---|---|---|
| Germany |  |
20th Panzer Division |
| Germany |  |
7th Panzer Division |
| Soviet Union |  |
5th Tank Division |

| Total | |
|---|---|
| Side 1 | 25 |
| Draw | 0 |
| Side 2 | 4 |


| Overall Rating, 28 votes |
|---|
|
3.14
|
| Scenario Rank: 650 of 913 |
| Parent Game | Eastern Front |
|---|---|
| Historicity | Historical |
| Date | 1941-06-22 |
| Start Time | 15:15 |
| Turn Count | 36 |
| Visibility | Day |
| Counters | 94 |
| Net Morale | 1 |
| Net Initiative | 2 |
| Maps | 4: 1, 3, 5, 7 |
| Layout Dimensions | 86 x 56 cm 34 x 22 in |
| Play Bounty | 83 |
| AAR Bounty | 111 |
| Total Plays | 29 |
| Total AARs | 11 |
| Battle Types |
|---|
| Inflict Enemy Casualties |
| Rear Guard |
| River Crossing |
| Conditions |
|---|
| Off-board Artillery |
| Randomly-drawn Aircraft |
| Reinforcements |
| Scenario Requirements & Playability | |
|---|---|
| Eastern Front | Base Game |
| Introduction |
|---|
|
In the early morning hours of 22 June, 7th Panzer Division raced over the border from East Prussia into Lithuania and headed for the key bridges over the Neiman River at Alytus. The Soviet 5th Tank Division, stationed there in peacetime, had already begun to withdraw. But when the Red Army engineers tried to destroy the big concrete bridge on the south end of town, it withstood the blast. Realizing that his division's T-26's tanks could not outrun the panzers, Col. F.F. Fedorov ordered his unit to turn around and strike the Germans as they deployed into their newly won bridgehead. |
| Conclusion |
|---|
|
A confused tank battle developed on the fields to the west of Alytus; exactly where it took place is, like many actions, still disputed. During their rapid advance the units of 7th Panzer had become badly intermingled and command and control suffered accordingly from this lack of march discipline. The 5th Tank Division suffered heavy losses but inflicted considerable damage on the 7th Panzer as well. Only the timely arrival of 20th Panzer's tank regiment allowed the Germans to drive off the Soviet division and resume their offensive. |

|


|
|---|
| AFV Rules Pertaining to this Scenario's Order of Battle |
|---|
|
| Heer |
|---|
|


| Army (RKKA) |
|---|
|


| 3 Errata Items | |
|---|---|

|
The reduced direct fire value of the Heer HMG became 5-5 starting with Fall of France. (plloyd1010
on 2015 Jul 31)
|

|
One unit from Eastern Front has a direct firepower of 3-5 on its reduced side instead of the normal 4-5 (garbare83686
on 2023 Nov 26)
|

|
The reduced direct fire value in Kursk: Burning Tigers is 4-4. (plloyd1010
on 2015 Jul 31)
|
| Yikes! Who's This Opponent?( | ||||||||||||||
|---|---|---|---|---|---|---|---|---|---|---|---|---|---|---|
I don't even have a clue who this opponent is. I splayed Mark Kalina, a well known CT gamer, back to back games of Road to Alutus back around 10 years ago. The scenario proved so fun we played it 2 Times. The outcome was the same- The Russians couldn't control the forest on their side of the bridge. German fire kept the Russia's at bay. Then the German armor reinforcements arrived and didn't even need to cross the bridge or the river. They just Sat on their side and thus controlled the bridge and river w direct and opportunity fire. But it was the fight for the forest near the bridge that was so intense and a tactically interesting scenario. |
||||||||||||||
| 0 Comments |
| Scenario 5/112: Crossing at Alytus – Fun blowing up T-26s | ||||||||||||
|---|---|---|---|---|---|---|---|---|---|---|---|---|
Introduction22 June 1941 – German forces cross the Alytus River and meet Russian resistance, who try to halt their advance. (German Score – Russian Score) 15:15 Russian infantry and AT forces begin to dig in on hill 945 but get attacked by Ju88s from the German Luftwaffe! Berfore they can even sneeze, a 45mm AT and half an infantry platoon are eliminated! (2-0) German forces advance, led by their Pz38t platoons. As they have improved range over the Russian T-26s, the latter pull back to stay out of range. 15:30 – 15:45 German Luftwaffe keeps the AT guns under the bomb as the German forces begin a flanking manoeuvre to the north. T-26s continue to back up along the road, preparing for a quick ‘breakout’ to get into range. 16:00 Luftwaffe (JU87 and BF110) eliminate another Russian AT Gun and Infantry Step (4-0). The final AT Gun opens up long range fire against the approaching Pz38ts. 16:15 The Tank Battle begins in earnest with the German Pz38ts opening up with long range fire and the T-26s charging in to counter-attack. Long range fire eliminates 3 Russian armour steps and another platoon is devastated charging the German position! Incredible shooting results in a quarter of the Russian armour eliminated! (14-0) Meanwhile, Luftwaffe demoralizes the last of the Russian AT guns while Russian Artillery and Mortars disrupt the advancing German infantry. 16:30 Air Support forces the final AT crew to flee their guns (15-0) Russian Armour continues it’s counter-attack against the superior Pz38ts. Not as luck as their initial barrage, only a few (one step) of Russian tanks are lost. (17-0) 16:45 German AT armour efficiency knocks off another two T-26 steps (21-0). The Russian armour scores it’s first Pz38t kill! (21-2) Russian infantry in the south trees storms north toward the GE armour to help the 5th Tank Division 17:00 German armour continues to pound away at the Russian tanks. Only two Russian T-26s remain at full strength (23-2). Things are looking even worse for the Russians at the German armour reinforcements reach the south bridge (to the west). German Luftwaffe strafes the Russian infantry advancing in the south. 17:15 German armour pulls away from the advancing Russian infantry while the remainder destroys two T-26 platoons! (31-2) A second Pz38t platoon loses some tanks (31-4). An infantry battle ensues. 17:30 – 17:45 German armour reinforcements begin to fire upon Russian infantry causing severe losses (34-4) as the Russians begin to flee. Russian mortar fire catches German infantry in the open (34-5) Russian fleeing infantry is eliminated in close assault. Meanwhile, Russian tanks try to rally in the east. 18:00 – 18:15 German armour eliminates the final Russian T-26s holding the road and begin to advance. (37-5) Luftwaffe and Pz38t reinforcements continue to mop up the Russian infantry (39-5). A German half platoon is eliminated in the assault (39-6) as the Russian Lt leading the assault dies from a wound. 18:30 T-26s in the south are eliminated as the Russian infantry is overrun! (43-6) 18:45 The German Panzers storm in between the hill and the fields taking light fire from rallied T-26s as the German armoured cars cut off the Russian FAI from flanking. German infantry takes some losses from Russian assault (43-7) 19:00 The Panzers open fire and three T-26 half platoons are lost! (49-7) The FAI flees from the superior German guns. Another German infantry is eliminated by Russian attack. (49-8) 19:15 The Panzers destroy the last of the T-26s (except for a demoralized half platoon on the hill) (51-8). With evening approaching the German tanks and troops withdraw to regroup to the west. Solid Victory to the Germans! AftermathThis was a very entertaining scenario. The Russians were facing a difficult set-up situation. Either use the terrain in the south or set-up far to the north. A northern set-up would allow them time to adequately dig-in, but being out-ranged by the panzers, it seemed ill advised for the T-26s to engage in a long range battle. Perhaps with the AT guns set in the woods, supported by infantry would have made a better delay tactic, allowing the T-26s to strike while the Panzers were otherwise engaged. Scenario Rating 4/5: All in all, a fun scenario with numerous replay possibilities. |
||||||||||||
| 0 Comments |
| Si todos los escenarios fuesen como éste... |
|---|
|
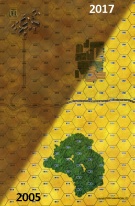
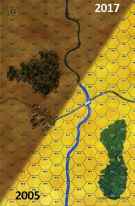
(Nota del autor: En el informe adjunto hay referencias a fotografías tomadas a lo largo de la partida que no han podido serreproducidas en esta página). 22 Junio 1941 En esta partida, que tiene lugar en el primer día de la campaña rusa, elementos de la 7ª División Panzer alemana deben conseguir una cabeza de puente en la ribera oriental del río Nieman, junto a la localidad lituana (entonces soviética) de Alytus. Para evitarlo se les enfrentan elementos de la 5ª División de Tanques soviética, a las órdenes del coronel F.F. Fedorov. Los alemanes cuentan con 5 pelotones de infantería, 2 de ametralladoras pesadas (HMG), 1 de ingenieros, 6 de tanques Pz 38t –de fabricación checoslovaca-, 1 de P204f, 1 de SdKfz 222 -estos dos últimos vehículos blindados con ruedas-, 1 batería de cañones antitanque de 37 mm y 9 de camiones. En cierto momento de la partida, determinado aleatoriamente, entran como refuerzos alemanes 6 pelotones más de tanques Pz 38t. Los alemanes disponen también de cobertura aérea, pudiendo utilizar en cada turno dos escuadrillas de cazas o bombarderos. Por el contrario, los alemanes carecen de apoyo de artillería “off-board”. Los soviéticos, por su parte, disponen de 12 pelotones de infantería, 4 de ametralladoras pesadas, 10 de tanques T-26, 2 de FAI – vehículos acorazados con ruedas-, 2 baterías de morteros de 82 mm, 3 baterías de cañones antitanque de 45 mm, 12 de camiones y 3 de KMS –transportes blindados de artillería-. Cuentan además con escasa artillería “off-board” (1 x . Los soviéticos carecen de protección antiaérea. Los alemanes gozan de la moral estándar de sus tropas en esa época (8/7). Los soviéticos tienen una moral inferior (7/6), consecuencia sin duda de las aún no lejanas purgas stalinistas en el Ejército Rojo. La batalla tiene lugar a partir de las 1515 y dura 36 turnos. A partir de las 2000 la luz solar va desapareciendo paulatinamente. A partir de ese momento los alemanes dejan de recibir apoyo aéreo. Condiciones de victoria: Se computan los “steps” de bajas de ambos bandos (los tanques cuentan el doble). Ganan los alemanes si las bajas propias son la mitad o menos de las causadas a los soviéticos. Si no, hay victoria soviética. En la foto siguiente se aprecia el campo de batalla. El norte está en el borde derecho. La parte superior del tablero es, por tanto, el oeste. El río Nieman atraviesa el campo de batalla de norte a sur. La población al oeste del río es Alytus. El puente al norte ha sido volado. El otro está practicable. El río Nieman tiene las característica de “mayor” según las instrucciones del escenario, por lo que sólo puede ser atravesado con la ayuda de ingenieros. En la foto reproducida a continuación figura el despliegue inicial de ambos bandos. A la izquierda de la imagen y en la parte superior, al oeste del río, formadas en columna y dispuesta a cruzar el puente se encuentran las unidades blindadas alemanas. A su derecha están las unidades a pie alemanas, que se dirigen hacia el norte buscando un sitio propicio para cruzar el río (recordemos que el otro puente a sido volado). En el centro izquierda del tablero, en ángulo recto con la carretera se encuentra una línea defensiva soviética, integrada por unidades de infantería y de artillería antitanque. En el extremo derecho de esa línea se ocultan en un bosquecillo 4 pelotones de tanques T-26. Debajo de estas unidades (al sureste) se encuentran dos grupos más de tanques T-26, uno encima de una pequeña colina y otro en un campo de cultivo. A la derecha de éstos se encuentra el grueso de la infantería y HMG soviéticas y dos baterías de morteros, fortificados en una población. Por último, en el extremo inferior derecho, en un bosque, se encuentran la totalidad de los camiones soviéticos y 2 pelotones de FAI, vehículos de ligero blindaje y muy rápidos, aptos para acudir con rapidez allí donde se les necesite. En la foto siguiente se aprecia el detalle de la línea defensiva soviética de vanguardia, atravesada en la carretera. Las potentes baterías antitanque de 45 mm se emplazan convenientemente separadas para beneficiarse del fuego cruzado. Como ordenan los manuales tácticos, están protegidas por una línea de infantería. TÁCTICA Dado que la finalidad de la partida no es conquistar un objetivo geográfico determinado, sino causar el mayor número posible de bajas al contrario, sufriendo uno mismo las menos posibles, los soviéticos optan por una defensa elástica. Concentran sus baterías antitanque lo más cerca posible del puente –lugar obligado de paso de los blindados alemanes- y protegidas por una pantalla de infantería. El resto de sus fuerzas se mantienen convenientemente ocultas a la vista del enemigo y fortificadas, a la espera del ataque alemán. La espina dorsal de las fuerzas soviéticas lo constituyen sus unidades de tanques T-26, repartidas en grupos y listas para lanzar contraataques coordinadamente en aquellos lugares en que tengan ventaja táctica. En definitiva, los soviéticos están a la defensiva y esperan hacer pagar una elevada cuota en sangre al enemigo. Por su parte, los alemanes están obligados a atacar desde el primer momento. Han repartido sus fuerzas en dos grupos. Las unidades blindadas cruzarán el único puente en condiciones y esperarán a que su apoyo aéreo haya silenciado a las baterías antitanque enemigas. Una vez producido esto se aprovecharán de su superior velocidad, adiestramiento y alcance de sus cañones para aniquilar a los lentos y mediocremente blindados T-26 soviéticos. Caso de encontrar una fuerte resistencia enemiga, esperarán a los refuerzos para lanzar entonces un ataque devastador y en masa. Los vehículos blindados ligeros irán a retaguardia de los tanques y procurarán infiltrarse por los huecos del dispositivo enemigo para atacar unidades con escaso poder defensivo (unidades aisladas de infantería, baterías de morteros, camiones, etc.) Paralelamente, las unidades a pie buscarán un lugar apropiada para cruzar el río, lo cruzarán y atacarán los puntos de resistencia enemigos. En aquellos casos en que encuentren una fuerte resistencia, evitarán costosos ataques y esperarán el apoyo de los tanques para lanzar asaltos combinados. TURNO 1 Son las 1515. Empieza la partida. La aviación alemana, compuesta por una escuadrilla de Ju 88 y otra de He 111, sobrevuela el campo de batalla. Una ligera bruma no le permite ver bien el objetivo, por lo que se retira sin realizar ninguna acción. Acto seguido el comandante alemán da la orden de marcha a sus tanques. Los primeros blindados alemanes cruzan el puente y ponen sus orugas por primera vez en tierra soviética. El ensordecedor rugido de los motores alerta a los servidores de las baterías antitanque soviéticas, bien enmascaradas debajo de sus redes de camuflaje. La columna alemana pasa veloz por el puente y se dirige a un bosque próximo. Los artilleros soviéticos cargan sus piezas con proyectiles perforantes y esperan. A un momento dado, un oficial soviético da una orden seca y todas las piezas disparan al unísono sobre los últimos tanques de la columna. Tres Pz 38t alemanes acusan el impacto brutal y quedan convertidos en antorchas. Otros dos sufren desperfectos de distinta consideración. Son las primeras víctimas de la batalla. TURNO 2 El repentino estrépito ha revelado la posición de las piezas soviéticas y las escuadrillas de Ju 88 y He 111 hacen otra pasada y pican sobre ellas. Varios artefactos caen certeramente sobre una de las baterías, que es completamente destruida, junto con sus transportes KMS. Mientras tanto, los tanques alemanes se han ido introduciendo en un bosque próximo, al abrigo de los letales proyectiles soviéticos. Al mismo tiempo, las unidades de infantería soviéticas de la primea línea defensiva han ido cavando pozos de tirador a la espera del inminente ataque. Vista la potencia de fuego de las piezas antitanque soviéticas, los vehículos blindados ligeros alemanes deciden no cruzar el puente y dirigirse con la infantería para protegerla en el paso del río. Véase la situación en el sector en la foto adjunta. Por su parte, los infantes alemanes se aproximan a un recodo del río con intención de cruzarlo. Conscientes del peligro, el mando soviético envía a tres pelotones de infantería así como a los dos pelotones de vehículos blindados ligeros FAI para tomar posiciones en un bosquecillo próximo y hostilizar el cruce todo lo posible. En la foto adjunta puede verse la situación en ese sector. (Balance de bajas hasta el momento: Alemanes 2 “steps”, soviéticos 2 “steps”). TURNO 3 La aviación alemana, compuesta ahora por una escuadrilla de Ju 87 (“Stukas”) y otra de Hs 129, hace una pasada sobre el campo de batalla y detecta una batería antitanque soviética. Inmediatamente los “Stukas” se lanzan en picado sobre el objetivo y dejan caer sus bombas. Pasan unos segundos y se oye la trepidación de varias explosiones y llamaradas. Tras ello, un amasijo de metal retorcido y vehículos destruidos es todo lo que queda de la antaño eficiente batería. A los soviéticos ya sólo les queda una batería antitanque. Los tanques alemanes, mientras tanto, siguen concentrándose en el bosque próximo. En el sector del río, los alemanes destacan a su pelotón de ingenieros para hacer los trabajos preparatorios del cruce del río. Los vehículos FAI soviéticos disparan sus armas automáticas sobre los ingenieros alemanes, pero sin obtener resultado. La infantería soviética llega al bosquecillo junto al río y toma posiciones. TURNO 4 La aviación alemana, formada ahora por una escuadrilla de “Stukas” y una de cazas Messerschmidt Bf 109 intenta localizar objetivos enemigos, pero sin éxito. La situación en el sector del puente se mantiene estática. La batería antitanque soviética situada en el bosquecillo contiguo a la línea defensiva ha enganchado los cañones a los vehículos y se prepara a partir a una posición no detectada. Los tanques alemanes, conscientes de la desaparición de buena parte de las baterías antitanque enemigas, se aproxima al lindero del bosque y empieza a disparar con ametralladoras las posiciones de infantería enemigas. La foto adjunta reproduce la situación en el sector. En el bosquecillo junto al río, donde los alemanes intentan cruzarlo, el fuego de las ametralladoras de los vehículos FAI soviéticos consigue hacer blanco sobre el pelotón de ingenieros alemanes, al que produce numerosas bajas. No obstante, lo que queda del pelotón prosigue sus trabajos. El resto de fuerzas alemanas y soviéticas en el sector entrecruzan un nutrido fuego de armas automáticas, aunque sin resultado significativo de momento. Por encima del crepitar de las ametralladoras, los combatientes de ese sector escuchan un rugido de motores. Son los refuerzos alemanes -6 pelotones de tanques Pz 38t- que hacen su entrada a toda velocidad en el campo de batalla por la carretera del noroeste. En la foto adjunta figura la situación en el sector. (Balance de bajas hasta el momento: Alemanes 3 “steps”, soviéticos 4 “steps”). TURNO 5 Una escuadrilla de Hs 129 y otra de He 111 sobrevuelan el campo de batalla, pero son incapaces de localizar ningún objetivo. Los tanques alemanes desplegados en el bosque del sector del puente consiguen localizar la batería antitanque soviética que se encontraba en un bosquecillo a kilómetro y medio aproximadamente. Esta batería estaba enganchada a sus transportes KMS y se encontraba dispuesta a trasladarse a un nuevo emplazamiento. Demasiado tarde. Los blindados alemanes hacen fuego y destrozan todos los transportes y los cañones. Los soviéticos han perdido su última batería antitanque. A partir de ahora sólo pueden confiar en sus blindados T-26 para combatir a los panzer. En el sector del cruce del río, los pelotones de tanques Pz 38t alemanes que acaban de llegar al campo de batalla detectan a los vehículos FAI soviéticos que hostilizaban –con bastante éxito- el paso del río por la infantería alemana. El comandante soviético se da cuenta del peligro inminente e intenta maniobrar los vehículos. Pero es tarde. Una lluvia de proyectiles perforantes acribilla el débil blindaje de los FAI. De los ocho vehículos, seis son completamente destruidos y dos quedan momentáneamente averiados y con sus tripulaciones desmoralizadas. TURNO 6 De nuevo se deja ver la aviación alemana. Una escuadrilla de He 111 no consigue detectar ningún objetivo y pasa de largo. Sin embargo, una escuadrilla de cazas Messerschmidt Bf 109 consigue localizar un pelotón de infantería enemigo situado en el bosque junto al río y que intentaba impedir el cruce por los alemanes. Los cazas hacen varias pasadas rociando de balas el terreno. El pelotón soviético queda desmoralizado. Los soviéticos están sufriendo un duro castigo en este sector, que aprovecha la infantería alemana para hacer pasar dos pelotones de infantería al otro lado del río. En la foto siguiente se aprecia el paso del río por los alemanes y el mal estado de las fuerzas que se les oponen (restos desmoralizados de dos pelotones de FAI y unidades de infantería desorganizadas o desmoralizadas). Dos pelotones de vehículos blindados ligeros alemanes protegen con su fuego el paso del río. Los seis pelotones de Pz 38t llegados como refuerzo pasan a toda velocidad hacia el puente. En el sector del puente, neutralizadas ya todas las baterías antitanque soviéticas, los tanques alemanes salen del bosque en dirección del bosquecillo al norte para atacar a dos aislados pelotones de T-26. En la foto siguiente puede verse este movimiento, que produce la retirada de la mayor parte de la infantería soviética, salvo dos pelotones que cortan el paso de la carretera. Este es el momento que esperaba el coronel Fedorov para lanzar un contraataque con la totalidad de sus blindados. Efectivamente, los distintos grupos de T-26 se ponen en marcha coordinadamente y forman un peligroso arco en torno al grupo atacante alemán. Los panzer están dentro del alcance de tiro de los cañones soviéticos, que por su posición pueden aprovecharse además de los efectos del fuego cruzado. (Balance de bajas hasta el momento: Alemanes 3 “steps”, soviéticos 9 “steps”) TURNO 7 La aviación alemana hace una nueva salida, protagonizada por una escuadrilla de “Stukas” y otra de cazas Messerschmidt Bf 109. Los cazas localizan un blanco, pero no consiguen acertarle. Los “Stukas” no pueden localizar ningún objetivo. En el sector al este del puente tiene lugar el bien preparado ataque de los T-26 contra los panzer alemanes. El copioso y bien coordinado fuego de los blindados soviéticos destruye dos Pz 38t y avería otros dos. Un humo pegajoso y grasiento empieza a impregnar el ambiente en esa zona. Los alemanes, desconcertados, son incapaces de dar réplica al ataque enemigo. Por si fuera poco, uno de los pelotones de infantería soviético que bloqueaba la carretera se lanza al asalto de un pelotón de Pz 38t, pero las armas antitanques de la infantería soviética son en este tiempo aún bastante primitivas, por lo que los blindados alemanes aguantan el ataque enemigo. El asalto ha servido al menos para inmovilizar al pelotón blindado alemán. En el sector del cruce del río, los alemanes siguen haciendo pasar lenta pero metódicamente a sus fuerzas a la ribera este. Se están produciendo violentos combates en el bosque contiguo y las maltratadas unidades soviéticas se retiran lentamente, incapaces de paralizar el avance germano. TURNO 8 Los cazas Messerschmidt Bf 109 hacen una nueva salida protegiendo una escuadrilla de “Stukas”, pero unas inoportunas nubes cubren en ese momento el campo de batalla y los aviones son incapaces de localizar objetivo alguno. En el sector al este del puente los tanques alemanes, sorprendidos y vapuleados, se retiran hacia el río. Los T-26 siguen disparándoles desde varios ángulos y conseguir destruir dos Pz 38t más, averiando otros dos y dejando a algunas de las tripulaciones desmoralizadas. Varias columnas de humo testifican la debacle alemana en este sector. Paralelamente, la infantería soviética vuelve a avanzar cautelosamente para intentar acabar con las tripulaciones de los tanques averiados. Una batería antitanque alemana de 37 mm que se había emplazado en el borde del bosque cercano al puente para intentar frenar el avance de los T-26, es blanco de la artillería soviética a larga distancia. Sus servidores quedan desmoralizados y la batería de momento inservible. En la foto siguiente se aprecia la situación en esos momentos: los tanques alemanes se retiran con relativo desorden dejando atrás varias unidades averiadas y destruidas y los soviéticos avanzan convergiendo desde varios ángulos. En el sector del cruce del río, en cambio, la situación es completamente diferente. Los alemanes han conseguido hacer pasar varias unidades a la ribera este y los soviéticos están siendo derrotados. Los dos vehículos FAI supervivientes ofrecen una resistencia fanática al asalto de la infantería alemana, pero su destino está sellado. Sólo un pelotón de infantería soviético se mantiene casi intacto ofreciendo una resistencia a ultranza, aunque es blanco de un fuego sostenido de las ametralladoras de dos pelotones de vehículos blindados ligeros alemanes. El resto de las unidades rusas del sector empiezan a desmoronarse y a huir del bosque. La foto siguiente reproduce la situación es ese sector. (Balance de bajas hasta el momento: Alemanes 11 “steps”, soviéticos 9 “steps”) TURNO 9 La aviación alemana sobrevuela el campo de batalla, pero persisten las nubes y pasa de largo sin poder detectar ningún objetivo. En el bosque cercano al cruce del río varios pelotones de infantería alemanes se lanzan al asalto de los dos únicos vehículos FAI supervivientes. Los alemanes consiguen destruir completamente ambos vehículos y sus dotaciones en una refriega a muy corta distancia y con el empleo de granadas de mano. Asimismo, en el mismo bosque, varias unidades de infantería y HMG alemanas asaltan al único pelotón soviético que quedaba en buen orden. Los soviéticos resisten estoicamente la avalancha en un primer momento, pero al retirarse sufren un nutrido fuego directo, que elimina la mitad de sus efectivos y desmoraliza al resto. Puede decirse que la resistencia soviética ha terminado en este sector. En el sector cercano al puente, dos pelotones de infantería soviéticos asaltan a dos Pz 38t alemanes averiados. Las dotaciones de los tanques alemanes se defienden con uñas y dientes, pero al final son reducidas y aniquiladas. Sin embargo, el resto de los tanques alemanes – que se retiraba hacia el puente- consigue reorganizarse y dispara certeramente hacia los T-26 soviéticos que se aproximaban. Los proyectiles alemanes de alta velocidad consiguen perforar los blindajes y un pelotón completo de tanques soviéticos es destruido. Las tripulaciones apenas tienen tiempo de abandonar las teas rojizas en que se han convertido los vehículos. TURNO 10 Una escuadrilla de He 111 y otra de Hs 129 sobrevuelan el campo de batalla, pero las densas columnas de humo procedentes de los tanques incendiados les impiden localizar blancos en tierra. En la foto siguiente se ve la situación en el sector del puente. Los tanques alemanes han conseguido reorganizarse y formar una barrera defensiva, revestida de una potencia de fuego temible. Tanto es así que los T-26 deciden retirarse. Sólo algunos pelotones de infantería soviéticos, algunos bastante desorganizados, se mantienen en el campo. Puede verse también que los tanques alemanes de refuerzo están llegando ya al puente por la ribera occidental. En la foto siguiente se aprecia a situación junto al bosque próximo al lugar de cruce del río por los alemanes. Los soviéticos supervivientes se retiran a la desbandada. Las unidades alemanas, que han pasado el río en su totalidad, se aprestan a perseguirlos. (Balance de bajas hasta el momento: Alemanes 13 “steps”, soviéticos 15 “steps”) TURNO 11 La aviación alemana, compuesta en esta ocasión por una escuadrilla de He111 y otra de cazas Messerschmidt Bf 109 intentan localizar blancos enemigos entre las espesas columnas de humo. La escuadrilla de He 111 consigue descubrir un pelotón soviético de infantería, al que bombardea y desmoraliza. En el sector del puente los alemanes van acumulando refuerzos y preparando un golpe decisivo con su puño blindado. En el sector central, las fuerzas alemanas que han cruzado el río se lanzan en pos del enemigo, que se retira desordenadamente hacia posiciones seguras. TURNO 12 Los incansables “Stukas” hacen una nueva salida, esta vez acompañados de una escuadrilla de Ju 88. A pesar de la cortina de humo que empieza a cubrir todo el campo de batalla, ambas escuadrillas distinguen una concentración de infantería soviética y la atacan inmediatamente. El ulular de las sirenas de los “Stukas” preludia una lluvia de bombas, que hace blanco en medio de la concentración soviética y destruye un pelotón completo. En la foto siguiente se recoge la situación general de la batalla. La parte superior izquierda de la imagen muestra una línea de tanques alemanes en actitud expectante. Una batería alemana de 37 mm ha sido desplegada en el bosque próximo por si se produjera un nuevo contraataque blindado soviético. Más abajo hay varios pelotones de infantería soviéticos –algunos cortando la carretera- que no llegan a formar una línea coherente. En la parte superior derecha se aprecia la principal concentración de tanques alemanes que, junto a las unidades a pie que aparecen a su derecha, se prepara para asestar un golpe definitivo en el “Schwerpunkt” soviético. Los tanques alemanes se han visto engrosados por los refuerzos llegados recientemente. Frente a ellos uno o dos pelotones de infantería soviéticos y dos pelotones de T-26 intentan formar una primera línea defensiva. El resto de las fuerzas soviéticas está fuera de la imagen. Un detalle puede apreciarse en la foto siguiente. Un único pelotón de infantería (desorganizado) y su teniente se enfrentan en solitario a la avalancha de blindados y de infantería alemana. Esta imagen prefigura bastante bien la resistencia a ultranza de los soviéticos en los primeros años de guerra. (Balance de bajas hasta el momento: Alemanes 13 “steps”, soviéticos 17 “steps”). TURNO 13 La batalla se acerca a su momento culminante. Una escuadrilla de Ju 88 y otra de Messerschmidt Bf 109 escudriñan el suelo desde el aire, pero la densa humareda procedente de los vehículos destrozados dificulta la visión y los aviones alemanes deben volver sin haber intervenido. En la zona central del campo de batalla, el grupo principal de blindados alemanes hace fuego sobre dos solitarios pelotones de T-26. Con precisión matemática, los proyectiles alemanes taladran los blindajes soviéticos. El resultado es devastador: de los ocho tanques soviéticos, cuatro son completamente destruidos y los restantes quedan averiados en distintos grados. Las tripulaciones, con los cabellos y uniformes humeantes, salen de los vehículos completamente desmoralizadas. Por si fuera poco, el pelotón soviético que se oponía a la marea germana (que figuraba en la última foto) es asaltado por varias unidades alemanas de infantería y aniquilado. El teniente que lo mandaba escapa como puede. La batalla empieza a desnivelarse claramente hacia el lado alemán. TURNO 14 La escuadrilla de Ju 88 y la de Messerschmidt Bf 109 vuelven a hacer una pasada y consiguen localizar una concentración soviética de infantería. Los bombarderos Ju 88 dejan caer sus bombas y los Messerschmidt vacían sus cargadores sobre el objetivo. Los soviéticos acusan el golpe. Un pelotón de infantería queda desmoralizado y otro desorganizado. En el extremo noreste del campo de batalla se produce un hecho decisivo: un pelotón de vehículos blindados ligeros alemanes avanza sin oposición por una zona desguarnecida del enemigo y consigue cortar la carretera norte. De esta manera, tal como se muestra en la foto siguiente, todos los camiones soviéticos quedan aislados del grueso de sus fuerzas y además sin posibilidad de salvación, ya que los tanques soviéticos están demasiado lejos y son demasiado lentos para prestarles ayuda. La foto siguiente muestra la situación en el centro de campo de batalla. El grueso de los blindados alemanes y toda la infantería se está concentrando junto a un campo de cultivo para lanzar el ataque definitivo sobre una población soviética. En el sector sureste, el segundo grupo de tanques alemanes se pone en acción. Uno de sus pelotones hace fuego de cobertura sobre un lejano pelotón de T-26 y hace blanco. Dos tanques soviéticos se incendian inmediatamente y otros dos se retiran renqueantes. Las tripulaciones quedan desmoralizadas. Más de una veintena de columnas de humo se elevan ahora sobre el terreno. El resto de los Pz 38t avanza pensando que la situación de los soviéticos es crítica. Pero el coronel Fedorov guarda un as en la manga. Casi todos los pelotones de T-26 supervivientes salen en abanico sorpresivamente de los campos de cultivo y contraatacan por segunda vez. La fotografía siguiente muestra la situación en ese sector. (Balance de bajas hasta el momento: Alemanes 13 “steps”, soviéticos 25 “steps”) TURNO 15 La Luftwaffe, compuesta ahora por una escuadrilla de He 111 y otra de Hs 129, merodea sobre el campo de batalla buscando presas. Al fin localizan una concentración de infantería enemiga y dejan caer sus bombas. Medio pelotón de infantería soviético es aniquilado. En el extremo noreste del campo de batalla el pelotón de vehículos blindados ligeros alemán se ve apoyado por otro e inicia una maniobra de tenaza para atacar a los indefensos camiones soviéticos. En el sector sureste, los blindados alemanes sorprendidos por el repentino ataque de los T-26, empiezan a retirarse prudentemente sorteando con éxito el fuego de oportunidad soviético. TURNO 16 Una pasada de una escuadrilla de Ju 88 y de otra de cazas Messerschmidt Bf 109 consigue localizar en medio de las humaredas una pequeña concentración de infantería enemiga y la ataca. La lluvia de bombas y balas logra destruir medio pelotón soviético. El contraataque blindado soviético en el sector sureste ha supuesto que los T-26 quedaran al descubierto y dentro de alcance de los cañones de los panzer alemanes del grupo principal. Éstos hacen fuego y consiguen destruir un pelotón completo de T-26 (cuatro tanques). Por su parte, el grupo minoritario de tanques alemanes que era objeto del contraataque y que prudentemente se había retirado, hace también fuego sobre los T-26, beneficiándose de los efectos del fuego cruzado. Los proyectiles alemanes rasgan el aire y hacen blanco sobre otro pelotón de T-26, que también queda completamente destruido. En un momento ocho carros soviéticos han sido convertidos en ruinas humeantes. El contraataque soviético ha sido un fracaso. No ha conseguido destruir ningún panzer alemán y ha sufrido a su vez un grave quebranto. La fotografía siguiente muestra la situación en este sector. Los tanques alemanes forman una sólida línea en la parte superior de la foto, mientras que los pelotones supervivientes de T-26 y de infantería soviética forman una masa inconexa en torno a campos de cultivo. Por si fuera poco, en el extremo noreste del campo de batalla, dos pelotones de vehículos blindados ligeros alemanes han destruido con facilidad seis pelotones de camiones soviéticos (24 camiones). En la foto siguiente puede verse a los dos pelotones germanos acosando a los supervivientes soviéticos, que intentan guarecerse en un bosque próximo. El cómputo de bajas en este momento es de “13” steps” los alemanes y 40 los soviéticos. El coronel Fedorov hace balance de la situación. Sólo dispone de cuatro o cinco pelotones de T-26 en buen orden. Los restantes han sido destruidos o se encuentran con la mitad de sus efectivos y desorganizados o desmoralizados. Sus pérdidas generales triplican las de los alemanes, por lo que si quiere ganar la partida debe lanzar un ataque. Ahora bien, ¿con qué posibilidades de éxito? Los blindados alemanes, más numerosos, con mayor potencia de fuego y con cañones de mayor alcance, harán trizas a sus T-26 antes de que éstos lleguen a tener a los alemanes dentro del alcance de sus piezas. La infantería soviética carece de potencia ofensiva ante una infantería alemana casi intacta, sin contar con que el salir las tropas soviéticas a campo abierto serían bombardeadas y ametralladas por la Luftwaffe. Llevar a cabo una defensa numantina en la población al este del campo de batalla tampoco tiene sentido, ya que el ataque enemigo combinado de aviación, infantería y blindados ocupará sin duda dicha población y los soviéticos llevarán la peor parte en bajas. En consecuencia, el coronel soviético da la batalla por pérdida y ordena la retirada de sus tropas. Los alemanes han perforado el frente enemigo y se disponen a perseguirlo. Los alemanes han conseguido una victoria sin paliativos. La Blitzkrieg sigue su curso. |
| 0 Comments |
| good combined-forces engagement |
|---|
|
I'd rate this a 3.5 with a finer scale. It's certainly the most interesting of the seven day 1 scenarios. It's not without problems; as usual, PG's lackluster scenario design fails to provide incentive for the Germans to attack, and this is the first day of Barbarossa! To mitigate this I used the requirement I found in a supplemental EFD scenario document available at BGG - the Germans must advance to the first full road hex of either of the eastern maps. With more design care this could be a great scenario, although the Reds are a bit short on tanks. In contrast the Germans are actually a bit short on infantry. Consequently, I had the RKKA attack toward the bridge, especially before the German tank reinforcements showed up, to target the German infantry. Below is a record of a bulk of the turns. 1515 - Germans start inching across the river. Engineers set up an assist south of the bridge. RKKA sweep flanking platoons north of the bridge. Germans demoralize the only RKKA AT battery that isn't in cover. 1530 - RKKA close on the Germans near the bridge. German tanks withhold fire for now, preferring not to give the T-26s the jump they need to close range. Arc of RKKA is now set up to deliver superior firepower on the limited German infantry. Demoralized RKKA AT battery routs and is thus eliminated. 1545 - RKKA infantry opened fire to no effect. With the RKKA AT battery now set up for potential crossfire from the north the RKKA tanks advanced to target range on the German tanks. 1600 - German tanks stand their ground for the most part and start trading fire with the T-26s. One step on each side is lost. Other T-26s close ranks. Meanwhile, infantry trades fire to little effect. 1615 - Mostly tanks firing and a few of the Germans dropping back. Also German tank reinforcements arrived. Turn cut short by early FoW trigger, so no infantry activity. 1645 - RKKA started taking the worst of the tank exchanges, losing numerous steps compared to the Germans. 1700 - Panzers shifted fire to the AT battery in range. 1715 - Demoralized Germans on bridge rout. Panzers slowly advance on the bridge. Germans gain upper hand in assault hex just north of the bridge. 1745 - As RKKA losses accummulate Germans take opportunity now to start advancing on the bridge again. 1815 - German tanks start crossing the river in force. Only two RKKA tank steps remain. Step loss count is 12 German, 42 RKKA. 1915 - At this time I decided to pull the plug and award victory to the Germans. It was an easy task for them to keep the remaining RKKA at bay, and have at least one tank move north to the road hex required for victory. |
| 0 Comments |
| Not sure about balance, but still a lot of action! | ||||||||||||||
|---|---|---|---|---|---|---|---|---|---|---|---|---|---|---|
The Russian set up most of his force near the hill on board 5. I thought this curious, but chose not to challenge his thinking. I set the Germans up mostly in the town and woods on board three west of the river, covering the bridge, but put my recon units in 0809. Gaining the initiative on the first turn, I sent my P204f and SdKfz 222 over and had them race up the east side of the river. The Russians chose to charge towards the bridge. He felt killing me before reinforcements arrived to be the best choice. My Pz 38t managed to hit a couple loaded trucks, giving me an immediate advantage. As his forces continued to attack and seize the bridge, I kept my forces in a defensive position and shot whatever I could. The recon units on the other side of the river began to give the Russian fits. I got within range of the road, and any truck was fair game until he dispatched sufficient force to run them down. They each took a hit, but not until after they littered the road with several burning trucks with dead infantry and drew off some of his force. He managed to move his tanks to the bridge, at which point I began to pummel him from cover. In the end, it was a total massacre. Somehow he had gotten in his head (due to the intro text) that he needed to come after me and get across the river to clear me out. Given the large force at his disposal it just seemed to make sense to him. The idea of hunkering down in the woods and blowing me away as I crossed never occurred to him. His long trek to the bridge using the road (vice moving up behind the woods) and offensive mindset made this an easy win for the Germans. He reached the bridge, and even took it for a time, but never got to the west side of the river. Had he set up smarter and attacked from the woods he may have had sufficient firepower to force a crossing and try to overrun my position. It still probably would have failed, but it would have at least been a closer battle. The Germans lost very little in the battle, while the 5th Tank just took a severe beating. Not sure I see a lot of chance of a Russian victory in this scenario, but it was still a lot of fun to play. |
||||||||||||||
| 4 Comments |
Something, somewhere, semehow seems to have gone wrong w the computer for this play. First, I played this scenario 10-12 years ago, long before PG-HQ was born.I included it in my play log forPG-HQ because it has stuck in my mind as one of the best games Iever played, even though Ilost. Interestingly, historically, the German general in direct charge of the battle thought that the battle on June 22, 1941 was the hardest fought that he encountered for the rest of the war.
In fact, I didn’t play dricher here. I played Mark Kalina FtF at my house in Enfield, CT. Mark is a well known war gamer in Connecticut, but not a member of PG-HQ. He is, however, a veteran gamer of Panzer Grenadier. This remains one of the strangest incidents I can think of.
Craig Martin
@SARACV3, if you submitted the play first and dricher added it later, he may have chosen the wrong matching shared play by mistake.
I can unlink these plays in the database. Let me know both of you.
Gents,
Thanks for bringing me back onto the site after a long absence!
No, I did not play SARACV3. I played against Crickethawk, I believe before he started his account. I did not select another player when I wrote the AAR, so I am also surprised that SARACV3 got linked to this.
Shad,
Appreciate you unlinking.
- Dennis
| The slow, systematic, methodical reduction of the Soviet 5th Tank Division | ||||||||||||
|---|---|---|---|---|---|---|---|---|---|---|---|---|
Somehow, at the conclusion of 36 turns, there were still a few Soviet units left in town hexes stubbornly resisting overwhelming numbers of German units which had encircled the entire town after eliminating or pushing back the rest of the defending forces. A German victory was secured as soon as the reinforcements of the 20th Panzer Division arrived at 15:15/turn 1 and made their way, slowly but surely, across the river to assist their beleagured comrades. Initally 8 of the 10 Soviet T-26 tanks were deployed on the southern hill and had enough time to dig-in before attacked. This gave them the best defensive advantages possible, provoking the Pz38s of the 7th Panzer Division to roll up to adjacent hexes to get the best possible results of having to roll 11s instead of 12s for Soviet tank step losses. At first the T-26s had some intial success in eliminating 4 steps of Pz38ts but before things got much worse, the German armored reinforcements arrived in time to bail the 7th Division out of it's predictament. By 20:45/turn 23, all T-26s had been eliminated including the two units left defending the town and the Luftwaffe attacks had cleared the way of the 45mm AT guns and mortar units before nightfall. Soviet resistance from that point on was futile but all 36 turns were played out regardless. The final German step losses were: 1 x Lt (deserted), 1 step INF and 7 steps of Pz38t. Soviet losses were: 1x CAPT, 2x LT, 21 steps INF, 6 HMG, 2x 82mm, 3x 45mm, 20x T-26, 4x FAI, 3x KMS and 12 trucks. Despite the the overwhelming advantage that the Germans had in this one it was, for me, a fun scenario to play solo. The fact that it favors the Germans so much is what kept me from ratibg it a '4'. The only thing I think I may have been able to do differently with the Soviets would have been to deploy most of the T-26s further north in the forests or northern town, hoping that they would hold out longer before German reinforcements arrived. Having those reinforcements arrive on the first turn really worked in Germany's favor as they showed up just in time when the other Pz38ts from the 7th Division had taken enough losses to make the tank battle almost even. The only case where the Soviets have a chance of winning this is if they are able to eliminate the first 6 Pz38t units before the other 6 arrive, otherwise the sheer numbers of panzers will tip the scales. |
||||||||||||
| 4 Comments |
Despite the overwhelming number of German victories recorded for this one, including mine, it did seem that the Soviets had an advantage against German armor for a total of 2 turns. However, German reduced Pz38ts only either became disrupted or unaffected after taking a step loss and then quickly recovered while Soviet T-26s easily became demoralized after a step loss and soon fled gave up dug-in hill positions; a one point morale difference in favor of the Germans helped a lot to hang on until the reinforcements arrived. Even though it was a crushing defeat for the Soviet Union it was still fun trying to hold out against incredible odds though I don't think I would enjoy playing the Soviets in a shared play so much.
Mine was a shared play, double-blind with our house rules. I had the Soviets. My strategy was a reverse strongpoint from the field. It worked as well as could be expected.
My play of this game was against Vince and I was pretty much mopped up as I could neither outmaneuver nor outgun the Pz38ts. I think Vince rated it lower because the victory conditions didn't force the Germans to take the town, although I don't remember off-hand now.
| How do you stop the Blitzkrieg ? | ||||||||||||||
|---|---|---|---|---|---|---|---|---|---|---|---|---|---|---|
I decided to set up my 3 AT guns as close as possible to the bridge, hoping to have wrecks on it. Sweet dream... The rest of my forces were far behind, on the hill and in the fields, with one order : dig in ! The German began with a bit of luck as they received immediately their reinforcements. With their longer range and their armor efficiency, the Pz38t are far better than the T26, and one after the other, my tanks were destroyed. So were my AT guns. Germans lost only two steps... On turn 10 (I think), the German had already won. So, the scenario had no interest anymore and we stopped. My T26 were probably too scattered. Maybe as a group they have a greater chance of doing something to the german tanks. But with a ratio of 24 AT shots vs 10, the Germans have a big advantage and I don't know how to deal with that. I give it a 2. Maybe with a better strategic solution can we go for a 3 (or event better)... |
||||||||||||||
| 3 Comments |
This scenario, has seen a twelve to one advantage to the Wehrmacht forces, is a perfect specimen for developing alternate orders of battle to balance game play. As this battle occured on the first day of hostilities against a surprised defender, I wouldn't supply either air-support for the Soviets or change the morale levels (I feel the lower Soviet morale reflects the shock of invasion, and not the lack of officers due to the purge.
There are 3 good ways to enhance the survivability of the Soviet defenders against this well composed Wehrmacht force.
1, change weather conditions, starting the battle in either rain or heavy fog. This cuts down the range of the German tanks, possibly grounds the Stukas, and forces a close range battle.
2, Increase the Soviet force. Add 4 more infantry platoons with transport (horse drawn of course) and two low level leaders to the mix, either as a reinforcement, or as at start units.
Finally, we know Soviet engineers were attempting to blow the bridge and had explosive charges available. Allow them to mine 2 (or 3) hexes prior to play.
Playing this at the moment as a 2 player game.
As a historical scenario, weather conditions can not be changed. The weather was good.
Quite simply, it needs new VC's instead of the Germans holding a 2-1 advantage in kills. If they knock off 1 enemy step, they can quite literally sit back and await a Soviet counter-attack, because if the Reds do not attack and knock off enemy steps, they lose from that point on.
Therefore it needs something to force the Germans to attack more vigourously, such as controlling the majority of Alytus ?
Also, both sides should be shown as an attacker in this. Nobody is a defender IMO
| Will the singular Soviet Commander who was victorous please stand and be recognized... | ||||||||||||||
|---|---|---|---|---|---|---|---|---|---|---|---|---|---|---|
Crossing at Alytus depicts the German 7th Panzer advance to and over the Neiman River near Alytus. Within the district is the Soviet 5th Tank Division standing in the way of the German steamroller. As Vince has already stated in his AAR, The scenario description and conclusion read as an interesting game to play and seeing multiple AARs showing high ratings, Vince and I decided to give it a go. It may be that the scenario is winnable by the Soviet Union, and to the single victor I congratulate you, but I must apparently still have a lot to learn about PG tactics and setup because there is no way that I could see a Soviet victory in this scenario without a blundering German commander (which Herr Hughes certainly is not) and a skillful Soviet Commander (which, apparently, I certainly am not). In reading the victory conditions, I needed to inflict half as many step losses as the Germans inflicted and if I was able to avoid taking casualties or immediately inflict casualties, I could stand a chance. Also, seeing that there was a visibility factor coming into play later in the scenario that would eliminate the Luftwaffe and the range of the German tanks, I pondered a long time about the setup. I went between setting up an aggressive forward force in the woods facing the bridge or playing more conservative and hanging around Alytus. I ended up doing the latter. I placed the hidden AT units in the wheat fields to the south and west of Alytus and arrayed my armored units in a small semi-circle between the woods on board 5 and the wheat fields to the east. My 82mm mortars were placed on the hill with a Lt 800 so that spotting could be accomplished to the bridge for OBA shots (with my mighty 8-factor OBA!). Finally, my infantry was dug in around and in Alytus with transports and armored car platoons. I will not go into minute detail here as it is the victors who write the history. The Germans moved over the bridge with their Pz38t units leading along with infantry units and minor leaders probing to find hidden AT positions. Trucks of Infantry and engineers followed behind and headed for the small clump of woods southwest of Alytus. The Soviet Tanks watched the Germans approach and attempted to get into a position to defend but were to find that the German guns outranged them by double. I then proceeded to try and move units so that the lines of site were blocked or I had range where the strength was halved but was to lose several more tanks before I could move them out of harm’s way and into the wheat fields. As stated in the German AAR, the infantry was initially intimidated by the Luftwaffe as they had tried to start maneuver out but aerial attacks were accurate and forced them to keep their heads low. My scant OBA and meager Mortar fire were able to disrupt an infantry unit or two but did play a major part. There was one point in the battle where there was hope for the Soviet troops and that was when a German truck platoon carrying the commanding officer and a platoon of infantry and Engineers got overzealous and drove within a long range shot of two T-26 units. Both fires ended up missing but Herr Hughes admitted that it would have been a severe blow had the T-26s found their mark. They paid for those shots later when they were destroyed by the Pz38s. Our first session ended as the Germans built a 12-0 casualty ratio by eliminating both 82mm (Luftwaffe attacks) and 5 actual steps of T-26s (10 victory step losses). I decided to move my infantry out to support the armor in our second session and began to move the entire division towards the clump of woods to try and divert some of the pressure on the tankers and to get some step losses back. However, the best LT on the Soviet side went down with a platoon of infantry in the face of brutally efficient German HMG fire and the rest of the division began to try and move around the northern part of the woods to get around and make the German move the dug in units but the Luftwaffe had a field day and the German tanks continued to roll, leaving most of the T-26s as burning hulks. I was able to avoid a shutout by a single AT shot from a gun in the wheat fields that forced a step loss and rout of a Pz38t platoon. The Germans asked if I wanted to continue and I did for a few more turns as I tried to do anything that would even budge the Germans a little but after a few more turns, it felt like I was hitting my head against a wall and called it there. As stated in the intro, I definitely have a lot more to learn about this game and how seemingly small factors in the game can magnify the supremacy or deficiency of one side or the other. Herr Hughes gave some possible tactical advice about ways a Soviet Commander could possibly win the scenario and they may work but I find that there are many factors working against the Soviet even with the tactical advice: 1. T-26 vs. Pz38t - Looking at the counters initially, It seemingly looked balanced as the Soviet has an AT factor of 3 while the German is only a 2, but the armor of the Pz38 is 3 where the T-26 is 2. This is deceptive because the Pz28ts move twice as fast as the T-26s (in the open). Moving at the incredible speed of an HMG unit, the T26 has almost no chance of out-maneuvering the Pz38s. Also, the Pz 38 has a range of 7 (telescoped out to 11 for long range) compared to a range of 4 for the T26 (6 long range). Add in the efficiency and that means that the Germans can move into a position that is one hex out of long range for the Soviet (or even in long range) and with a stack of 3 tanks, get 6 shots at 9 or 10, depending on the modifier circumstance. The AT Units may tip the balance a little but even then, long range is 8 and these are immobile. Adding in Infantry support could possibly alleviate some of the discrepancy here but combined with #3 and #4 below, it still makes for a bad situation. 2. Luftwaffe attacks - acts as OBA each turn until 2000 hours when they are grounded. Worst case scenario for air factor draw: 15, Best case scenario:44. Yes it is direct fire instead of OBA but it still outmatches the Soviet OBA of 8 and ANY unit is a valid target for fire, not only spotted units. 3. Morale level - not much that can be done about this one. It is the Early Eastern Front and the Russians were still in shock that they were being attacked so I can't do much about this one. I also can't mount any type of adequate attack as they fall apart when it starts to rain. 4. Initiative Level - Germans 4 - Soviets 2. Again, probably very accurate historically but combined with the T26 vs Pz38 entry and the morale level difference, it eliminates almost any chance of sustaining a decent attack when first move is almost always going to the Germans. All of this being said, I rated this scenario a 2 but I don't know if that is for all these reasons or because I simply don't have the experience under my belt to take these situations and turn them into winning situations. It is most probable that I played this one wrong and could have pulled out some sort of victory or made it close. |
||||||||||||||
| 2 Comments |
Tony,
Just a couple of levellers on the downside you showed for the Russians.
Pz38t long range is 10 not 11 hexes Up to 50% of 7 only takes it to 10 hexes. 11 hexes would be about 56%.
When shooting out of the range of a T26 (7 hexes is beyond T26 range), a Pz38t does not need 9's or 10's to hit, but actually requires 11's (2 AT fire v 2 Armour defence but +1 target at 5 hexes or more).
Also remember with the Luftwaffe. For some reason, not once did the planes fail to hit the hex they were attacking (1 or 2 = misses hex). So although 1/3 of my planes should have failed to attack, in this game they ALL did in the 2nd session for some weird fate of dice-rolling luck.
Vince,
Yes that's right on the range and luftwaffe - Its just that we were playing Vince's rules... ;)
It was amazing how much you were getting the 11s later in the game and I think that you only failed on two planes the whole game.
| Great Premise For A Scenario Spoilt By Ill-Thought Out VC's | ||||||||||||||
|---|---|---|---|---|---|---|---|---|---|---|---|---|---|---|
This game was played over 2 sessions on Skype against Tony Langston. Having read the scenario, it looked like it would be an interesting battle and I had also remembered Enrique's picture AAR that made it appear a potential good un'. Unfortunately, this turned out not to be the case. 1515 hours: The German forces deployed as near to the bridge as possible as the Soviets left it unprotected. Most of the Soviet infantry were in Alytus itself, some 2km or so from the bridge. Their T26s were arrayed in the area around the bridge, but still some distance from it. The full German force streamed over the bridge, but were still awaiting half of their tanks to arrive. After an hour, the first casualties were rung in as the panzers took out a step of T26. Also, the plentiful Luftwaffe forces in the area had destroyed the Soviet mortars. Canny German tank tactics soon accounted for 2 more platoons of T26’s and their air-force continued to destroy Russian mortars and AT guns. By 1700 hours, the Soviets could see that unless their tanks received some support they would be done for. But was this realization too late ? The Germans had by now deployed well in advance of the bridge and the other half of their tank force had arrived and were now taking part in the battle. They had pushed about 1.5km forward and the foot soldiers had either dug-in or placed themselves in the woods located there. The Soviets initially attacked these dug-in enemy infantrymen straight on, but devastating bursts from the German MG’s cut to pieces a whole platoon and its Lieutenant within seconds. Seeing this, the Soviet infantrymen began to head for the farmland, though what their purpose was by now was not apparent. Elsewhere, the Soviet armour was being eliminated in a lop-sided tank battle. A hidden Soviet AT gun was the only unit that recorded any tangible casualties on the invaders as it took out a step of Pz38t’s that passed by its location hidden in wheatfields. This was a solitary success in what was a complete rout and hiding for the defenders. Their tank force had been completely outfought. Their infantry were losing heavily against the less numerous but better positioned German soldiers and the Luftwaffe continued to pound Soviet units wherever they raised their heads. It was turning into a complete rout. Alytus would fall with heavy casualties and an almost pointless defence. Casualties for the Germans was just 1 Pz38t step. Soviet losses were 7 INF steps, 3 leaders, 4 ordnance pieces and 16 T26 steps. German victory. It wasn't the rout that made this a poor game. Boy, I enjoy routing enemy forces any time I am given the chance. But it was the silly VC's assigned the game. In this scenario, the Germans must inflict a 2:1 ratio of casualties to win. Now if they inflict the first casualties as the German, a boorish player could simply dig-in his troops and make the Soviets come onto him and at the same time, blast him with the Luftwaffe too. This would then hopefully allow the German to sit back and as a defender continue to knock out a desperate attacking and exposed enemy. I didnt play that way and continued to attack as there were more opportunities to inflict damage. Now it may have been Tony's play that led to the heavy loss, who can say for sure, but looking at the scenario results, 14 German wins to 1 Soviet would suggest a small imbalance perhaps ? How this scenario has received so many '4' results is a surprise to me as it was so lop-sided. It might be because the premise and historical situation is quite interesting BUT the VC's ruin it. I won't go into how simple VC changes could make this a star-scenario, nor will I bother to add the VC changes I think would do it. It should have been done already ... pity ! One tactic I would suggest to any future Soviet player MAY (and I stress the 'may') be this. At game start, as the Germans only have 6 of their 12 tank units, it could be a shrewd move by the Russians to get their 10 T26's into battle against the 6 German Pz38t's, thus producing a 10 shot v 12 shot situation.(both sides need rolled 10's for kills if shooting at 4 hexes or less). If you wait for the Germans to get their 6 other tanks into action (and they do have a long journey), you are then looking at a 10 shot v 24 shot proposition which is not good for the Russians. Well placed Soviet AT guns may help too (the Soviets have 3), and a bit of support from the infantry in this situation will help balance it even more, especially if they threaten to pounce on the German tanks. In our game, Tony left his T26's out on their own with the infantry tucked away in Alytus picking their noses and never really tried to take the Germans on before their reinforcemnets entered. Would this have helped make the scenario a closer battle ? I don't know without trying. But its worth a try next time round for the Reds. |
||||||||||||||
| 2 Comments |
Vince,
As I mentioned in our post battle discussion, this was a worse beating than Hucheln Town... maybe I should stick to checkers... LOL.
| outranged | ||||||||||||
|---|---|---|---|---|---|---|---|---|---|---|---|---|
Big German advantage. Aircraft & better range worked well for easy German Victory. Maybe a more pulled back positioning for Soviets to pull Germans into kill zones could work better but I don't see it. German armor waited in the town while infantry crossed the river under cover of the woods. Aircraft harassed Soviet units moving up into woods desiring overwatch on the bridge. Other soviet forces waited in woods or dug in to position to direct AT fire on armor crossing the bridge. A/C harassment was effective keeping units in enough trouble that they could not get in the woods in time to effectively defend them from the German infantry advance. German reinforcements arrived & took a few shots at units across the northern ends the river before joining up with the town armor. German infantry moved through the woods & effectively assaulted infantry & armor they found there. With the guns & tanks driven out of the woods, the armor emerged to cross the river & engage the dug in positions with Standoff direct fire. Soviet armor was engaged at range but there were some German casualties from gun positions in the grove of trees. Soviet forces were unable to mount an assault on the standoff armour & the Germans destroyed enough forces to prevent a Soviet victory by 7 pm. Allowing a closer deployment of Soviet forces, more & further AT firepower & taking away German aircraft all & each might start to nudge the scenario back toward balance. |
||||||||||||
| 0 Comments |
| Gamey VCs |
|---|
|
Initially I thought the victory conditions made sense and then I played. The Germans need to eliminate twice as many steps as they loose. This sounds like an German assault and a Soviet defense. WRONG. The Germans destroyed a few Russian steps and then, since they have eliminated more than half the steps they lost, they went on the defense. The Soviets on the offensive have numbers by being caught in the open with persistent air attacks proved fatal (what's with the +2 adjacent rule for aircraft; it makes them crazy powerful). When it was finally dark the Soviets advanced under cover but too late to catch up. Perhaps the idea is to wait until dark to advance on the Germans. Still, then, the Germans will be dug-in and waiting. My in-depth Soviet defense with flanking AT fire lanes and fortified towns were worthless while the Germans lurked in the west woods and dug-in their tanks. Or perhaps it's best for the Soviets to hunker down, let the Germans freely cross the river and force them to move into the Soviet's in-depth Soviet defense with flanking AT fire lanes and fortified towns. |
| 2 Comments |