
|
A Rotten Morning Eastern Front #1 |
||
|---|---|---|
| (Attacker) Germany | vs | Soviet Union (Defender) |
| Formations Involved | ||
|---|---|---|
| Germany |  |
1st Panzer Division |
| Soviet Union |  |
657th Rifle Regiment |

| Total | |
|---|---|
| Side 1 | 35 |
| Draw | 1 |
| Side 2 | 8 |


| Overall Rating, 43 votes |
|---|
|
3.16
|
| Scenario Rank: 641 of 913 |
| Parent Game | Eastern Front |
|---|---|
| Historicity | Historical |
| Date | 1941-06-22 |
| Start Time | 05:00 |
| Turn Count | 20 |
| Visibility | Day |
| Counters | 128 |
| Net Morale | 1 |
| Net Initiative | 5 |
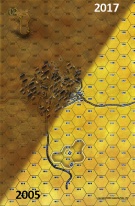
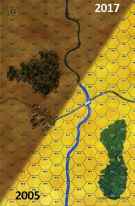
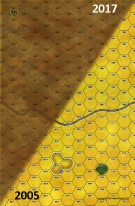
| Maps | 3: 2, 3, 8 |
| Layout Dimensions | 84 x 43 cm 33 x 17 in |
| Play Bounty | 71 |
| AAR Bounty | 99 |
| Total Plays | 44 |
| Total AARs | 13 |
| Battle Types |
|---|
| River Crossing |
| Surprise Attack |
| Urban Assault |
| Conditions |
|---|
| Off-board Artillery |
| Scenario Requirements & Playability | |
|---|---|
| Eastern Front | Base Game |
| Introduction |
|---|
|
A terrific artillery bombardment awakened the Soviet 125th Rifle Division in the early morning hours of 22 June. As the barrage lifted, tanks and infantry of 1st Panzer Division emerged from the smoke. Bound for the Lithuanian border town of Taurage, the Germans had little time to spare. |
| Conclusion |
|---|
|
The 657th Rifle Regiment and its parent 125th Rifle Division suffered terrible losses, but fell back and kept fighting. The 125th would be one of the divisions to capture the smoking wreck of Berlin four years later, but for now the German panzers rolled toward Leningrad. |

|
|
|---|
| AFV Rules Pertaining to this Scenario's Order of Battle |
|---|
|
| Heer |
|---|
|


| Army (RKKA) |
|---|
|


| 7 Errata Items | |
|---|---|
| Scen 1 |
Use boards 8/3/2. (Shad
on 2010 Apr 29)
|
| Scen 1 |
Soviet officers should be 1 x LT COL, 3 x CAPT, 4 x LT. (Shad
on 2010 Dec 01)
|

|
The reduced direct fire value of the Heer HMG became 5-5 starting with Fall of France. (plloyd1010
on 2015 Jul 31)
|

|
The Pz IVe appearing in the original Panzer Grenadier game had an Anti tank value of 4-7. As of Afrika Korps (2002), continuing onward through the 3rd and 4th edition games, the anti tank value has been 4-4. (plloyd1010
on 2016 Jul 25)
|

|
The morale and combat modifiers of German Sergeant #1614 should be "0", not "8". (Shad
on 2010 Dec 15)
|

|
All SPW 251s have an armor value of 0. (Shad
on 2010 Dec 15)
|

|
The reduced direct fire value in Kursk: Burning Tigers is 4-4. (plloyd1010
on 2015 Jul 31)
|
| The True God of War! No, it ain't Mars! | ||||||||||||
|---|---|---|---|---|---|---|---|---|---|---|---|---|
20 Turns Victory conditions: Germans - Control all town hexes on boards 2 & 3 Soviet - Germans lose 10 or more steps or keep Germans from controlling town(s) Set-up: Germans - Loaded on trucks on the Western edge of Map 8 ready to roll. Tanks are spread out in spearhead formation on Eastern Edge of Map 8. Armored car with a leader to the North and South to act as Artillery Spotters. Soviets - I put a small token force (including the Tankettes) in the small town and in the woods on Map 3. A mortar team w/Leader on the northern hill of Map 2. The Artillery units with support troops on the larger southern hill with a Leader perched on the 40m hill (giving him a 24 hex visual range) The rest of the troops went into the protection of the large town. Turn 1: Huge Initiative to the Germans 10/1. Northern cell moves into the treeline to the North. Southern cell of Tanks move to bridge - drawing AT fire from the woods resulting in no harm. Four columns (x3) of truck move forward and unload troops. Soviet Lt. positioned in the treeline calls for artillery and gets 2 disruptions and 1 Demoralization on the closest column of trucks and unloaded troops. Turn 2: German Artillery Spotters begin calling in Heavy OBA. Soviet AT is demoralized as is the 1/2 strength Inf. Both fail recovery later in the turn -Inf. flees, AT gun is abandoned. Turn 3: Germans begin clearing forest south of town, getting a bloody nose from Soviet Opportunity fire - 1 German Inf. getting Demoralized with another getting disrupted. More units cross bridge while trucks retreat to a safe distance. Turns 4-5: Most of the Soviets in the small town are now demoralized from heavy bombardment, which nets 2 soviet step losses. Soviet Mortar Team on the northern hill are able to get a disruption on a loaded SPW, which in turn draws OBA on to there position, eliminating them. Germans suffer their first step loss from Op fire from a T-37. Turns 6-7: Small town and woods to the South are cleared of Soviets. 1/2 strength T-37 is assaulted and eliminated. A column of Pz IIIG take out the remaining T-37. Turns 8-10: Germans now turn their attention to the fortified Southern hill. The artillery on top is becoming quite a nuisance. OBA is called in - eliminating the other AT gun and getting a disruption on 1 of the Artillery units. Combined HMG/SPW's get Op fired on and recieve 1 INF step loss, 2 demoralizations and 1 SPW eliminated. Soviet Artillery is ineffective. Turns 10-11: More OBA directed onto the hill - resulting in 1 Soviet Battery getting eliminated. Lone Soviet battery able to get a step loss on a PzII as well as eliminating an armored car before German tanks roll over it. Turn 12: Last Heavy barrage on hill nets more step-losses to the Soviets and the Germans finally take over the 40m hill and can now direct OBA fire into the city. German forces begin to surround the town. Turns 13-15: Multiple OBA's into the Soviet forces in town net half a dozen step loses while some mopping up outside of town captures 2 Soviet lone leaders. Soviets able to get another step loss on the Germans. Turns 16-17: The God of War (OBA) is fearsome, attaining 3 more step loses. The noose tightens as 2 more Soviet step losses are gained from DF. Turn 18: Three more step losses to OBA and the final Soviet step falls to a massive two hex DF. The 3 remaining Soviet leaders were rounded up and shot. Conclusion: I rate this Scenario a 4/5. I think if I play this again, I will put a much larger force around the Soviet Artillery units and leave the small town more or less undefended. If I was able to keep the Germans from attaining that 40m hill for a few more turns, I could have prolonged the battle to a draw, if not a Soviet victory, which with getting 8 1/2 German steps as it was, wouldn't have been too difficult. This Scenario is a good learning scenario for anyone just getting started. A lot of counters to keep track of if just starting out though, but still manageable. All major points in the rules are touched upon in this scenario. Realization of what is the real "God of War" comes quickly! On a side note, the half sheet of Soviet counters (the ones with the side nubs) were really frustrating. They are half as thin, I believe someone mentioned that they were printed along with the counters of Beyond Normandy, and a pain to get a hold of with tweezers, especially when you have multiple stacks like I did in the final turns in the town. I have recently fixed this by replacing those counters with the ones that came with the original Panzer Grenadier game. The ATR counters are the only ones you can't replace since these were not part of the original, but all of the INF, HMG, SMG, 76.2m and trucks can be replaced. |
||||||||||||
| 0 Comments |
| Steamrolled |
|---|
|
After picking up a used copy of Eastern Front a few years back (along with Afrika Korps, Desert Rats, and White Eagles - all of them as a set for a very reasonable price, from a friend), I finally dove in. I picked the very first scenario, A Rotten Morning, to get a "first day of Barbarossa" experience. And it was indeed a rotten morning for the defenders - despite the fact that they almost won. The Soviets set up the 76.2mm's on Board 2 hilltops, set up the 45mm ATG's (each accompanied by a leader and a full-strength INF) dug in along the east side of the river, an HMG and INF dug in at the bridge, a couple of infantry stacks in the woods west of the river (including one HMG) as a potentially nasty speed bump, and the remaining forces divided between the two towns. The Germans lined up as much as they could safely put in line at the eastern limit of Board 8, some units within DF range of the forward woods position, and the still-loaded transports further back. When things jumped off, the Germans pushed panzers to the front (except those confronting the woods defenders) while some of the infantry, including both engineers, went on a sweep right to cross the river in the southern part of the map. Russian artillery briefly played havoc with those crossings, and ultimately only a few leaders and units were able to cross down there; by turn 10 those units, and the engineers, were on the move towards the huge town on Board 2. Meanwhile, after surviving a few shots from the 45mm ATG's (before they were wiped out by OBA), the tanks cleared the bridge defenses and pushed on, while the massed fire of tanks, SPW's and foot troops splintered the woods defenders, followed by assaults from flanking forces. By Turn 10, around half of the Russians - including their 76.2mm's, taken out by OBA - were hors de combat, with only one - yes one - German step lost (a PZ-IIIG.) By Turn 15,the smaller town was cleared and plenty of Germans were in and around the large town - some of the overmatched defenders were blistered by point-blank DF from tanks and SPW's, and others desperately defending against assault. Time and firepower gradually ground down the remaining Russians. By Turn 18 just two hexes had live combat units left: a reduced and demoralized INF in one, and four leaders with two 82mm mortars in the other. Both were beset by assaults on the "30+" column, even after accounting for shifts. And yet...since the demoralized units had nowhere to flee, they had to die for the hexes to be cleared. The demoralized half-INF was eliminated on Turn 19, but it took until the very last turn for the final remaining combat unit - a disrupted mortar - to give up the ghost. When Turn 20 ended, all that was left on the board for the Soviets was one leader, who had fled to a 1-hex woods on Board 8 (a refugee of the fight in the larger woods) and, after recovery, moved to the small nearby hill, only to have no bombardment available to call in. And the Germans? They lost three steps total: The PZ-IIIG and two INF (the latter in assaults in the big town.) And yet, the Soviets were a turn away from holding on... |
| 0 Comments |
| Deux villes |
|---|
|
Scénario encore très déséquilibré. Une très grosse force allemande, avec beaucoup d’artillerie off board, attaque une force russe pas très costaude ni motivée (moral 7/5). Les allemands doivent traverser une rivière et nettoyer deux villes où les russes sont enterrés. J’ai mis les canons anti-chars russes dans la forêt au sud des deux villes pour essayer de faire des tirs croisés, et deux chars légers enterrés sur le pont pour bloquer le passage. Les allemands se sont séparés en deux forces : un groupe motorisé principal qui veut passer par le pont plus une force d’infanterie à pied qui va traverser la rivière avec deux pelotons du génie pour prendre la forêt au sud des deux villes. Au début, tout baigne pour les allemands. Deux mortiers russes cachés dans la forêt essaient de tirer sur les allemands qui avancent à pied. Ils sont repérés et très vite rendus inoffensifs par l’artillerie externe, et les deux tanks enterrés sont très vite éliminés. Mais voilà trois épaves qui bloquent le pont. Un PzIV entre pour dégager les épaves, ce qui lui prendrait deux tours, non dérangé. C’est le moment pour les canons anti-chars enterrés dans la ville en face et dans la forêt au sud de tirer. Un pas de tank éliminé, ce qui compte double, et les allemands ne peuvent perdre que dix pas en tout. Tous les véhicules se mettent hors de portée. Mais maintenant les canons sont « spotted » et l’artillerie externe peut les pilonner. Celui de la forêt ne tient pas longtemps, mais celui qui est enterré résiste. Deux mitrailleuses et un peloton d’infanterie descendent de leurs halfs-tracks pour s’approcher à pied et aider l’artillerie à faire taire le canon AT. Pendant ce temps, les allemands au sud essaient de traverser la rivière. Une fois posé dans l’hexagone de rivière où se trouve un peloton du génie, il faut faire moins que six en jetant deux dés pour sortir (ce chiffre dépend du scénario, et représente la « largeur » de la rivière). En trois tours, quatre pelotons ont traversé sur dix. Pas encore assez pour attaquer la forêt. Plus que 14 tours pour traverser et nettoyer les deux villes ! Il va falloir que les allemands accélèrent. Finalement, les allemands gagnent. Au 19ème tour, ils arrivent à éliminer les dernières unités qui se trouvaient dans la grosse ville, un peloton de char T26 réduit, qui bloquait le pont au départ et qui s'était enfui après démoralisation. Et ils ne perdent que huit pas en tout. Au début des attaques finales, une infanterie soviétique a éliminé un peloton d'infanterie allemande complet sur un tir d'opportunité chanceux, mais les russes n'ont jamais réédité ce genre de coup. En tout, les russes ont démoralisés 3-4 infanteries, plus un leader. Par contre, les allemands ont pu monter des assauts sur la colonne 30 et plus (6 pour une infanterie + 11 pour un gros char + 9 pour une HMG - 2 colonnes pour l'assaut en ville +1 pour l'attaque combinée char-infanterie + 1 pour le leader + 1 pour meilleur moral allemand que russe), et une fois ont pu éliminer trois pas d'un coup avec un six. L'infanterie qui a traversé la rivière avec le génie a pu arriver à la toute fin faire quelques assauts décisifs. Les pauvres russes ne pouvaient pas grand chose face à un tel débordement de puissance. Je pense commencer à savoir monter des attaques efficaces, mais si j'avais mieux placé l'artillerie russe suivant les conseils de Kalman, j'aurais probablement pu infliger plus de pertes aux allemands lorsqu'ils montaient à l'assaut, et les allemands auraient perdu. |
| 0 Comments |
| Learning as you throttle |
|---|
|
If Eastern Front is your first game you will probably start with this scenario. As a result there is plenty to learn. In setting up I had the Soviets place a dug in 76 in the bridge and the strongpoint did well causing some losses to teh Germans but quickly the resistance fell and the Germans flowed through. The replacement of Map 1 with 2 in the errata is critical to having a chance for the Soviets. |
| 0 Comments |
| Russian private exclaims "What the hell are we supposed to use man? Harsh language?" | ||||||||||||
|---|---|---|---|---|---|---|---|---|---|---|---|---|
Russian private exclaims "What the hell are we supposed to use man? Harsh language?" IntroductionElements of the German 1st Panzer Division are racing to the town of Taurage. In their path are the sleeping elements of the Russian 657th Rifle Brigade… The time is 5:00am. The morning sun has not yet risen. The German forces must cross the river to the east, capture the small town east of the bridge and also push NE to Taurage. One bridge, two towns, and 5 hours to complete the mission before 11:00am. The Germans also must maintain their integrity and suffer less than 10 step losses (armour counts double). 5:00am The German armour leads the blitz and the tanks find the one bridge heavily defended by Russian infantry dug-in and half asleep. There are 4 platoons before the bridge, 2 at the bridge and another 4 on the far side. The German panzers flank the defenders and the first truck loaded with infantry was destroyed approaching the Russians. (2 step losses!) More infantry advances through the dark and unloads at close range. They begin to call in some major artillery strikes against the dug-in Russians. Meanwhile, 2 platoons of engineers and 6 platoons of infantry head south of the bridge to make their own river crossing. 5:15am Artillery and Tank fire disrupts, demoralizes and eliminates some of the Russian defenders. 1 platoon flees into the night. Russian artillery begins to reply. 5:30am Tank fire rips into the Russians at and before the bridge. Russian platoons can do little but keep their heads low and pray. In the south, the engineers begin assisting the infantry across the river. 5:45am The third Russian platoon is eliminated. Their small arm fire has no effect against the armoured tanks. Three platoons are still making their stand at the bridge with the four platoons behind it, awake but unmoving in their sandbags. The first two German squads make it across the river in the far south. The begin to regroup south of some woods (south of the town, SE of the bridge). 6:00am Serious shelling at the bridge from artillery and the tanks eliminates one platoon another flees in panic. Only half a platoon remains, held in place by a brave, but stupid, Lieutenant. 6:15am Tank fire captures the bridge and some armour advances to face the 4 dug-in platoons on the far side. In the south, the six infantry platoons have completed their crossing and begin to move, on foot, along the south side of the woods. Dawn is coming… 6:30am An AT gun (facing the bridge) and infantry platoon are spotted in the woods by the German infantry and they begin to exchange fire. 6:45am The German armour, unable to rout the dug-in Russian defenders (without artillery support) line up along the west bank of the river and get ready for sunrise. Death toll before Dawn: Russian – 5 platoons, one officer (Lt) German – 1 platoon, 1 truck 7:00am The rooster crows as the morning sunrise shines light across the plains. The Russian defenders have a quick cuppa and spot about 20 armored platoons lined up along the river’s bank. “Now I'm afraid that there's going to have to be a certain amount of violence. But at least we know it's all in a good cause, don't we?” As the German tanks begin to open fire against the Russian infantry the AT gun (not yet engaged by the German infantry) fires against a PzIIIG platoon and takes out half the tanks! (Counts as 2 more steps!) The Germans call in their artillery against the AT Gun which is demoralized. 7:15am It doesn’t take long and soon the bridge is all but cleared. One lonely Russian platoon is unable to stop the German armor from pouring across the bridge. German infantry assaults the AT Gun in the woods. Happy to simply “tie them up” they exchange small fire for the next hour while the battle rages around them. 7:30am The German panzers head to the north of the small town and race due east towards Taurage. German artillery begins shelling the unfortunate 657th Rifle Brigade in the small town as the German infantry moves in to assault. The artillery eliminates a second AT gun placement within the town. 7:45am German panzers spot the Russian 76.2mm artillery in Taurage and begin drawing fire. In small town, the assaults begin in earnest. 40% of the town is engaged in close assault. One German infantry and truck are eliminated approaching the town! (Germans have now lost the equivalent of 7 steps). 8:00am German artillery is now focused on Taurage to knock out the Russian guns. Unfortunately, only half of them are silenced and the 76.2mm artillery targets and destroys a platoon of weakly armored PzIIs! This counts as 4 steps, and the Russians have succeeded in their victory conditions! What were those lousy PzIIs doing up there! In small town, Russian infantry begins to rout and head for the woods. 8:15am Russian 76.2mm pick off half the remaining PzIIs (13 steps lost now) but are quickly demoralized by combined artillery and tank fire. 40% of small town is captured and the remainder of it is being assaulted by German HMG and Infantry. 8:30am German artillery eliminates half the Russian 76.2mm artillery and force the other crews to flee. The Russian artillery is no more. The Russians begin to rally in the woods, protected by some T-37s. Half the T-37s are turned to scrap by the superior PzIIIG. 8:45am Small town is completely taken by German troops as German armour and Artillery continue to clean up Taurage. As the battle winds down, the Russians flee for the hills. AftermathCommand is displeased with the 1st Pz division believing that, although acquiring their objectives, they should not have taken as many losses as they did. Victory to the Russian Commander! |
||||||||||||
| 0 Comments |
| Fácil victoria alemana |
|---|
|
Victoria alemana relativamente fácil. En el turno 17 los alemanes consiguen su objetivo. Sufren solamente 6 steps de bajas (todas correspondientes a tanques). Casi todas las unidades soviéticas son aniquiladas.Los soviéticos despliegan sus dos pelotones de T-37 en el puente, con idea de retrasar el paso de los tanques enemigos. Interesante. |
| 0 Comments |
| Will always be a rotten morning for the Soviets | ||||||||||||
|---|---|---|---|---|---|---|---|---|---|---|---|---|
This was a very old AAR, but a FTF with a old friend. He took the Soviets and I had the Germans. I was still learning the game but he was generous with his strategy. The perspective is all from the German side as these were my notes. Setup - The tanks and armored cars were setup on the road close to the board 8/3 border. The infantry and artillery were loaded on trucks on the road back near board 8 west edge. The Soviets had infantry companies setup in the town on board 3 and the woods east of the river. Dug in AT guns and HMG's hold the bridge and several infantry platoons hold the north and south flanks. The T-37's and mortars were located on board 1. Germans start moving the armored cars up the road to attack the bridge. The tanks move to the woods in the north to provide support. Truck loaded infantry move up the road and bailout near the boarder with board 3/8. Long range Soviet AT fire hits a truck unit for a quick kill. (my mistake was to keep the infantry and leaders back so I did not get to us the masive German OBA.) I moved the armor forward to fire on the Soviet HMG's on the bridge. Soviet AT fire gets another kill, at this point I get the infantry moving and get a leader so I can spot the AT guns. OBA silences one AT gun and disrupts the other. A German company moves to assualt the bridge and is hit with OP fire, HMG units move up to provide support fire. The Soviet HMG on the bridge is demoralized and runs when it tries to rally. The armored cars move forward and get hit with 45mm AT fire, luckly missing. Tanks move across nexts as well as some still mounted infantry. The Soviet company in the woods moves to the edge to open fire on the mounted infantry. Soviet morters start lobbing in shells with no effect. German OBA goes after the Soviet company in the woods east of the river. The German tanks move around the town to move in on the flank while the mounted infantry dismount and move up. Soviet OP fire disrupts several German units, but German ENG units move up to assualt with infantry. The Soviet tanks move up to try to support the defense of the town. German Pz IIIh wipe out the attack. The German assualts start on the town. Several get bogged down and take several turns to resolve. The Soviets try to bring up several reinforcing units but it was not enough to hold off the attack. By turn 18 the town on board 3 is taken by the Germans. The Soviets don't have any mobile force and the German armored cars and a couple of tanks move to attack the 82mm mortars in the town on board 1. The mortars get overrun and the Germans have the win. A good scenario but slightly unbalanced in favor of the Germans. |
||||||||||||
| 0 Comments |
| Worried Morning | ||||||||||||||
|---|---|---|---|---|---|---|---|---|---|---|---|---|---|---|
Pertinent house rules: Double-blind, fast mech & efficient AT/AA. We choose this scenario, partly because I wanted to play a linear progression through the war, and partly because it looked good for double blind play. German setup and observations: Motor/mech units will have difficulty crossing the river (8.3%/2.8% chances per attempt), so I will need to force the bridge. There is a small infantry block dug in behind the bridge. The village on board 3 has 2 OPs in it (for perhaps more than a company and support?). The town on board 2 has only 2 OPs, which is deceptively sparse. There is also an OP on the hill watching almost everything I do. I am more than a little concerned that the center of the board 3 village is 4 hexes from the bridge/river. I weight my motor/mech units in the center and South., and put 2 companies of infantry to the North, behind the woods. With foot units having a 42.7% chance of a successful crossing attempt, I intend to use the Northern infantry force to flank the village if things bog down. Otherwise the plan is to bombard, assault and blitz around the village. The infantry can kill the AT guns I am worried about. Opening moves, German: The bombardment of the infantry block begins with a dismal performance. My infantry begins to move up, tanks follow, the Northern infantry moves through the woods. As my center infantry approaches the bridge, I start receiving indirect fire from the Russian field guns. Just as my infantry reaches the bridge, my artillery (finally!) hits the infantry block effectively (I was having bad dice rolls before). The Russian infantry in the block gets off a shot and is demoralized by artillery fire, as I rush across. The Northern infantry just reaches the river. The village, German: German infantry presses the village, finding some garrison infantry and the block survivors. The AT guns I was worried about before are nowhere to be seen. Infantry (including an assault team) moves up to the edge of the village. Armor moves to the South of the village, by the woods, to provide fire support. Mechanized infantry rushes into the woods and deploys to prevent a counter attack from that direction. A Russian infantry platoon is observed running from the hill to the town. More armor and my AT guns work their way through the Eastern edge of the woods and onto the Southern plain. Northern infantry begins to cross the river. Reduction of the village proceeds at a good pace. The panzer grenadiers in the wood prepare to make a sweep, initially led by the halftracks. The lead halftrack moves forward and is fired upon by a Russian AT gun. The halftrack survives and, with a second chance at life, retreats back to the infantry. The Northern infantry is mostly across the river at this time. Tanks and armored cars move across the Northern plain. Russian infantry is seen in the Northeast corner of the town. The panzer grenadier company, sweeps through the woods, encountering a reduced infantry company and the AT battery. In a brief firefight, they are eliminated. On to the town, German: The armored cars begin to scout the plain North of the town, observing HMGs with infantry support in the North-West corner. Infantry emerging from the woods find an AT gun, with infantry support covering the South side. Some more Soviet infantry runs from the hill into the town before my advancing infantry can cover the gap with fire. Under ongoing artillery fire, my forces prepare for set-piece attacks into the town. Infantry advance in the South to engage the AT gun, before revealing the tanks. In the North PzIVs deploy as a group and begin blasting the defenders. Breaking in, German: Infantry and artillery fire eliminate the AT gun, allowing a tank/infantry team to assault the defending infantry. Infantry with halftracks assault more infantry in the Western-center. At this point the Soviet artillery is revealed. This revelation results in a burning halftrack and a reduced tank. The Northern advance is momentarily broken-up by fire from the HMGs, no steps are lost, but recovery takes a couple turns. The reduced tank does not escape from the artillery. At this point I have lost 5 steps in value, all in steel. With the artillery revealed and AT guns dead, tanks cautiously move through the Eastern part of the town, with a small infantry force close behind. Infantry finally assaults the North-West corner. The South-West side is mostly cleared in successive assaults. PzIIIs find the T-37s, trap and kill them. The end, German: With the town's perimeter collapsing, and being forced into a decreasing pocket, the Soviets resign. Parts of the Soviet strategy worked well. Part was a little too cute. The infantry block in the village was a good idea, and delayed me by about 4 turns. Splitting the AT guns, was intended to catch the German armor in a crossfire. The sweep through the woods put an end to that. I was concerned about exposing my flank just such fire. Playing double-blind I would expect that creating an inverted hedgehog in the town would be the best Soviet plan. I would have stacked the mortars with the field guns, but that is of minor value. Still the Soviets need all the help they can get. |
||||||||||||||
| 0 Comments |
| A very close run on opening day of Barbarossa | ||||||||||||
|---|---|---|---|---|---|---|---|---|---|---|---|---|
I went into this scenario believing it would be an almost effortless win for Germany and it turned out to be a very desperate struggle. German victory conditions were not met until turn 20, the last turn. This scenario required a lot of coordination in regards to the German forces and managing them was a challenge in itself. With the Soviets, I divided their forces as evenly as I could between the village and town leaving just a few reduced INF units by the bridge and road to act as speedbumps to slow the German advance down. I didn't have much hope in generating the required 10 step losses for a Soviet victory or draw so instead, I did everything I could with the Soviets to avoid unnecessary combat. A lot of this involved waiting until German units moved or fired first and then either rallying or moving to another spot where LOS was blocked if possible - a lot of bullet dodging. This strategy worked for quite a while, in fact, the smaller village did not become completely German controlled until turn 16. Luckily I had a good draw of Soviet leaders to rally units as well. With the Germans I played very conservatively, maybe too much. However, as a result of that, there was only one German step loss the whole battle from an INF unit taking in opportunity fire. I also attempted a river crossing with the Germans early on and it was almost met with total disaster when 76.2mm shells disrupted the ENG unit assisting the crossing which in turn disrupted all other units in the river hex. I only managed to get one HMG unit across before aborting the attempt. By that time the bridge and road had been cleared but it costed valuable time. I probably didn't go about the German attack in the best manner by being cautious and there were times that I thought the Soviets would manage to hold on. Eventually, despite some mistakes and setbacks, I managed to surround and eliminate all Soviet units except for one reduced INF and a few lone leaders that scattered, leaving someone to tell the tale and/or possibly get court-martialed and shot. It was a tough timetable for me to keep with the Germans but soon, though not a moment too soon, the last town hex was cleared and secured. A long story short, a very painstaking and tedious German victory. It wasn't the rollover I had expected and believe that the Soviets have a lot fairer chance of winning or getting a draw than the stats for the scenario here may suggest. I believe that I could of both deployed Soviet forces a little better and inflicted a lot more German losses though I think I also did well with delaying actions. With the Germans, I could of taken more risks early on and reached objectives sooner. I would be very interested in revisiting this one as a shared play and think it may actually be more enjoyable that way. I noticed that from the recorded plays that they were all logged in solo like this one. I give this one a solid '3'; nothing more, nothing less. |
||||||||||||
| 3 Comments |
Brett, this is one of those scenario's which if played FtF can result in total slaughter of the Soviets, if the Russian player trys any other tactic than the one you outline above. Imagine new players starting out with this scenario.
I played this one long ago, Worried Morning being the AAR for that experience. It looks like you did the 2 stage defense rather like my opponent did. What I wonder about your game is what the Soviet plan was for after the first town fell. In our game it was to catch the German tanks in an AT ambush (it came close to working too).
First Wayne -this would be a very discouraging and confusing scenario to start out with as a new player as it frustrated me a lot at times with playing the Germans. I took the possible loss of ten steps very seriously and had to be patient with making assaults. Lloyd - the Soviet plan was to keep moving around in the larger town hexes with the leaders and units, do whatever it took to delay the inevitable. Also, at key moments, fog of war came into play to the Soviet's benefit. The smaller village did not fall as quickly as anticipated or forecasted so there were two separate urban assaults going on for quite a while. I suppose if I had a Soviet strategy it was to divide the units as evenly as possible between both towns by proximity to their size along with dividing the Soviet leaders with morale modifiers between them. In the Soviet leader draw I was lucky enough to get three of them with a +1 modifier. Another factor -luck. The Soviet plan was to spread out in the larger town and keep moving sround until there were no spaces or good order units left. As far as AT ambushes go, both the 45mms were eliminated as soon as they fired and missed targets and with INF versus tank assaults, well, too many tanks to risk losing ground in town hexes. I probably should of attempted those assaults in hindsight as time was running out as tanks are worth two step losses and a draw may have been forced but even that seems like a longshot.
| Blitzkrieg across the Jūra | ||||||||||||
|---|---|---|---|---|---|---|---|---|---|---|---|---|
At sunrise on the morning of June 22, 1941, a thundering artillery barrage rattled the Soviet units of the 675th Rifle Regiment protecting a section near the Lithuanian border. This bombardment was closely followed by a large contingent of the 1st Panzer Division crossing the Jūra River and assaulting units in east Taurage. Two T-37’s were quickly dispatched and left a brewed up hulk blocking the primary road. By 0615, the road was cleared, the west side of Taurage was under assault, and all German units had crossed the river via the main bridge with the loss of a single Panzer II to Soviet fire. The Germans continued to gain ground, but lost one infantry platoon to an IL-2 squadron that strafed them during the advance. By 0800, the remaining Soviet units were under heavy attack from German combined arms in east central Taurage. AT 0845, the last two Soviet leaders were rounded up, as all the Allied combat units in Taurage had been eliminated, which resulted in a solid victory for the Axis. This 3-map scenario has primary objectives that involve control of the town hexes for the Axis and German step loss count for the Allies. The German setup was placement of all units near the road for a quick advance, while using the armored cars for artillery spotting. The Soviets placed a small force with the tankettes and a few units in the west town to attempt to slow the German advance, while the remainder of the force was in the east town with mortars on the north hill. It is a true blitzkrieg opportunity for the Germans that not only have an overwhelming unit majority, but also have the Soviets limited in unit ordering for the first five turns. While the advance of German units is somewhat restricted by the single bridge over a major river, engineer platoons are available to assist in river crossing. However, all German units were eventually able to cross at the bridge, which left the engineers ready for town combat. The scenario ended in a German victory on Turn #16 with complete control of all town hexes, and only two Soviet Lieutenants scrambling for their lives. The Soviets lost a total of 48 steps to only 7 for the Germans. |
||||||||||||
| 0 Comments |
| Oberst Fritzenfuhrer claims success |
|---|
|
When I discovered all the great Vassal modules for PG recently, I was reminded of a document I found on BGG about a year ago. I was motivated to play many of the Eastern Front Deluxe scenarios in chronological order using Vassal, which has many advantages over the tabletop. I make no promises to play all of EFD. 112 would be an unprecedented undertaking in any game for me. The BGG document attempts to address a common complaint about EFD, that a plurality and perhaps even a majority of its scenarios are imbalanced. I used the balancing recommendations on my first two solo efforts, scenarios #4 & #2. However, by the time I started #1 I decided to take a different balancing approach. I set up both sides exactly as indicated in the scenario book. One pro-Soviet rule I used was hidden initial placement, which concealed all the Red Army AT guns and a couple of machine gun platoons. Recorded games on PG-HQ indicate the Germans have a significant advantage, so for balance I envisioned the German CO bucking for a promotion. "I can complete the objective an hour ahead of schedule." This balancing approach has the advantage of making the scenario quicker to play. The RKKA set up most units in the towns, although there were a few in the forests. AT guns were set up for potential crossfire in the area between the two towns. The German attack proceeded methodically and carefully, first hammering with OBA, followed up with armor HE, then infantry fire at 3 hexes, beyond the range of most of the Soviet infantry. Once the Reds started being disrupted and demoralized the Germans moved in for assaults. By around turn 8 they were close to completing capture of the first town. I was concerned the pace was too slow for the ambitious Colonel's timetable, so I pushed things a bit harder as they approached the second town. At the start of turn 15 there were still five contested hexes in the second town, but it was a decisive point. On turn 16 only one contested hex remained, which the Germans captured just in time to satisfy the CO. The Reds had caused five German step losses, including two halftrack steps, but that was well below the other RKKA victory threshold. So my balancing approach yielded a nail-biter finish. I'll definitely keep this approach in mind as I get to more EFD scenarios. |
| 0 Comments |
| Soviet's hang on | ||||||||||||
|---|---|---|---|---|---|---|---|---|---|---|---|---|
Overwhelming Ger forces bash aside low morale Red Army units on the first day of the war in the east. However they only have a limited time to gain their objectives and by using the reduced Soviet forces as road blocks and the better units to defend the towns, somehow one unit is left at the end of the game in one town hex just denying a German victory. I suspect however that other playings of this scenario will result in German wins as Russian players fail their personal morale checks while watching the German roll over the Soviets troops. |
||||||||||||
| 0 Comments |
| Pointless Slaughter | ||||||||||||
|---|---|---|---|---|---|---|---|---|---|---|---|---|
To make a short story even shorter, the Germans bashed their way across the bridge, had demoralized almost all Soviet units on Board 3 by Turn 4, and had demoralized almost everyone else by Turn 8 (less than halfway through the game). All the special rules hobbling the Soviets in this scenario are unnecessary; the Soviet player should have the opportunity to do all he can with what little he has, but the special rules don’t let him do it. So, he’s doomed from the getgo and I have no idea how the Soviets can win this scenario as written except by sheer dumb luck. I also don’t know how the victory conditions could be improved to give them a chance, so I’ll rate it a 1. It's a historical reenactment, not a playable scenario. |
||||||||||||
| 2 Comments |
Doug,
I've learnt to NEVER write never (or in your case DOOMED from the getgo or I have NO IDEA how they can win) in these AAR's.
There is always somebody that DOES do it and I see 4 x well-trained Soviet players have nabbed a win out of this one !! (17%).... Skilled commanders indeed that Stalin failed to shoot before the war !
Well, I congratulate them. They're better men than I am on defense. I found myself simply not knowing what to do with the Soviets other than wait for annihilation.