
|
First Axis Deluge #40 |
||
|---|---|---|
| (Defender) Poland | vs | Slovak Republic (Attacker) |
| Formations Involved |
|---|

| Total | |
|---|---|
| Side 1 | 1 |
| Draw | 0 |
| Side 2 | 0 |


| Overall Rating, 1 vote |
|---|
|
4
|
| Scenario Rank: --- of 913 |
| Parent Game | Deluge |
|---|---|
| Historicity | Historical |
| Date | 1939-09-04 |
| Start Time | 07:00 |
| Turn Count | 24 |
| Visibility | Day |
| Counters | 90 |
| Net Morale | 1 |
| Net Initiative | 0 |
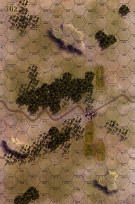
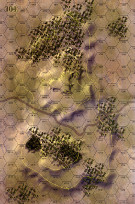
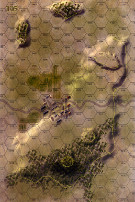
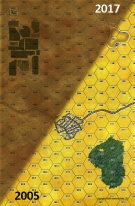
| Maps | 4: 102, 104, 105, 4 |
| Layout Dimensions | 86 x 56 cm 34 x 22 in |
| Play Bounty | 192 |
| AAR Bounty | 171 |
| Total Plays | 1 |
| Total AARs | 1 |
| Battle Types |
|---|
| Inflict Enemy Casualties |
| Urban Assault |
| Conditions |
|---|
| Off-board Artillery |
| Randomly-drawn Aircraft |
| Scenario Requirements & Playability | |
|---|---|
| Broken Axis | Maps |
| Deluge | Base Game |
| Slovakia’s War | Counters |
| Introduction |
|---|
|
Poland’s military dictatorship had taken advantage of Czechoslovakia’s woes to seize several pieces of territory in 1938. When Germany planned to attack Poland the next year, the new Slovak government gladly agreed to allow the Germans to move through Slovakia and mobilized their own small army to assist in the invasion. The Slovaks followed the Germans across the border and several days after the offensive began they saw their only serious action of the campaign. |
| Conclusion |
|---|
|
The Slovaks, still not really organized into an effective army, had the misfortune to run into one of the Polish army's best units fighting in its home district. The Slovaks reeled back without having taken any of their objectives, though their casualties were relatively light – too many of their formations broke and ran and the Poles did not deign to pursue them. The Slovak government declared victory and annexed the lost territories, but these had been won by German generosity rather than force of arms. And the Germans gave nothing without a price. |

|
|
|---|
| AFV Rules Pertaining to this Scenario's Order of Battle |
|---|
|
| Wojska Lądowe |
|---|
|


| Slovenská Armáda |
|---|
|


| #40 First Axis |
|---|
|
Control of the town hexes is key to victory for this scenario, 2 VPs for Polish control and 4 VPs for Slovak control, so the fighting concentrated around the towns on maps 105 and 4. The outnumbered Polish forces put up one heck of a fight, with their mortars & French 75s providing much needed fire support that broke up several Slovak attacks before they could get into close range of the Polish forces, this was especially true with the fighting around the town on map 4. The Slovak forces suffered from lower morale, especially if reduced, but there were a couple of good leaders that held it together and rallied their troops enough to keep the game interesting. In the end the Slovaks only lost by 4 VPs, step losses hurt them but, in the end, they did not control enough town hexes to make up the difference, overall, a good scenario, challenging for the Slovaks, if you draw and flip good leaders. Would be a good game for head-to-head play with the veteran player playing the Slovaks |
| 0 Comments |