
|
Alem Hamza: Left Flank Desert Rats #39 |
||
|---|---|---|
| (Attacker) Germany | vs |
Britain
(Defender)
India (Defender) |
| Formations Involved | ||
|---|---|---|
| Britain |  |
1st East Kent Buffs Infantry |
| Britain |  |
31st Field Regiment Royal Artillery |
| Britain |  |
4th Royal Tank Regiment |
| Germany |  |
2nd Machine Gun Battalion |
| Germany |  |
8th Panzer Regiment |
| India |  |
Central India Horse "21st King George V's Own Horse" |

| Total | |
|---|---|
| Side 1 | 1 |
| Draw | 0 |
| Side 2 | 3 |


| Overall Rating, 4 votes |
|---|
|
2.75
|
| Scenario Rank: --- of 913 |
| Parent Game | Desert Rats |
|---|---|
| Historicity | Historical |
| Date | 1941-12-15 |
| Start Time | 12:00 |
| Turn Count | 36 |
| Visibility | Day |
| Counters | 87 |
| Net Morale | 0 |
| Net Initiative | 0 |
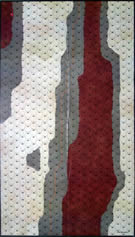
| Maps | 1: DR4 |
| Layout Dimensions | 88 x 58 cm 35 x 23 in |
| Play Bounty | 125 |
| AAR Bounty | 165 |
| Total Plays | 4 |
| Total AARs | 2 |
| Battle Types |
|---|
| Exit the Battle Area |
| Inflict Enemy Casualties |
| Rural Assault |
| Conditions |
|---|
| Off-board Artillery |
| Reinforcements |
| Terrain Mods |
| Scenario Requirements & Playability | |
|---|---|
| Desert Rats | Base Game |
| Introduction |
|---|
|
According to the official British historian, British troops seized the south-east sector of the Alem Hamza ridge line in a tough fight. However, the Indian Divisional history confirms the Italian version : the ever effecient Germans had neglected to move up troops adjacent to the Trieste Division's flank, and the British strolled unopposed onto the key high ground. On the afternoon of the 15th, the Germans tried to take by force what they had given away by mistake. Apparently eager to return the favour, the British supporting artillery had not been dug in, and its transport had been sent away. |
| Conclusion |
|---|
|
The Germans rolled over the British positions, wiping out the battalion as a fighting force. The gunners attempted to fight their pieces to the end, but German machine-gunners set up in front of their unprotected positions and slaughtered them where they stood. |

|
|
|---|
| AFV Rules Pertaining to this Scenario's Order of Battle |
|---|
|
| Army |
|---|
|


| Heer |
|---|
|


| Army |
|---|
|


| 3 Errata Items | |
|---|---|

|
Two British infantry have their full strengths printed on the back. They should both be "2-3" when reduced. (Shad
on 2010 Dec 15)
|

|
The reduced direct fire value of the Heer HMG became 5-5 starting with Fall of France. (plloyd1010
on 2015 Jul 31)
|

|
The Pz IVe appearing in the original Panzer Grenadier game had an Anti tank value of 4-7. As of Afrika Korps (2002), continuing onward through the 3rd and 4th edition games, the anti tank value has been 4-4. (plloyd1010
on 2016 Jul 25)
|
| Even the 2-pounders get lucky sometimes | ||||||||||||
|---|---|---|---|---|---|---|---|---|---|---|---|---|
I went into this scenario believing it would be an easy German win but I was clearly mistaken. On paper it looks tough for the Commonwealth and even more so once the actual deployment begins. The Commonwealth force has to eliminate 8 German steps and prevent them from opening a corridor 6 hexes wide from the north edge to the south edge. This means they must spread their units out carefully along the longer portion of the map. German victory conditions also require 10 steps to exit the map before 36 turns pass. There is one more Victory condition for the Germans, that if they eliminate 4 artillery units then they win regardless of losses. This should of been the prime objective to begin with as the 31st Field Regiment's morale is only rated at 7/6 compared to the rest of the British force's morale of 8/7. Instead, I chose to use most of the German OBA against the dug-in defenders. With the Commonwealth deployment I spread units out as needed and kept the Valentines along with the Indian ACWs loaded with INF and HMG units in the center to be able to mobilize them where needed. The three 2-pdrs and 40mm AA gun were placed near the vicinity of where it would be easiest for German panzers to either approach the artillery units and/or exit the map. The main German force enters from the north edge and takes the most predictable path towards the artillery pieces with panzers on both flanks, mistakingly believing they would just roll over Commonwealth positions as the historical conclusion suggests. With the Commonwealth forces I did something desperate and despisable. I sent the whole Central India Horse squadron to intercept the German foot unit's advance, before they could make it to the upper ridge areas and have leaders spot for OBA versus the artillery. The results were predictable and horrible for the Indians but they did delay the advance for a while. By 13:00/turn 5, all Indian ACWs were easily wiped by the PzII's and the 37mm AT gun and soon the remaining Indian foot units were devastated by German HMG fire. Eventually, every India Central Horse unit was eliminated. However, while all this took place, during the same turn, British 2-pdrs managed to not only eliminate a step of PzII but take out a step of PzIIIGs as well. This already met half of the step loss requirements for Britiah victory conditions. But the 2-pdrs weren't finished yet. At 13:45/turn 8, a 2-pdr takes a potshot at a PzIVE, just in 5-hex range making it's way south toward the artillery units and the required '12' is rolled! The Commonwealth needs only to inflict 2 more step losses to at least force a draw and there are still 28 turns left to go. Now German forces decide to escape with all remaining armor units along with the 37mm, now towed, to qualify for exiting 10 steps off the map. The original plan was for the PzIVEs to use their deadly direct fire values and range against the field pieces before exiting but if 2-pdrs had enough luck (or skill) to eliminate 3 steps of panzers then 18 and 25-pdrs would likely do even better. At this point both of the British Valentine units had been reduced from AT fire and didn't seem much of a threat so all German, AT capable units leave the south edge. Meanwhile, back at the ridge, the British (no Indians left) and German foot units slug it out back and forth and it looks like it can go either way as far as a corridor 6 hexes wide being forced open goes but British units from the other posts start tricking in leaving just one unit behind to block paths. Though dug-in defenders are dislodged and flee, new defenders arrive and take their place. Soon visibilty is reduced as the sun begins to slowly set and the German leaders cannot spot for OBA against British artillery units. German step losses are over 8 steps and they are fighting for a draw. The axis gets so close to forcing a corridor open but one HMG unit refuses to give ground. Soon the British have cut off a chain of command and hit the German right flank and isolate it. The combination of British OBA, 3-inch mortar, 18 and 25-pdr fire leaves the attackers a discombobulated, disrupted and demoralized mess and it is all over. With the grim sacrifice of Central India Horse, the unheard of efficiency of 2-pdr AT guns and overall stubborn resistance the British hold their positions on the ridge at Alem Hamza. Final losses were: Germany: Major(8-0-0), 2 steps of INF, 5 steps of HMG, 1 step PzII, 1 step PzIIIG, and 1 step of PzIVE. Britain: 9 steps of INF, 2 steps of HMG, 1 2-pdr and 4 steps of Valentine. India: Naib Subedar(8-0-0), 4 steps of INF, 2 steps of HMG and 3 ACWs. |
||||||||||||
| 0 Comments |
| When German tankers lose their nerve | ||||||||||||||
|---|---|---|---|---|---|---|---|---|---|---|---|---|---|---|
This scenario was played as a team event by my gaming group. I act as moderator and facilitator for each game, and I do not participate directly as a player. My listing of “winning” is based on the PG HQ site cannot support a neutral role in AARs. In this scenario the Germans must exit forces and maintain a corridor across the map or destroy four of six British artillery emplacements. The British/Indian force begins dug in along the length of a ridge in a relatively thin line of defense. We played this some time ago, so I can’t recall all the details and will summarize the battle. The German forces mass against the extreme right flank of the Brits, leaving the strung out line a large distance away from the action. The Germans punch through the thin red line, and their tanks rush up the ridge. British tanks close to near point blank range, and an ineffective tank duel begins. The swirling sands prevent good spotting, and both sides continuously miss each other. There is finally a break in the sandstorm, and the Germans react quicker and blow the British tanks into burning hulks. The time spent in the tank battle gives the Germans a chance to begin forming a line perpendicular to the British line, but also gives the Indian left and British center troops time to pull from the line and head to the right flank. One lone British 2lb gun creates havoc among the Germans, and the Germans don’t seem to be able to take it out. It forms the British pivot point, and the British and Indian transports work furiously to shuttle troops to the new line. German tanks advance on the artillery park, and the British choose to send minimal reinforcements to the area. Instead, they advance on the German step-off point where German mortars are protected by a light screen. The German tanks advance on the artillery park, and seem poised to smash the British guns. Then, for some reason, they lose nerve and hesitate. During the hesitation the British advance on the German support location blows through the screen and wrecks the German mortar position. The German commander completely loses nerve and withdraws the attack on the artillery park, gathers his force, and pulls back to leave the British/Indian force victorious. This was a good scenario, and earns a three. But it didn’t stir folks enough to reach a four status. If the Germans hadn’t lost nerve in the tank attack, or had any amount of supporting infantry to support the tank attack, this could have been a German victory. The German losses would have been significant against 25lb and 18lb guns, but probably would have succeeded. One significant issue with the victory conditions that lowered the possibility of a four rating is the Germans just don’t have enough force to exit the required steps and maintain a corridor unless the Brits leave a gaping hole (which the Brits did do, but the Germans were then too tied down to exit and minimize losses) and are unable to inflict a handful of losses on the Germans (explaining the attack on the support base). Attacking the artillery seems the best bet up front since German losses are immaterial once four guns are destroyed, and British victory conditions seem very soft if the Germans attempt the exit condition. |
||||||||||||||
| 0 Comments |