
|
Carpathians on the Massif Cassino '44 #23 |
||
|---|---|---|
| (Attacker) Poland | vs | Germany (Defender) |
| Formations Involved | ||
|---|---|---|
| Germany |  |
1st Fallschirmjäger Division |
| Germany |  |
3rd Fallschirmjager Regiment |
| Poland |  |
1st Carpathian Rifle Brigade |

| Total | |
|---|---|
| Side 1 | 0 |
| Draw | 2 |
| Side 2 | 3 |


| Overall Rating, 5 votes |
|---|
|
3.8
|
| Scenario Rank: 189 of 913 |
| Parent Game | Cassino '44 |
|---|---|
| Historicity | Historical |
| Date | 1944-05-12 |
| Start Time | 05:00 |
| Turn Count | 18 |
| Visibility | Day |
| Counters | 58 |
| Net Morale | 0 |
| Net Initiative | 0 |
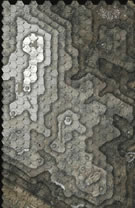
| Maps | 1: CassUR |
| Layout Dimensions | 85 x 54 cm 33 x 21 in |
| Play Bounty | 130 |
| AAR Bounty | 165 |
| Total Plays | 5 |
| Total AARs | 2 |
| Battle Types |
|---|
| Hill Control |
| Conditions |
|---|
| Off-board Artillery |
| Illumination |
| Scenario Requirements & Playability | |
|---|---|
| Cassino '44 | Base Game |
| Introduction |
|---|
|
Polish commander General Wladyslaw Anders did not wish to repeat previous mistakes by attacking areas of the Massif piecemeal or by making a frontal assault on the Monastery. So he decided to mount a major attack behind the Monastery in an effort to isolate it. The Carpathian Division was to secure Albaneta Farm and Snakeshead Ridge. |
| Conclusion |
|---|
|
First Battalion struck down the Gorge trying for Albaneta Farm. Much was expected from the Polish tank support, but well-placed German guns and panzerfaust fire soon neutralized them. Without the tanks the infantry attack soon bogged down, and only a few isolated groups of Poles made it to within 200 metres of Albaneta Farm. Second Battalion moved along Snakeshead Ridge and quickly took Point 593, but casualties were very high and General Anders called off the attack. The Poles were ordered to withdraw to their start lines. |

|
|
|---|
| AFV Rules Pertaining to this Scenario's Order of Battle |
|---|
|
| Heer |
|---|
|
| Luftwaffe |
|---|
|


| Wojska Lądowe |
|---|
|


| 2 Errata Items | |
|---|---|

|
The movement allowance on the counters in Airborne is misprinted. It should be "3." (rerathbun
on 2012 Jan 30)
|

|
Reduce strength direct fire value be came 5-5 in Army at Dawn. (plloyd1010
on 2015 Jul 31)
|
| Taking the Mastiff |
|---|
|
A larger scenario for me as I ususally enjoy the shorter, smaller ones. The Germans hold the mountain tops and buildings. The polish need to capture the same. The Germans set up in a line with the right flank anchored on one mountain, and the left flank anchored int he buildings. The Polish advance across a wide front to envelop both ends of the shorter German line while maintaining pressure in the center. The Polish center is quickly hit hard by the higher morale and dug in Germans. However, the Polish left flank begins to wrap around the German lines. The Polish right flank also continues to slowly advance against the German left. As the German center continues to inflict casualties on the Polish center, the Polish left eliminates several steps of the German right, and forces the German to pull back. The German left and Polish right exchange fire with several Polish units disrupted. The Polish finally ejects the Germans from the first mountain top objective and begin to exert force on the German center. The German left however, continues to disrupt the Polish right and prevents it from getting a fire group together. The Polish left now begins to move towards the other objective hex, and continue pressure on the German center. Fire is exchanged with more Polish casualties. The game ends after 18 turns with the Polish only in possession of one objective and having lost more steps than the Germans, german victory. |
| 0 Comments |
| Macizo sangriento |
|---|
|
En este escenario entran por primera vez en escena los polacos. En efecto, aproximadamente un batallón de la 1ª Brigada de Fusileros "Carpática", apoyada por dos pelotones de tanques Sherman y morteros pesados, tiene como misión desalojar de sus posiciones en el macizo de Cassino a tres compañías de paracaidistas de la magnífica 1ª División de Fallschirmjäger alemana. La lucha se centra en torno a tres objetivos de gran valor táctico: la granja de Albaneta y las cotas 447 y 593. Los paracaidistas alemanes se despliegan un en una línea al norte de estos objetivos y en la granja y cotas citadas. Los polacos se despliegan en torno a la carretera "Cavendish", mientras que los tanques se sitúan justamente en esta carretera, de la que prácticamente no pueden salir dado lo escabroso del terreno. Los polacos envían por delante a los tanques, pensando con razón que las débiles baterías alemanas (75 MTN y 75 RCL) no podrían frenarlos. Sin embargo los polacos no contaban con la combatividad de los paracaidistas alemanes, que provistos de "Panzerfäuste" asaltan a los blindados y consiguen destruir medio pelotón y desmoralizar al otro medio. A continuación la infantería polaca avanza y va asaltando y destruyendo sistemáticamente las posiciones alemanas de primera línea. Los paracaidistas son casi indestructibles en principio dada su alta motal (9/8), pero son bastante vulnerables si son asaltados en pelotones aislados por una fuerza enemiga muy superior numéricamente. Cuando la batalla empieza a tomar un cariz preocupante para los alemanes, éstos deciden agrupar sus fuerzas en núcleos de resistencia de dos pelotones por hex, a cubierto de la especial protección de la granja Albaneta y de las cotas o resguardados en pozos de tirador. A partir de este momento las posiciones alemanas son casi inexpugnables. Los polacos deben acercarse al máximo a las posiciones alemanas para realizar un fuego eficaz, pero a cambio reciben un castigo devastador. La lucha es extremadamente sangrienta, pero los alemanes consiguen al final mantener bajo control la cota 447 y la granja Albaneta, mientras que la cota 593 es ocupada por ambos bandos. Al cabo de 18 turnos los alemanes han sufrido una terrible sangría, con cerca de un 80% de bajas. Los polacos han experimentado también un duro castigo, con un 40% de bajas aproximadamente, además de que al final no han conseguido sus objetivos. Los alemanes contabilizan 20 VP y los polacos 18 VP. Empate. Escenario muy interesante y creo que bastante realista. |
| 0 Comments |