
|
Red Bull Attacks the Barracks Cassino '44 #3 |
||
|---|---|---|
| (Attacker) United States | vs | Germany (Defender) |
| Formations Involved | ||
|---|---|---|
| United States |  |
133rd "First Iowa" Infantry Regiment |
| United States |  |
756th Tank Battalion |

| Total | |
|---|---|
| Side 1 | 7 |
| Draw | 1 |
| Side 2 | 6 |


| Overall Rating, 15 votes |
|---|
|
3.47
|
| Scenario Rank: 427 of 913 |
| Parent Game | Cassino '44 |
|---|---|
| Historicity | Historical |
| Date | 1944-01-24 |
| Start Time | 22:00 |
| Turn Count | 18 |
| Visibility | Night |
| Counters | 51 |
| Net Morale | 0 |
| Net Initiative | 3 |
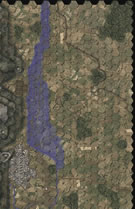
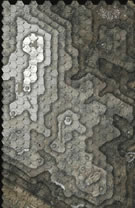
| Maps | 2: CassLR, CassUR |
| Layout Dimensions | 43 x 28 cm 17 x 11 in |
| Play Bounty | 106 |
| AAR Bounty | 147 |
| Total Plays | 14 |
| Total AARs | 5 |
| Battle Types |
|---|
| Hill Control |
| River Crossing |
| Urban Assault |
| Conditions |
|---|
| Off-board Artillery |
| Severe Weather |
| Smoke |
| Illumination |
| Scenario Requirements & Playability | |
|---|---|
| Cassino '44 | Base Game |
| Introduction |
|---|
|
With the Anzio landings just a few days old, it was imperative that the Germans not be allowed to redeploy any troops from the Cassino are to the Anzio sector. With this in mind, the U.S. 34th Division struck across the Rapido River north of Cassino in an attempt to gain a foothold on the Gustav Line. |
| Conclusion |
|---|
|
Flooded farmland and German mines and barbed wire on the east bank of the Rapido slowed the American infantry, and kept their tanks from crossing the river. By dawn, the 133rd had a couple of companies on the west bank, but none of the objectives had been taken and casualties were again very high. |

|
|
|---|
| AFV Rules Pertaining to this Scenario's Order of Battle |
|---|
|
| Heer |
|---|
|


| Army |
|---|
|


| 5 Errata Items | |
|---|---|

|
The reduced direct fire value of the Heer HMG became 5-5 starting with Fall of France. (plloyd1010
on 2015 Jul 31)
|

|
Strongpoints are single step units and can be eliminated with X results like any other single step unit. (Shad
on 2010 Dec 15)
|
|
|
The standard mix of strongpoints may be downloaded from Avalanche Press: http://www.avalanchepress.com/German_Strongpoints.php This is the standard mix found in Airborne, Airborne-IE, and Edelweiss Expanded. The strongpoint mix in Cassino '44 is different from that of other PG games. (plloyd1010
on 2012 Feb 01)
|
|
|
Strongpoints are affected by the terrain in their hex just like any other unit.
Even though they can't move, they can attack using Assault Combat if an enemy unit moves into their hex.
They may not dig in or benefit from entrenchments.
(rerathbun
on 2014 Apr 21)
|

|
The movement allowance on the counters in Airborne is misprinted. It should be "3." (rerathbun
on 2012 Jan 30)
|
| Red Bull gives you wings? | ||||||||||||
|---|---|---|---|---|---|---|---|---|---|---|---|---|
This is another tough one for the US forces but a lot closer than the first two scenario's. I seem to recall that the Germans just held onto the barracks and the US really ran out of time to take sufficient objectives for a victory. |
||||||||||||
| 0 Comments |
| Jugable con reglas caseras |
|---|
|
Si se hace un correcto despliegue por parte de los alemanes, los americanos no tienen ninguna opción de victoria. He aplicado una "house rule" según la que los alemanes despliegan al oeste del río Rapido, pero no pueden situarse en hexes adyacentes a la Gustav Line. |
| 0 Comments |
| Red Bull Attacks the Barracks -- two versions of rules, dramatically different outcomes | ||||||||||||
|---|---|---|---|---|---|---|---|---|---|---|---|---|
Rule Interpretation, Crossing the Rapido. Though a major river, the Rapido runs along a hexside like a minor one. After some conversation in the Panzergrenadier folder in CSW, I thought it not unreasonable to treat the Rapido as a hybrid hex; i.e. units need engineer to cross but do not need to stop before entering. It takes, therefore, only two turns to cross, not three. The special rules call for all 40 mine units (not points) to deploy into the Gustav line hexes. Since the scenario was played solitaire, I distributed the mines randomly, two counters per hex, with three units on the most vulnerable crossing hex. The US had only 1 engineer so this scenario is especially problematic for the USA side. On turn 1 the US sent a leader into hex 5825, preparatory to calling in smoke. According to the special rules, leader by themselves do not activate the German side. Unfortunately the first leader to enter tripped 3 points of mines (a dummy and a three-pointer) and was eliminated. A second leader fared little better suffering a demoralization. Seeing that this tactic was pointless, the engineer entered the hex on turn 2, thus triggering a German response. The mine die roll (1 die) , unfortunately for the engineer, was a 6 – the unit lost a step and was demoralized. Now the German activated and quickly closed on the possible landing hexes. They were promptly sealed off, and with the Gustav line rule (2 hex visibility at night) the Germans could bring overwhelming direct fire on the hex. I decided to terminate the game at this point with not a shot fired and turn 1 not even completed. I reset the game (including redistributing all mine counters) and tried it a second time. Though this time the leader survived the mine attack (somehow, even though he entered 3 points of mines again) and promptly called in smoke. This at least blocked sighting by the Germans and allowed the engineer to enter the hex unobserved. On turn 2 the engineer entered the crossing hex but again faced misfortune, rolling a five for a Demoralization. Though the leader continued to call in smoke, the Engineer failed to recover and had to flee (what an unlucky unit!). The scenario was proving to be very frustrating, so I decided to again abort the game. After some posts to CSW about my possible rules interpretation (I had questions about whether I was playing correctly), the original designer of the game, Mr. Dave Murray, was generous enough to send me his original scenario booklet, which deviated in significant ways from the published version. In the unpublished version, the Gustav line has 2 points of intrinsic mines; no mine counters were used. Also, it cost a units 2 mps to cross a river, thus the infantry had an extra hex of movement. So I reset a third time. Again, I tried to cross at 5825. The first leader I sent to call in smoke was eliminated by the mine roll, but the second survived. Smoke was called in and the following turn the engineer entered the hex. Hooray! No mine roll and the unit was unobserved. At last, the hex was entered by a leader, two infantry and an HMG. One infantry step was lost on a mine roll, but the other units survived unscathed. More smoke continued to obscure the landing and the units crossed unopposed. This alerted the Germans, who immediately moved to contain the breach. That the infantry could move an additional hex after crossing the river proved significant and made it much more difficult for the Germans to threaten the bridgehead. Reinforcements continued to cross (though at some cost, as a couple steps were lost by mine attacks). Some hard fighting pushed the Germans into the mountains and back towards the barracks. Their losses steadily mounted as the Americans became ever more aggressive. The fighting culminated in a decisive assault against the StuGIIIG AFV, supported by 2 infantry units. Fortune at last smiled on the US, as a lucky barrage caused a step loss and disruption against one infantry unit and a demoralization against the second. With an infantry, HMG, and FLM unit leading the assault, the German suffered a second step loss and a demoralization against the AFV. This result left the barracks practically defenseless. After turn 9 the German side conceded; a decisive US victory. Conclusion: The scenario in the published version seems in need of revision. From my limited playtesting, the games were over barely before they had begun. For that reason, I rate scenario 3 a 1. In contrast, the unpublished version was eminently more playable and fun. The mine rules alone restores much of the balance to the game. The crossing rules also provide flexibility to the crossing side. For that reason, I rate that version a 4 – for an average rating of 2.5. (3 on a generous scale). |
||||||||||||
| 0 Comments |
| Play it with two engineers... | ||||||||||||
|---|---|---|---|---|---|---|---|---|---|---|---|---|
My Americans crept up to the Gustav line and spotted for smoke. Once concealed the engineers moved forward and discovered a nasty surprise. 4 minefield factors! I fired more smoke charges but they were ineffective! So, I had to make a choice. Either wait and move down the Gustav line to a less mine-inflicted hex and pray the one smoke counter wouldn’t dissipate. Or move in some INF right now and try to get them across the river before I was spotted. I chose option 2. Two infantry advanced. 6 dice were rolled resulting in 5 sixes! Both were blown to pieces and to add insult to the injury, all 3 leaders also died! And the smoke dissipated. So, the Germans spotted my engineers and started a mass mobilisation to stop my crossing. I did manage to get a HMG and captain into the barracks, but although “dug in with first fire”, they waffled their attack and were eliminated. My only success was blowing the StuG out of the barracks with my adjacent M4 from the Gustav line. By this time, the Germans had congregated near my engineer. With +1 minefield, and +1 Gustav line, the German attacks were devastating. I managed a few more platoons across, but they were quickly eliminated by assault. I ended up with a real leader shortage and was not able to get another leader across, so the poor infantry were cruelly assaulted and eliminated swiftly. My second M4 entered the Gustav line and was eliminated when a 5,6 was rolled. Turn 9, the Americans surrendered. This scenario would have been much better with two engineers. This would allow for a "double" spearhead attack, so the Germans would have to spread their forces among the two crossing attempts (like in Scenario 1). Also, a bad roll at the beginning could mean instant loss for the Americans if the engineer dies early. |
||||||||||||
| 0 Comments |
| They're all Dead, Man! They're all DEAD! | ||||||||||||
|---|---|---|---|---|---|---|---|---|---|---|---|---|
Cassino 44' Scenario 3 - Red Bull Attacks the BarracksTurns: 18 (starting at 2200hr) Victory Conditions: American - Kill Germans, Get across the Rapido in good order, Control Barracks, Point 56 and 324. Germans - Kill Americans, Maintain control of Barracks, Point 56 and 324. Set-up: I did a much better set up this time playing as the Germans. No area of the Gustav Line is "unwatched" this time. As soon as the Americans set foot in it, I'll know about it providing the smoke clears in my favor, which I'm sure will be used. My Infantry Guns have command of the heights and therefore the entire Gustav Line in their LOS once the flares start going off. My one AFV is sitting on the road by the Barracks to quickly respond to any area under threat. With all the flooding and mud rules in effect, the allies are going to have a rough go of it. Randy sets up his forces directly across from the Barracks. The shortest path to his VP's. With only one ENG to help his units get across the Rapido, he'll have to make extensive use of Smoke as he probes the Minefields. Again, I am unable to make any activations until one of my units spots his. Turn 1: The Americans move forward. One of the M4's manages to get disrupted moving into the flooded area. Turn 2: Three Leaders are sent into the Gustav Line to draw op-fire, I obtain a disruption on one of them. Smoke is fired and the ENG's makes their way into the minefield directly across from the Barracks, where they find themselves in one of the worst spots on the Gustav Line, with a 3 and a 1 Mine Marker. The Luck of the Irish must be with Randy, because I only roll 2's! And just to show how fickle Lady Luck can be, Randy moves 2xINF units into the hex with the ENG's, where all 4 steps get blown to smithereens and to add insult to injury, all 3 Leaders that entered the hex previously fail their Leader Death rolls and are also removed from the board. Turn 3: Is over quickly. After 3 activations each, FOW is rolled. I'm able to get a Leader close enough to fire Flares and my Stug takes a position among the Barracks. Turn 4: THE ALLIES ARE ACROSS! Randy manages to get an HMG and Captain across into an assault with the Stug in the Barracks. No damage is sustained to either unit however. My OBA into the River Crossing Hex, with all the bonuses, gains nothing. Who ever said 7's are Lucky? Turn 5: The Allies begin with 4 activations! Allied OBA is ineffective. M4 firing into the assault hex at my Stug is ineffective. Demoralized HMG recovering to disrupted is as good as it got for the Allies. The German Captain gathers his GREN and HMG up to lead them into the assault hex with the Stug. The Allied HMG has 1st fire from the Barracks hex and is able to disrupt both the GREN and HMG, but that doesn't save them from the 30+ column on the assault hex, which a 6 is rolled, breaking the Allied assault and destroying the HMG. The Allied Leader is able to avoid death and capture. Germans troops make their way towards the River crossing before FOW is rolled. Turn 6 & 7: Allies start with 2 activations and make extremely good use of them. M4 fires from across the river at my Stug, missing the 1st time but gaining a hit the 2nd time and demoralizing it. The OBA coming in gains an X1 on a soft target and demoralizes the Stug again, losing the remaining the step. After the Allies sustain another step loss from entering the minefield, Infantry Guns on the mountain fire on a flare lighted hex containing 3 combat units, gaining an X2. A GREN brought into the assault hex is enough to gain another step loss and demoralize the remaining step. A German assault on the remaining INF west of the Rapido gains another step-loss. German OBA is able to demoralize the ENG's. Casualties are now Germans 5 and Allies 12. Turn 8: ENG's recover to disrupted. An M4 moving up into the minefield is unlucky, receiving a Demoralization and then a step loss, effectively destroying both steps. German Infantry Guns are able to destroy a step of HMG that were lit up by a flare from compound morale failure. Germans 5 to Allies 17. Turn 9: ENG's recover to good order, which is the only good news for Randy. INF units moving into the minefields sustain 2 step losses while German OBA gains another step-loss in the River crossing hex. Total frustration sets in as the Allies order an OBA strike into the assault hex, demoralizing the GREN and disrupting the Lt while also demoralizing the Allied INF. Disrupted Lt and HMG reassault, finishing off the INF and a massive DF attack removes the last of the Allied INF West of the Rapido. Germans 5 to Allies 21 steps lost. With only a handful of troops left on the East side of the Rapido, the Allied Commander gives the order to retreat, giving the Germans a Major Victory.Conclusion: With only one ENG to assist in the crossing, this scenario is almost impossible for the Allied troops since all German troops will key on that one hex. The Minefields, however, were the biggest obstacle. Gaining 4 step losses and 3 Leaders Deaths in Turn 2 from mines was extraordinary and set the stage for a very bloody battle. Would love to try this again sometime playing as the Allies. A 2 out of 5 for play due to the harsh impossibility (?), but 5 out of 5 for those unbelievable Minefield rolls. Thanks to John Stafford at AvP for official rulings on the Minefield situations that came up. |
||||||||||||
| 0 Comments |