
|
Second Ogaden: Battle of Gianagobò Conquest of Ethiopia #28 |
||
|---|---|---|
| (Defender) Italy | vs | Ethiopia (Attacker) |
| Formations Involved |
|---|

| Total | |
|---|---|
| Side 1 | 1 |
| Draw | 1 |
| Side 2 | 0 |


| Overall Rating, 2 votes |
|---|
|
4
|
| Scenario Rank: --- of 913 |
| Parent Game | Conquest of Ethiopia |
|---|---|
| Historicity | Historical |
| Date | 1936-04-15 |
| Start Time | 09:30 |
| Turn Count | 30 |
| Visibility | Day |
| Counters | 124 |
| Net Morale | 0 |
| Net Initiative | 2 |
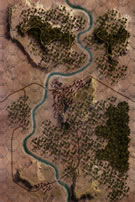
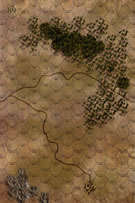
| Maps | 2: 87, 89 |
| Layout Dimensions | 56 x 43 cm 22 x 17 in |
| Play Bounty | 180 |
| AAR Bounty | 171 |
| Total Plays | 2 |
| Total AARs | 1 |
| Battle Types |
|---|
| Hill Control |
| Inflict Enemy Casualties |
| Conditions |
|---|
| Caves |
| Randomly-drawn Aircraft |
| Reinforcements |
| Terrain Mods |
| Scenario Requirements & Playability | |
|---|---|
| Conquest of Ethiopia | Base Game |
| Introduction |
|---|
|
Marshal Badoglio's successes on the northern front frustrated the vain and envious General Rodolfo Graziani in the south. Hampered by terrible rains and a lack of roads, Graziani delayed repeatedly as he built up his infrastructure and supplies. Mussolini, ignorant or just uncaring of the difficulties, repeatedly urged the general to resume the offensive in the southern sector. Against his better judgment, Graziani finally ordered several mobile columns to further penetrate into Ethiopian territory. The left column headed for the strategic Korrak Wadi near Gianagobò, but encountered a surprise. |
| Conclusion |
|---|
|
Olal Dinle’s tough Somali Dubats met stiff resistance as they closed on the wadi. Gen. Guglielmo Nasi soon dispatched Libyan troops to reinforce their efforts and some of them, with the support of tanks, reached the wadi. However, due to recent heavy rain the wadi was in flood and posed a major obstacle. To make things worse the Ethiopians had skillfully exploited the caves and broken terrain on the opposite side of the wadi. Some Ethiopians attempted to infiltrate the Italian positions but were repelled with the aid of the tanks. The first day of the battle ended in a bloody stalemate. Only a small Italian detachment managed to cross the wadi (and that was in a marginal sector not portrayed in this scenario). However, Gen. Franco Navarra's forces reestablished contact with the left side of the Nasi's column. Nasi, one of the best officers of Regio Esercito during both the Ethiopian and Second World Wars, methodically prepared for the rest of the day and night for the following day's battle in which his troops outflanked the Ethiopians, who quickly gave ground. |

|
|
|---|
| AFV Rules Pertaining to this Scenario's Order of Battle |
|---|
|
| Ethiopian Imperial Army |
|---|
|


| Imperial Irregulars |
|---|
|


| Sefari |
|---|
|


| Regio Corpo di Truppe Coloniali |
|---|
|


| Regio Esercito |
|---|
|


| Conquest of Ethiopia, scenario #28: Second Ogaden: Battle of Gianagobo | ||||||||||||
|---|---|---|---|---|---|---|---|---|---|---|---|---|
Conquest of Ethiopia, scenario #28: Second Ogaden: Battle of Gianagobo This was a slugfest battle no doubt, with three battlegroups of Ethiopians and three battlegroups of Italians all fighting over some hills with caves in forest terrain to boot. I used extra cave counters I have from my laser to die-cast counter conversion days. So I think they are from my Saipan game but I wanted to use actual cave counters then entrenchment counters. With Conquest of Ethiopia, the scenarios have few leaders for either side, showing how difficult it was to manage battles in this era of early WWII. It encourages you that you must stack three units per hex regardless of the combat modifiers when hit by enemy fire, or you will never get your troops to the battle. This causes more casualties but makes playing these battles more interest as well. I won’t go into the back and forth of a slugfest 30 turn scenario as this, but the Ethiopians did send out a few units early to strike at the first group of Italians before their reinforcements arrive and then pulled back into the hills. The Italians were assisted by their air-forces and armor, including one Flame-throwing L3 unit, both of which open a small hole in the far western hill mass. By the end of game play, the Italians had a small 6 point lead in causality points over the Ethiopians but more importantly, controlled one hill hex worth 8 points giving them a 14 point lead and a Minor Victory, on point short of a major victory. But really, this battle could have gone either way depending on attack strategies, setup and die-rolls. |
||||||||||||
| 0 Comments |