
|
Tobruk C&CV2: The King's Officers #4 |
||
|---|---|---|
| (Defender) Italy | vs |
Australia
(Attacker)
Britain (Attacker) |
| Formations Involved | ||
|---|---|---|
| Australia |  |
6th Infantry Division |
| Britain |  |
7th "Desert Rats" Armoured Division |
| Italy |  |
Regio Esercito |

| Total | |
|---|---|
| Side 1 | 2 |
| Draw | 0 |
| Side 2 | 2 |


| Overall Rating, 4 votes |
|---|
|
3.5
|
| Scenario Rank: --- of 914 |
| Parent Game | C&CV2: The King's Officers |
|---|---|
| Historicity | Alt-History |
| Date | |
| Start Time | 15:30 |
| Turn Count | 30 |
| Visibility | Day |
| Counters | 102 |
| Net Morale | 0 |
| Net Initiative | 3 |
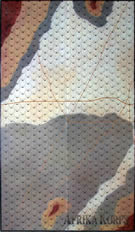
| Maps | 1: AK3 |
| Layout Dimensions | 88 x 58 cm 35 x 23 in |
| Play Bounty | 173 |
| AAR Bounty | 159 |
| Total Plays | 4 |
| Total AARs | 3 |
| Battle Types |
|---|
| Inflict Enemy Casualties |
| Road Control |
| Conditions |
|---|
| Minefields |
| Off-board Artillery |
| Randomly-drawn Aircraft |
| Terrain Mods |
| Scenario Requirements & Playability | |
|---|---|
| Afrika Korps | Maps + Counters |
| C&CV2: The King's Officers | Base Game |
| Introduction |
|---|
|
Tobruk has a deep natural port that is well-protected from both the elements and enemy attack. It therefore served as an excellent supply base for forces in North Africa, and would see much fighting as both sides vied for control of it. This scenario depicts an Allied attack on part of the defenses around Tobruk. |
| Conclusion |
|---|
|
Here's a wide-ranging scenario where the Allies must try to clear a path to Tobruk and the Italians must keep all paths blocked as long as possible. The fall of night partway through the scenario means any Leader Character with the Night Assault Skill will come into his own starting on turn 1900. |

|
|
|---|
| AFV Rules Pertaining to this Scenario's Order of Battle |
|---|
|
| Army |
|---|
|


| Army |
|---|
|


| Regio Esercito |
|---|
|


| 2 Errata Items | |
|---|---|

|
All Bren carriers should have a movement value of 7. (Shad
on 2010 Dec 15)
|

|
This is an armored car. (Shad
on 2010 Dec 15)
|
| Tobruk falls again | ||||||||||||
|---|---|---|---|---|---|---|---|---|---|---|---|---|
This is moderate sized scenarios for the King and Country series dealing with the first fall of Tobruk to the Commonwealth forces. It does involve a decent into night that will cause a little bit of trouble for the Commonwealth if they are not far enough along. Initially, they have quite a good force to attack the Italian defenders with. Infantry, armour and air support to try to push the Italians out of their dug-in positions. The Italians are on the defense and are dugin as well as have minefields, but these will do well to deny the VP's for the British rather than channel their attack. We will have our three British lieutenants attached to the Australian's for the battle. Each should provide some good characteristics for the attack. The same goes for the Italians, they have three Tenente's to help defend. The Italians choose to defend the northly tracks and roads with mines, thus providing a harder time for the British to get the VP's for them. They also position infantry around the mines to defend, in a reverse of what one would typically do with mines and dugin infantry. Maximum delay will be the defense. For the attacking Commonwealth troops, there will be two groups, one moving up the road and one moving up the westerly track that starts on the southern end of the board. Both will look to clear the track and road for the VP points as well as kill and capture Italian troops. The initial maneuver goes well and the Commonwealth get on the board without too much loss. Advancing quickly up the road the force of infantry and A10 tanks attack the first company location the Italians have setup. Both side get into heat assaults but the Commonwealth morale and leadership tip the odds to the Commonwealth and sappers are able to get started on the first set of mines. To the west the second group takes a bit more casualties from the Italian defenders and needs to rally several platoons before they can engage. When they do they are attacking a mix of regulars and BERS / BERS HMG provide a strong defense. Several Commonwealth artillery and air strikes help to discourage the Italians to begin to retreat. During this fight the first character Tenente is captured by the Commonwealth forces. Sappers go to work on the mines on the track as well. At this point night starts to fall and the air support goes home. The attackers just have artillery and mortars to support the attack. Along the road they move to the next blocking company and try to knock it out with artillery, but the night time visiblity hampers good spotting so the infantry and tanks need to go in. Once again a back and forth but Commonwealth leadership comes through and the second position is captured. At this point a smaller Commonwealth force moves to the easterly track to de-mine it, but will need to deal with a last defender. Along the road the attack goes after the last hold out in the dark of night. This provides more problems as the Italian start to desperately attack at long odds and win some. But it is not enough and the final defense falls. The Commonwealth take the road to Tobruk and most of the trails but run out of time to defuse the mines and lose the points for the tracks. But in the end the Italians are routed and the Commonweath wins. As for our leaders, the three British Lieutenants survive but just break even with leadership points. The Italians lose two, captured in assaults, with one getting away. Few points will add on for the next scenario. |
||||||||||||
| 0 Comments |
| King's Officers #4 Gazala Opening |
|---|
|
Both sides set up with forces opposite their respective hill masses in a position to make a dash for the hilltops. During the first few turns both sides jockyed for position with thier armor and Antitank guns. The allies won the races to the hilltops, mostly because the Axis missed a couple of activations during the advance. Several armored steps were lost on both sides. By 1600 there was stalmate on both hills. The axis had suffered 12 step losses including armor and the Allies had lost 9 including armor. Over the next 6 turns the Axis were finally able to push the Allies off the eastern hill. The conquest was expensive though, leaving the Axis on the eastern hill "hors de combat". The remnant of the Allied force defenting the Eastern hill fell back toward the western hill where the Allies were still in a stalemated position. Several turns later the game ended with the Allies in control of 6 40 meter hexes and the Axis only 4. The axis had also lost more steps than the Allies. Allied Victory. This was a nice little scenario that could have gone either way. The key for both sides is how the armor and ATGs are handled. The axis armor is formatable but not unbeatable. The biggest factor is how both players set up to attack their respective hills. Players must assign troops to both objectives before play and this more than any other factor will determine how the scenario goes. Commit too much to one and the other hill won't fall. Both sides have this decision to make. |
| 0 Comments |
| Diggers best the Bersaglieri in showdown at Tobruk | ||||||||||||
|---|---|---|---|---|---|---|---|---|---|---|---|---|
First off, this is a tough campaign scenario for both sides and it could of gone either way but in this case Australia prevailed in the end. To begin with, Italy gains 15 V.P.s automatically if they are able to hold down the road and unbroken track hexes with either units or minefield points and if they set-up correctly, it is nearly impossible for the Aussie engineer units to clear all the minefields blocking passage, especially if 3-pointers are randomly drawn, and most especially if they are protected by the higher morale ranking Bersaglieri units, and even then to try when visibility is more than one hex is suicide at best. So the minefields were virtually out of reach until nightfall and this battle had to be won the hard way, through sheer attrition. The Italians held the higher hand during the the first half of the battle until about dusk when their field pieces began to disappear but at that point they had more V.P.s by keeping road and track hexes blocked. Their reinforcements arrived right on time but the M11/39 tanks were caught in a chase by the British Matildas and quicly reduced to scrap metal. Soon however, the West end of the fortifications began to crumble and the highest ranking Italian officer, the Maggiore, was sent fleeing to Northwest corner with a few army regulars. By nightfall both sides were in a stranglehold when the order was given to brave the minefields and damn the casualties. Incredibily enough, no Aussie ENG units were eliminated while others were pulverized by a 3-pointer and opportunity fire at point blank range. At this moment the V.P.s briefly shifted to the Italians favor. However, even the seemingly formidable Bersaglieri units began to break down first with their HMG units and then INF but they still managed to block the road in the end retaining their 15 V.P. points which made this Commonwealth victory a minor one. The one Maggiore who fled the fortifications earlier recovered with a platoon and gave chase to an overwhelming force of Bren carriers and managed to evade them and block the Northwest tracks until the last hour. Minefields were cleared but not enough. The one 3-pointer blocking the road was never attempted as it was guarded by the remaining Bersagieri who were determined to fight to the last man. In the overall campaign scheme the British and Commonwealth still lead by 25 C.P.s, still reaping the rewards of Operation Compass while the Italians still remain defiant though their wins at the initial invasion of Egypt and defense of Bardia were marginal. The remnants of the 10th Army would have to give their all with a breakout at Beda Fomm to at least balance the scales until Germany delivered their promised support. Not a bad scenario overall but everything is required for both sides and some turns lasted well over an hour laden with frustration, especially the second half of the battle with night-time restrictions and modifiers. I believe it is a fair match though and I could of won with Italy if I perhaps split the forces up; the stronger group holding the road and the weaker holding the tracks, forcing the British to divide their attack ... now on to Beda Fomm ... |
||||||||||||
| 0 Comments |