
|
Romania Mare Scenario 1: Bloodletting Broken Axis #41 |
||
|---|---|---|
| (Defender) Romania | vs | Soviet Union (Attacker) |
| Formations Involved | ||
|---|---|---|
| Romania |  |
1st “Romania Mare” Armored Division |

| Total | |
|---|---|
| Side 1 | 4 |
| Draw | 0 |
| Side 2 | 1 |


| Overall Rating, 5 votes |
|---|
|
4
|
| Scenario Rank: 118 of 913 |
| Parent Game | Broken Axis |
|---|---|
| Historicity | Historical |
| Date | 1944-08-20 |
| Start Time | 12:30 |
| Turn Count | 14 |
| Visibility | Day |
| Counters | 25 |
| Net Morale | 1 |
| Net Initiative | 0 |
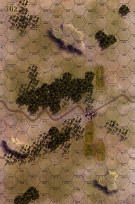
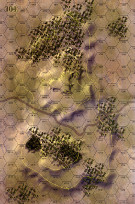
| Maps | 2: 102, 104 |
| Layout Dimensions | 56 x 43 cm 22 x 17 in |
| Play Bounty | 143 |
| AAR Bounty | 159 |
| Total Plays | 5 |
| Total AARs | 3 |
| Battle Types |
|---|
| Delaying Action |
| Exit the Battle Area |
| Hill Control |
| Inflict Enemy Casualties |
| Road Control |
| Conditions |
|---|
| Reinforcements |
| Scenario Requirements & Playability | |
|---|---|
| Broken Axis | Base Game |
| Introduction |
|---|
|
The new Soviet offensive managed to shred the German and Romanian lines in a matter of hours. While Soviet armor sped southward through Podu Iloaiei, the German 57th Panzer Corps command sent the 1st Royal Romania Mare Armored Division forward to meet them. Romania Mare's lead elements encountered the retreating Germans as they topped Crucea Hill while the Soviets struggled to negotiate the right turn around the lake just south of the village of Scobâlțeni. The Romanian tanks halted when antitank fire disabled three of their number and assumed defensive positions. Soon Soviet heavy tanks tried to force the position. |
| Conclusion |
|---|
|
Despite a BBC report to the contrary, the Soviets did not obliterate the Romania Mare that night, though the Romanian division suffered grievously. The detachment lost a significant portion of their tanks and two of the three tank company commanders came up missing. When darkness came they tucked the supporting infantry that had wandered into their positions during the afternoon between the remaining tanks and headed southward. |

|
|
|---|
| AFV Rules Pertaining to this Scenario's Order of Battle |
|---|
|
| Army |
|---|
|


| Army (RKKA) |
|---|
|


| Guards |
|---|
|
| 1 Errata Item | |
|---|---|

|
All Guards JS-IIs should have AT fire values of 8-8. (Shad
on 2010 Dec 15)
|
| Oh Dear oh Die | ||||||||||||
|---|---|---|---|---|---|---|---|---|---|---|---|---|
Romanians set up with two T4's each on the E & W high ground (mostly dug-in and on high ground); one sets back holding the road (covers the valley). One on the west is in the regular woods hex (so not dug-in) and so I treat it (playing solo) as invisible (i.e. the Soviets approach as though it is not there - until it fired/or was spotted at 3-hex range). The Soviets push the SMGs and 4x M4/76's towards the western hill; the JSII; the Su-85's and 1xM4/76 approach down the road. The Soviets approach in a leap-frog fashion along the road. On the west side, the SMG's off-ride in the light woods copse and approach with their armor. Early exchanges lead to two step losses for each side: the JS-II's efficiency and 8-8 AT factor getting in one kill (offsetting the dug-in and higher ground defensive advantages held by ROM). The ROM kill a step of Su-85 and M4. The ROM T4 holding the woods took a step loss, but was only DIS. The Soviets pushed forward to mount an assault: LDR + 2xSMG + M4/76. All told, a 30+ assault vs a 3-col. In one of those absurdities of fate, the SOV roll a '7' whilst the ROM a '2'. The SOV take a step loss; proceed to fail most of the morale checks (with a DEM on the SMG that didn't take the step loss). Naturally, the ROM make their M2 check! I tried to rationalize it by figuring that the two tanks left in that RED platoon must have: (i) burned out their gun tubes firing HE that (ii) knocked down a large tree that, in turn, knocked down other trees all of which landed on the two encroaching SMG platoons and on the M4/76's. The Romanians were so euphoric that they ignored the shells whizzing by (i.e. made their M2 check). This threw the SOV attack into disarray as 2/3 of their entire foot allotment was put out of action for a considerable time. On the other slope, the JS-II was in a bit of trouble as the ROM maneouvered for flanking bonuses as the thinner skinned Su-85's were picked off: and, finally, the 2xVAN (ROM INF) arrived (took four turns to roll a 5-6) arrived. The SOV middle had no foot support and, whilst the JS-II was likely to win the purely AT fire battle (despite a lot of misses on both sides to that point) they had to pull back in the face of an INF assault. It simply took too much time for the tattered SOV SMG remnants to recover (and the ROM/SOV armor on that western hill had pretty much reduced each other to nothing). So the ROM held the road and the Eastern hill; whilst the SOV held the western one and had exited no units (no point in that they couldn't have exited more steps than they'd lost). NOTES: had that assault gone "normally," this would (or could) have been a different story as the SMG+M4/76 group would likely have reduced the western hill about the time the ROM reinforcements arrived. An interesting battle for the road control would have ensued. Also note that I played the M4/76's as AC = 4 (not 3 as printed) as per recent APL conjecture. In early turns, two ROM AT attacks missed by '1' so this certainly had a significant role in the scenario. |
||||||||||||
| 0 Comments |
| Hunting JSII | ||||||||||||||
|---|---|---|---|---|---|---|---|---|---|---|---|---|---|---|
Nice small scenario including one JSII guards platoon, some SU85 SP guns and lend-lease shermans assaulting a high hill while trying to control the main road going through. I was commanding the Soviets and my (usual) opponent set up Romanian PzIVs (T4 tanks) on the hill. Since we play face to face, we use the hidden units optional rules and some of his T4 tanks are completely hidden. My Soviet troops following the main road are flanked on the west side by some SU85 and sherman platoons. The JSII platoon is the threatening spearhead with all the other Soviet tanks hiding behind, in the light woods and other limiting terrain. The first exchanges of fire result in several shattered sherman platoons (Soviet loses 9 VPs) but the returning fire of the JSII is devastating for one T4 platoon (hit by boxcars on the first shot !). At that point, I became berserk and drove ahead with the shermans and infantry still backed by the JSII... It could have sealed my bitter defeat but all the Romanians shots missed their targets and my back fire wiped out two T4 platoons and all the Romanian infantry (I rolled a '2' in assault...). Another duel (1 X SU85 + 1 X JSII vs 1 X T4) eventually ended in full Romanian defeat and Major Soviet victory. A tense scenario really fun to play and it could have gone the other way... A slight remark : the predominance of light woods seems a bit strange for heavy wooded Romania. |
||||||||||||||
| 0 Comments |
| Broken Axis, scenario 41: Bloodletting | ||||||||||||
|---|---|---|---|---|---|---|---|---|---|---|---|---|
Broken Axis, scenario 41: Bloodletting I saw some other guys recent AARs on this and it looked like a fun scenario and short, fast and not too many units/counters, just what I wanted in the time I had today. The Soviets have four different victory objectives and depending on how many they achieve, depends on their victory level or loss. The Soviet decide to charge their armor directly at the Romanians dug-in T4s but their M4/76s & SU-85s have a weak valued defend factor of 3 each and the Leading JS2 is soon reduced to nothing, both sides lost heavy but the Soviets much more. They were able to sneak an assault in on one T4 units which proved successful but soon the Romanian reinforcements arrived and the Soviet continued to roll terrible on the dice. The Romanians win a Major Victory as the Soviets achieved none of the objects but it was fun shoot them up scenarios. |
||||||||||||
| 0 Comments |