
|
Tashlyk Bridgehead Scenario 2: Which Bridgehead to Take? Broken Axis #28 |
||
|---|---|---|
| (Attacker) Germany | vs | Soviet Union (Defender) |
| Formations Involved | ||
|---|---|---|
| Germany |  |
13th Panzer Division |
| Germany |  |
14th Panzer Division |
| Germany |  |
320th Infantry Division |
| Soviet Union |  |
35th Guards "Krasnogradskaya" Rifle Division |
| Soviet Union |  |
5th Guards Independent Tank Regiment |

| Total | |
|---|---|
| Side 1 | 3 |
| Draw | 0 |
| Side 2 | 0 |


| Overall Rating, 3 votes |
|---|
|
4
|
| Scenario Rank: --- of 913 |
| Parent Game | Broken Axis |
|---|---|
| Historicity | Historical |
| Date | 1944-05-11 |
| Start Time | 05:00 |
| Turn Count | 22 |
| Visibility | Day |
| Counters | 137 |
| Net Morale | 0 |
| Net Initiative | 2 |
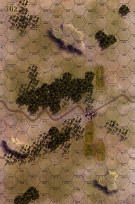
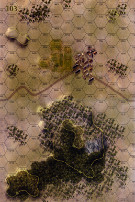
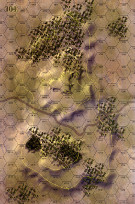
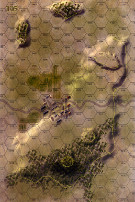
| Maps | 4: 102, 103, 104, 105 |
| Layout Dimensions | 86 x 56 cm 34 x 22 in |
| Play Bounty | 187 |
| AAR Bounty | 171 |
| Total Plays | 3 |
| Total AARs | 1 |
| Battle Types |
|---|
| Delaying Action |
| Exit the Battle Area |
| Inflict Enemy Casualties |
| Urban Assault |
| Conditions |
|---|
| Anti-infantry Wire |
| Minefields |
| Off-board Artillery |
| Randomly-drawn Aircraft |
| Smoke |
| Scenario Requirements & Playability | |
|---|---|
| Broken Axis | Base Game |
| Introduction |
|---|
|
After almost cutting the bridgehead in two, the Sixth Army staff decided that any more offensive action there would be costly with little chance for success. They thought it likely the bridgehead would collapse if they secured the sole river crossing further south at Butor. The seizure also required that Serpeni and Speia be taken, or at least screened. Since the Germans lacked sufficient forces in the area for this task, the panzer spearhead in the north wheeled right and started advancing. |
| Conclusion |
|---|
|
Serpeni (the town on Board 103) fell but the Soviets hung on to Speia (the town on Board 105) until after dark when they were ordered to cross over the Dneister at Butor. The Germans failed to take the Dneister crossing, and the fighting here died down over the next few days. Nevertheless, the Germans accomplished something here that they had been unable to do since late 1942: eliminate a good portion of the Soviet forces occupying an established bridgehead. |

|
|
|---|
| AFV Rules Pertaining to this Scenario's Order of Battle |
|---|
|
| Heer |
|---|
|


| Army (RKKA) |
|---|
|

| Guards |
|---|
|


| 4 Errata Items | |
|---|---|

|
The reduced direct fire value of the Heer HMG became 5-5 starting with Fall of France. (plloyd1010
on 2015 Jul 31)
|

|
All SS PzIVH tanks should have a movement of 8. (Shad
on 2010 Dec 15)
|

|
The morale and combat modifiers of German Sergeant #1614 should be "0", not "8". (Shad
on 2010 Dec 15)
|

|
All SPW 251s have an armor value of 0. (Shad
on 2010 Dec 15)
|
| When everything goes right except the dice |
|---|
|
I'm not usually one for 4 map scenarios, however I'm committed to playing this battle game, and this one had a unit density that wasn't bad. In fact, it may have changed my mind about bigger scenarios. Space can still be an issue, and manageability wasn't too bad. In this scenario, the Germans have 4 objectives. Take the village on 102 and the town on 105, take the town on 103, exit at least 15 steps and make sure the Soviets take higher losses. Achieve 3 or 4 of them and they win. 1 or 2 and the Soviets win. The Germans have a tank/mechanized infantry heavy force in the north, and an infantry force with some tank support in the south. They also get an aircraft on 3 turns of their choice. The Soviets have a couple of platoons of T-34Cs, and some 76.2mm guns, and not much else for anti-tank weapons. The Soviets heavily defended both towns, and used mines and wires to try to channel the northern German attack, defending the village and its environs. This did leave a big gap in the center of the Soviet line, however they knew where the Germans were heading. My plan as the Germans was to sweep a bunch of mechanized forces through the gap to get the exit condition, while the infantry and tanks invested the south western town. The rest of the mechanized infantry and the armor support would crush the village resistance and then either head to the southwestern town if help was needed or head for the south eastern town. Well, things started off slowly for the Germans. They were able to get fairly close to their objectives in the pre-dawn light, however as soon as they stuck up their heads, Soviet artillery began pounding them and causing some step losses and morale checks. In fact, on German HMG was demoralized on turn 1 and never recovered. He needs to win some sort of award for that. In the north, a lucky long range shot killed a step of T-34s on a hill, and demoralized the remaining step, who later recovered just in time to have 2 platoons of PZIVs turn them into scrap metal. I advanced the APCs into the T-34s Line of Sight (oops) and only some well placed smoke saved a bunch of German steps from dying. The tide in the north quickly turned towards the Germans, as the Soviets had no real answer for the armor. A 57mm AT gun took out a tank step in a crossfire before being destroyed by German OBA, and another unit wandered into a minefield and became demoralized for much of the game. What was helping the Soviets was Fog of War rolls. On turns 2-4, the Germans got no more than 4 activations per turn. However, that didn't hold forever, and the Germans began blasting everything in sight, causing big casualties to the Soviets. In the South, though, things were going more slowly. Artillery was more effective against the Germans here (amazing what a lack of APCs will do to a guy's vulnerability) and one unit of Panzers wandered into a 3 minefield and took a step loss and was demoralized. With the bad Fog of War, it took almost half the game to get the attack on the town organized. Up north, the Soviets, realizing the village was lost, gathered all the good order troops they could find and ran for the hills...and the village on board 103, hoping to prevent it's defense. By about 2/3 of the way through the game, the village fell, and the Germans headed a bunch of steps for the exit. Soviet losses were much higher than German losses, so that was 2 victory conditions for the Germans. It became obvious that there would not be enough time to mount any sort of assault on the town on 103, and a 76.2mm gun there was discouraging APCs from coming too close. So the Germans were content to sit back and push what they could against the town, slowly forcing the Russians out hex by hex. Let's just say digging out 8/6 morale, well led, Guards SMG units from a town isn't that easy. The Germans made progress, and the Soviets refused to quit. The 2 shifts for the town helped the Russians hang on, however the Germans were able to enter the assaults with leaders, tanks and engineers, which still netted them +1 column shift. It was bloody, and the Soviets were clearly losing the fight. However, due to some more short turns (and some great morale rolls), it took the Germans until turn 22 (the last turn) to finally clear the town on board 105 and escape with a minor victory. This was a fun scenario. In many ways it was a glorified urban assault, however with all the open ground on the map, the Germans had options of how to proceed, and weren't stuck just grinding it out, although the battle for the 105 town seemed that way at times. The German air was useless (I drew the 12 point Stuka all 3 times, it missed the target once and did nothing exciting the other 2 times) and could have done better with better rolls. Realizing that trying to protect the north was futile and committing the T-34s to the southern fight might have made that even tougher for the Germans, although it would have allowed the northern armor to intervene. I definitely enjoyed this one, and now the battle game is tied up 1-1. |
| 0 Comments |