
|
Stalemate at St. Barthelemy Black SS #28 |
||
|---|---|---|
| (Defender) Germany | vs | United States (Attacker) |
| Formations Involved | ||
|---|---|---|
| Germany |  |
1st SS "Leibstandarte Adolf Hitler" Division |
| Germany |  |
2nd SS "Das Reich" Division |
| United States |  |
30th "Old Hickory" Infantry Division |
| United States |  |
4th "Ivy" Infantry Division |
| United States |  |
629th Tank Destroyer Battalion |

| Total | |
|---|---|
| Side 1 | 3 |
| Draw | 0 |
| Side 2 | 0 |


| Overall Rating, 5 votes |
|---|
|
3.4
|
| Scenario Rank: 487 of 913 |
| Parent Game | Black SS |
|---|---|
| Historicity | Historical |
| Date | 1944-08-09 |
| Start Time | 16:45 |
| Turn Count | 18 |
| Visibility | Day |
| Counters | 110 |
| Net Morale | 0 |
| Net Initiative | 0 |
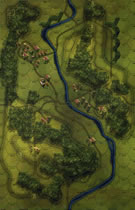
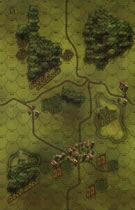
| Maps | 2: 29, 31 |
| Layout Dimensions | 56 x 43 cm 22 x 17 in |
| Play Bounty | 155 |
| AAR Bounty | 159 |
| Total Plays | 3 |
| Total AARs | 3 |
| Battle Types |
|---|
| Inflict Enemy Casualties |
| Road Control |
| Urban Assault |
| Conditions |
|---|
| Off-board Artillery |
| Terrain Mods |
| Scenario Requirements & Playability | |
|---|---|
| Black SS | Base Game |
| Cassino '44 | Counters |
| Elsenborn Ridge | Counters |
| Fall of France 1 | Maps |
| Introduction |
|---|
|
Throughout the battle for Mortain, American artillery had performed extremely well, many times providing the crucial edge for the Allied defenders. that record couldn't last forever, and as VII Corps prepared to jump off things started to go wrong. The Americans' initial bombardment fell on their own assault troops, badly disorganizing them. Causalities were light but it took nearly an hour to get the men reorganized for the assault. In the meantime, the barrage had lifted and the Germans were now fully alerted. |
| Conclusion |
|---|
|
The attacks were poorly coordinated, allowing the Germans to turn back the attack at St. Barthelemy before dealing with the advance on RJ278. The Americans were unable to overcome all the attention there and the attack stalled in the face of heavy enemy fire. |
| Additional Notes |
|---|
|
Use leaders from Elsenborn Ridge. Playable without using the black SS counters. |

|
|
|---|
| AFV Rules Pertaining to this Scenario's Order of Battle |
|---|
|
| Heer |
|---|
|


| Schutzstaffel |
|---|
|


")
")
")
")


| Army |
|---|
|


| 3 Errata Items | |
|---|---|

|
The reduced direct fire value of the SS HMG is 5-5 in Beyond Normandy and Road to Berlin. (plloyd1010
on 2015 Jul 31)
|

|
The Units in Beyond Normandy were misprinted with a movement factor of 5. The movement factor should be 8. (rerathbun
on 2012 Mar 21)
|
|
|
Liberation 1944's counters are mislabeled 'PzIVF2.' The counter's ratings are correct (Armor 5, Move 8, DF 11-6, AT 6-8). (rerathbun
on 2014 Feb 14)
|
| A Rollicking Good Scenario | ||||||||||||||
|---|---|---|---|---|---|---|---|---|---|---|---|---|---|---|
This scenario was played over 5 sessions on Skype with Hugmenot. It depicts a large American attack on German positions at St Barthelemy just after the US troops have been bombed accidentally by the USAAF. As a result, one clever SSR in this game is that when a US officer wishes to activate, he will need to avoid rolling a 1 or 2 on a d6. his can have ramifications on set-up and tactics throughout the game. The Germans, SS troops from 1st & 2nd SS Divisions (Leibstandarte & Das Reich) set up across a one board front in the hope of defending St.Barthelemy and a major road junction. The VP's award points for these features as well as inflicting losses. The terrain does not allow the Germans to simply plot up in towns as those features are to the rear. Therefore, they deploy forward, dug-in defending a hill line centrally located with GRENs, HMG's, PzIVH and AT. They also, on their right flank, set up a short series of dug-in positions to stave off or hold up any flanking attempt. On their right, another group of GRENs are located to try and force any American attack to be funnelled through the wheatfields to slow it down. They also deploy all their mortars and rockets in St.Barthelemy (a 55col shot when combined) out of sight of any US eyes. The US have many troops and outnumber the Germans by around 2 to 1. This means they have 32 INF and 9 HMG platoons backed by 6 x 81mm and a 3 x 18 OBA. BUT .. the big but, is that as mentioned, they are racked with confused command where there is a 1 in 3 chance of an officer failing to activate when required plus a huge logistical problem of getting this sizeable force forward. They also only have 18 turns to bring their numbers to bare. In turns 1 to 4 the US spend their time getting the juggernaut moving. In this time, they lose 5 steps inflicting 1 on the Germans. They have so far only brought themselves into long DF range of their enemy. Turns 5-8 saw the Americans begin to pressure the German right flank where their short line of dug-outs were located just for this eventuality. The GI's suffered going forward, taking 7 step losses here in those 4 turns. They did manage to keep pressing though and by the end of turn 8, they had instigated 3 x assaults against the SS positions. The Germans could have been in a stronger position, but their morale checks often let themselves down as they initially showed little stomach for a close-in fight. But the line was still just about holding but was being bent and stretched. If and when this line collapsed, St Barthelemy would be put in immediate danger. During the same period, the Amis tried a flanking effort on the left too. However, German fire continually disrupted leaders in this attack and getting the men forward was a slow and arduous task for the Americans. Little headway was made in fact. Also, in the centre, barring some bombardments, little pressure was being placed on the Germans, though this was probably in fear of this being the SS strongest point and DF received from here could be potentially deadly ? By the end of turn 8, losses were German 7 steps, American 16 steps. Turns 9-12: (Right Flank) : As I had a 2 v 1 initiative advantage, I was hoping to get the first AS of turn 9, but rolling a 2 to his 6 allowed the US two AS's. The US continued with their assaults on the weakened dug-in positions on the German right flank. It was a mixed bag of action. The US attacks were weak in their effect and the Germans inflicted tough MC's on the Americans. Despite this salvaging opportunity, 2 of the 3 dug-outs morale didn't hold up and left themselves vulnerable in demoralised and disrupted states. This was looking dangerous, so the Germans concentrated on putting what ever forces they could spare towards the threatened town plus use on and off board artillery to pummel the Americans. Both sides ended up inflicting 3 steps of damage on each other but at this point, the US were looking very threatening indeed. Turns 10 & 11 proved more sedatory in casualty loss, just one American step. But now, the US advance on the right had been slowed. German opportunity fire was still causing disorder and the guns continued to bombard the area. Add to this that one dug-out was completely holding out and the others were only now just being overrun PLUS a 4 AS turn ended quickly by FOW and suddenly there was a time pressure on the American attack. Turn 12 was a little devastating for the Americans as they collected 8 steps of casualties in their attempts to advance in the face of pinpoint artillery plotting and accurate opp.fire. The right flank attack in the north began looking very weakened for the US. It seemed every time they advanced elements forward, they were either shot up, disrupted or demoralised. On the left flank the American advance over the 4 turns played was no more than a trickle. Some GI's also changed direction as these, combined with the centre forces looked to push on towards the objective crossroads. There was lots of movement, but very little action on the left. Perhaps best expressed as some US disorder and German holding tactics. With the sudden ending of a very short turn 11, the US, in turn 12 got their troops in the centre on the move. These had been weakened in numbers a bit as some of this force had been disseminated in the last 3 turns towards both flanks. They finally advanced in sight of the German line, but were still 400m away on a wheat covered hill. Nonetheless, German defensive fire inflicted some losses as well as disruption and demoralisation. Overall, for the Germans, the end of turn 12 had them looking well-placed. The northern section or German right flank looked to have reduced the Americans to something nearing a disorganised group of 'small-groups'. The Germans also had the left or southern flank under control, but it still had to be suspiciously eyed for developments. The centre was also looking strong for the Germans. As it stood at turn 12's end, the Germans still controlled all 9 town hexes across the board and the crossroads. Step-losess were: German 11 steps, American 28 steps. American attacks on the German right flank continued, albeit weakened, but their slow advance had finally got eyes on the on-board artillery set up in the town. The Americans wasted no time in bringing OBA upon these guns and destroying the Nebelwurfer and 120mm mortar. The battle now began raging around the town, with both sides sending more men to it. On the German left, the US pushed for the objective crossroads and made some brave ground but with some cost in loss and disorder. Again, both sides are plying men into the area for a final scrimmage. The centre still was seeing little action by US troops there. By end of T15: Total steps lost were German 16, American 32. So onto the final 2 turns, 16 & 17 (18 did not get played), and the Americans now concentrated on attacking the crossroads and getting into any town hex they could. Initially it looked good as all their leaders activated and got the GI's assaulting forward. However, the effect was far less exciting than the movement ! They were unable to budge any of the Germans at any of the locations. The battle was falling into a lbit of chaotic series of hopeful assaults. One sideshow was when the US M10 got a jump on the PzIVH. The M10 loosed off two volleys and missed with both. The PzIV's turrets taversed, fired, fired again and the M10's were no more. With American forces either tied down in stalemate assaults or disrupted, the game ended at the end of turn 17 as the dusk began to draw in. The Germans had held St.Barthelemy and had inflicted sizeable losses on their attackers. Casualties for the opposing sides (in steps) were: German: 15 FOOT, 3 Leaders, 2 APC, 3 GUN = 20 step-equivalents American: 36 FOOT, 5 Leaders, 2 AFV = 40 step-equivalents. Germans held 5 Town hexes (10pts)- American held 2 Town hexes (6pts) (2 Town hexes were contested as was the major road junction) Final Points Tally - German 40+10 = 50pts, American 20+6 = 26pts Major German Victory. This was one really exciting scenario that flowed different ways each session. There is quite a bit of choice for set-up and attack routes, let alone variation of fate, leader draws and dice-rolls. Therefore I suspect future plays especially shared plays will see a variation of stories. This easily scores a 5 and will remain memorable to me just as Iron Line South has from FoF |
||||||||||||||
| 0 Comments |
| Brick Wall | ||||||||||||||
|---|---|---|---|---|---|---|---|---|---|---|---|---|---|---|
In this scenario a relatively huge American force runs up against a couple battalions of SS grenadiers holding a couple villages, a hill and a crossroads. The Americans have plenty of force but their commanders are a little bit confused and unable to ensure that the men receive commands on a timely basis. In addition a large river creates a roadblock for the Americans and provides the Germans with the ability to bottle up the advance somewhat. With only 18 turns the Americans have precious little time to maneuver as there is a 1 in 3 chance that a leader you are counting on to help your men make that aggressive move will be unable to direct the men at that time. I actually had less trouble than I expected with the confusion rules but they still did have an impact on the play. Several times I wanted to perform a chain and either the first leader failed or one of the key links in the chain failed and thus I needed many more activations to do anything. Add to that the fact that my main attack was straight up the road and was stopped by very effective opportunity fire (2s and 12s mainly leading to many instances where the moving platoon simply vanished. Finally, we had 4 or 5 turns where the FoW roll happened very early in the turn leaving a lot of my units exposed. With the heavy losses I lost much of my initiative early in the battle and frankly, if I was the American commander I would have called the whole thing off much earlier than I did (we played 13 of the 18 at which point the victory points were 49-9 in favor of the Germans and the Americans were neither causing losses (outpointed something like 28-9 in losses alone) nor did they seem likely to gain any traction by at least entering the town hexes to contest the control. While the die roll results were clearly abnormally good for opportunity fire, Daniel seemed to roll badly on his artillery for most of the game so I can't even say that the result was simply luck related. This is a very hard scenario for the Americans to get anything other than trounced. The level of trouncing will depend on exactly how vicious the German defense is. |
||||||||||||||
| 0 Comments |
| What? Were you talking to me? | ||||||||||||||
|---|---|---|---|---|---|---|---|---|---|---|---|---|---|---|
This was a double-blind game that required several sessions. I spent the the first couple sessions learning to deal with the primary American handicap, the command confusion special rule. the Germans however don't really have enough troops to a defense and maintain a reserve. The general result was that it took me inordinately long to get into attack position. While parts of the assaults went well, they quickly became disjointed. The center hill of board 31 did eventually fall, the towns were flanked, and the crossroads threatened. American losses were heavy. Proportionally the Germans proportionately lost more, but held the towns and the crossroads. |
||||||||||||||
| 0 Comments |