
|
By the Book Blackshirt Division #3 |
||
|---|---|---|
| (Defender) Italy | vs | United States (Attacker) |
| Formations Involved | ||
|---|---|---|
| Italy |  |
1ª Divisione Corazzata "Mussolino" |
| Italy |  |
Gruppo di Corazzata Leonessa |
| United States |  |
1st "Old Ironsides" Armored Division |

| Total | |
|---|---|
| Side 1 | 1 |
| Draw | 0 |
| Side 2 | 1 |


| Overall Rating, 2 votes |
|---|
|
3.5
|
| Scenario Rank: --- of 913 |
| Parent Game | Blackshirt Division |
|---|---|
| Historicity | Alt-History |
| Date | 1943-03-05 |
| Start Time | 06:00 |
| Turn Count | 36 |
| Visibility | Day & Night |
| Counters | 128 |
| Net Morale | 0 |
| Net Initiative | 1 |
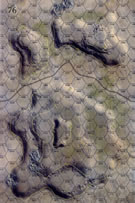
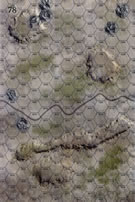
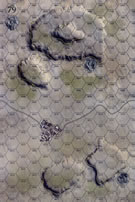
| Maps | 3: 76, 78, 79 |
| Layout Dimensions | 84 x 43 cm 33 x 17 in |
| Play Bounty | 196 |
| AAR Bounty | 171 |
| Total Plays | 2 |
| Total AARs | 1 |
| Battle Types |
|---|
| Exit the Battle Area |
| Hill Control |
| Inflict Enemy Casualties |
| Conditions |
|---|
| Off-board Artillery |
| Randomly-drawn Aircraft |
| Reinforcements |
| Scenario Requirements & Playability | |
|---|---|
| An Army at Dawn | Maps + Counters |
| Blackshirt Division | Base Game |
| Introduction |
|---|
|
Thrown into the path of Patton’s offensive, the Blackshirts would be expected to halt the American assault – and with their new 75mm anti-tank guns, a weapon rarely seen so far in the North African campaign, they stood a good chance of doing some damage to an un-coordinated tank-infantry attack. |
| Conclusion |
|---|
|
The Royal Italian Army had gained a great deal of experience in the Western Desert, defending positions against British tank attacks with infantry well-supported by anti-tank guns. The organizational tables for the M Division reflect this, and show some similarities to the Army’s AS42 divisional organization which mixed infantry, automatic weapons and anti-tank guns down to company level though not going nearly as far. The Blackshirt outfit’s success would depend in large part on how much of that institutional knowledge was passed on from the Army to the MVSN. In reality such cooperation did not appear to be at the top of the Royal Army’s to do list but we are not held hostage to the actual history here. |

|
|
|---|
| AFV Rules Pertaining to this Scenario's Order of Battle |
|---|
|
| Milizia Volontaria per la Sicurezza Nazionale |
|---|
|


| Army |
|---|
|


| Patience pays off | ||||||||||||
|---|---|---|---|---|---|---|---|---|---|---|---|---|
Blackshirt Scenario 3: By the book Background: The Americans, with a decent combined-arms force, need to punch through a large Italian infantry force, take the high ground, and exit the board. The map alignment is such that the Americans don’t have far to go, but there are a lot of blackshirts between them and the finish line. Setup: The Italians set up on the board first. With almost no armor of their own they are dependent upon their field guns to stop the tanks, so I set them up to cover as much of the map as possible and pile the infantry around them. The Americans start off-board and all can enter on the first turn. Summary: The game is 36 turns, so the Americans had plenty of time to soften up the Italians and flow through the weak points. Eventually they focused on the southern half of the map, using off board artillery to knock out the 75s. The blackshirts scored some hits with their 88s, but the Americans had too many tanks, too much artillery, and too much time for them to hold out for very long. By turn 20 the GIs had pushed the blackshirts out of the way and the armor started to break through. The rest of the game was mostly mopping up, but some Italian positions held on stubbornly until the end. Ultimately the US controlled all 40m and 60m hills and exited 55 steps—more than enough for a major win. Analysis: It was fun using the blackshirts in a battle, but this scenario is too long. The US had enough advantages in mobility and firepower that, preventing a major screw-up, they will eventually beat down their opponents and get the win. Around 20 turns would put more pressure and give the Italians a chance to stall them out. |
||||||||||||
| 0 Comments |