
|
Counterattack at Maltot Beyond Normandy #33 |
||
|---|---|---|
| (Attacker) Germany | vs | Britain (Defender) |
| Formations Involved | ||
|---|---|---|
| Britain |  |
4th Dorsetshire Infantry |
| Britain |  |
7th Hampshire Infantry |
| Britain |  |
9th Royal Tank Regiment |
| Britain |  |
Army |
| Germany |  |
102nd SS Heavy Panzer Battalion |
| Germany |  |
10th SS "Frundsburg" Panzer Division |
| Germany |  |
1st SS "Leibstandarte Adolf Hitler" Division |
| Germany |  |
22nd SS Panzergrenadier Regiment |

| Total | |
|---|---|
| Side 1 | 1 |
| Draw | 1 |
| Side 2 | 1 |


| Overall Rating, 3 votes |
|---|
|
3.33
|
| Scenario Rank: --- of 913 |
| Parent Game | Beyond Normandy |
|---|---|
| Historicity | Historical |
| Date | 1944-07-10 |
| Start Time | 14:45 |
| Turn Count | 23 |
| Visibility | Day |
| Counters | 115 |
| Net Morale | 1 |
| Net Initiative | 0 |
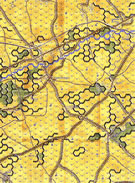
| Maps | 1: BN2 |
| Layout Dimensions | 88 x 58 cm 35 x 23 in |
| Play Bounty | 134 |
| AAR Bounty | 165 |
| Total Plays | 3 |
| Total AARs | 2 |
| Battle Types |
|---|
| Delaying Action |
| Inflict Enemy Casualties |
| Rural Assault |
| Urban Assault |
| Conditions |
|---|
| Off-board Artillery |
| Randomly-drawn Aircraft |
| Reinforcements |
| Smoke |
| Scenario Requirements & Playability | |
|---|---|
| Beyond Normandy | Base Game |
| Introduction |
|---|
|
The Germans viewed the British capture of Maltot with great concern. Much artillery and Nebelwerfer rocket fire had been brought down on the village after its loss. The 7th Hampshires held the town with great difficulty as casualties mounted. Maj. Gen. G.I. Thomas commanding 43rd "Wessex" Division, known to hismen as "The Butcher" failed to grasp that his forward battalion was so weak. At 1400 elements of the 10th SS launched a counterattack. |
| Conclusion |
|---|
|
The German direct and indirect fire on the 7th Hamps in Maltot caused heavy British casualties and left the battalion cut off and all but leaderless. The 4th Dorsets had been called forward shortly after going into reserve and ordered to relieve the Hamps. As the Dorsets advanced, they met the hamps retreating from the village. The Dorsets dug in in the western and northern portions of Maltot and fought hard to eject the Germans from the remainder, but by 2030 they too withdrew when it became clear to all that their continued efforts to secure the village would accomplish only the destruction of the battalion. |

|
|
|---|
| AFV Rules Pertaining to this Scenario's Order of Battle |
|---|
|
| Army |
|---|
|


| Heer |
|---|
|
| Schutzstaffel |
|---|
|


")
")
")
")


| 6 Errata Items | |
|---|---|

|
The "Optional Values" for the 17-Pdr given in an Avalanche Press Daily Content piece on the 17-Pdr Anti-Tank gun (and printed on a replacement counter sheet Download) are now the Official Ratings, published in games like Cassino '44, Grossdeutschland 1946, and Indian Unity, as shown in one of the two counter images. These are: 5-5 / 8-8 MA 0 (Towed). (caryn
on 2012 May 03)
|

|
The "Optional Values" for the Achilles---and by extension the Archer---given in an Avalanche Press Daily Content piece on the 17-Pdr Anti-Tank gun (and printed on a replacement counter sheet Download) are now the Official Ratings, published in games like Cassino '44, Grossdeutschland 1946, and Indian Unity. These are: 8-5 / 8-8 Full Strength and 4-5 / 8-8 Reduced Strength. (caryn
on 2012 May 03)
|

|
All Bren carriers should have a movement value of 7. (Shad
on 2010 Dec 15)
|

|
Ignore the direct fire values. (Shad
on 2010 Dec 15)
|

|
All SPW 251s have an armor value of 0. (Shad
on 2010 Dec 15)
|

|
The reduced direct fire value of the SS HMG is 5-5 in Beyond Normandy and Road to Berlin. (plloyd1010
on 2015 Jul 31)
|
| Decisive leaders |
|---|
|
This game was won almost entirely because of the great leaders the Germans drew. Most of their leaders had combat bonuses, including a +2 bonus. With these leaders the Germans were able to combine their superior firepower to disrupt and reduce the British units before engaging them in assault combat. This combined with the British rolling horribly for air support and artillery made this a decisive victory for the Germans. |
| 0 Comments |
| Good scenario, bad VCs, and a rant... | ||||||||||||||
|---|---|---|---|---|---|---|---|---|---|---|---|---|---|---|
This scenario was played as a team event by my gaming group. I act as moderator and facilitator for each game, and I do not participate directly as a player. My listing of “winning” is based on the PG HQ site cannot support a neutral role in AARs. In Counterattack at Maltot, the Germans are trying to clear an area of British units, largely centered around a town, while losing less than 12 steps, while the British, very weak to start but with substantial reinforcements arriving on turn 4 of 23, are similarly trying to keep a nearly overlapping area clear of German units. The Brits have significant airpower to support, and while there’s the normal tanks count double, there is also the issue of German Tigers counting triple (six steps of Tigers total). Understanding the ludicrousness of 12 steps, I doubled that number to 24 right off the bat. Odds are, given British tank killing aircraft and triple step numbers, the Germans would lose if there was no combat between ground forces, only planes hitting Tigers. The British set up their 17-pdr in town to face the Germans, along with a 6-pdr also in another town hex, and the last 6-pdr in a dug-in position on the British right. Infantry is set to support the ATGs and protect the town. The Germans set up with some of their forces nearly in contact, and the remainder ready to charge in and pummel the Brits before reinforcements arrive. Unfortunately, the Germans misread the numbers on the ATGs, and set up poorly with several armored units (SPW 251s, Marder, StuG IIIG) all in easy sighting of the British guns. And they pay the price. The Marder and two SPW 251s go up in flames immediately. The Germans persevere and push forward regardless. On turn two the Germans take a complete beating, especially when aircraft nail one step of Tigers, and in combo with the StuGs dying, the German loss count is already at 13 vice 1 for the British. Turns 3 and 4 see the Germans overrunning the ATG outpost on the British right, investing the town, and putting an absolute hurt on the British. By the end of turn 4 each side holds half the town, German losses are at 15 steps, and British losses have climbed to 12 steps. But the reinforcements have arrived, and are already in a supporting position to help the decimated defenders hold the town. In a true tragedy, the leader character of the British commander, who has earned more leadership points in our campaign than any other character on either side, and has become quite the nemesis for the Germans, dies as the 17-pdr crew abandons his guns and he tries to hold them in position. No telling if his death came from a German assaulter’s bullet, or a bullet from a fleeing British soldier. (He ends up rolling for a light wound, and will return without the Mentioned in Dispatches he had just qualified for, and a loss to morale.) These four turns have taken ages to play for some reason, and players are getting tired. For some inexplicable reason, the Germans decide to concede to the British despite the obviousness of a draw condition. And the British commander, having just lost his character (pre-roll), accepts an unearned victory, and later insists the British would have won anyway. Granted, the Germans never could have won, particularly with British airpower, but the victory conditions are ridiculous and the British probably would not have forced the Germans out of all the town hexes. A strange British victory where there should have been a draw. I rated this scenario a 3. It deserves a 1 for the same reason arixius describes in his AAR for scenario 23. The victory conditions are completely inappropriate, and require the extinction of one side for the other to win. The VCs are designed for no more than a draw. And given the step loss condition for the Germans at 12, it’s nearly impossible for them to win (except perhaps with the bad die rolling described by Greg SW.) But I know there’s a hidden gem in this scenario; lots of action, good fighting, etc. I talked it out with the players after, and all agreed if I had set the conditions to victory being determined by the ownership of 5 specific town hexes (control 3-4 for a minor, all 5 for a major), the scenario would have been much more fulfilling. Which brings me to my gripe of many scenarios in this box set. I believe this box has many gems in it destroyed by the idiocy of the design. My gripes: 1) All hexes as hills. I don’t play hills as hindering terrain anywhere in PG. First off, what nutcase believes a unit on a hill is harder to spot at four hexes than a unit 12 hexes away on flat ground? HILLS ARE NOT HINDERING TERRAIN IF YOU ARE ON THE SAME SIDE AS THE SLOPE! In our games we establish crests and relative spotting based on the crests, but just being on a hill slope makes you EASIER to spot, not harder. Put fifty guys and five cars on a slope of a hill, and the same number on the level ground, at one kilometer, and use your binoculars and see what is easier to spot. The idea that every hex, let alone a hill hex, is hindering is ridiculous. 2) Step losses in Beyond Normandy. Did the designer every play this game? When British aircraft can score the victory without combat, the numbers are too low. And the idea that one side can be obliterated shy of one step while the other takes 15% losses and we pull a draw makes scenarios unfulfilling. This is a wargame, and wargamers inflict losses on each other. When you have to take an entire decent sized town and you cannot accept losses there is no reason to play. I’ve played much smaller scenarios with more than 12 steps to one side. This box set continuously places unrealistic limitations on step losses that make the game unplayable. In real life soldiers’ lives matter, and units will break off engagement to save lives. In our games, where tomorrow never exists, gamers are free to engage their units. And a step loss does not mean death of that many people, it means combat ineffectiveness (morale, wounds, disorganization, fleeing, hiding, etc). Fifteen percent casualties is actually pretty low in wargames that I play, yet in BN it’s treated as a disaster. Typically, double the acceptable casualties listed in these scenarios to make them playable. 3) Overlapping area control. As arixius said, this leads to elimination scenarios since on the last turn one player can move a half step into a large area and create a draw. Unrealistic and unreasonable. There are gem scenarios in here inhibited by inappropriate VCs, usually due to this condition. The scenarios with specific objectives in this box have been very good, while genericized area conditions just create draw frustrations. For now on I will modify such scenarios with true objective hexes. |
||||||||||||||
| 0 Comments |