
|
The Gavrus Bridge Beyond Normandy #13 |
||
|---|---|---|
| (Defender) Germany | vs | Britain (Attacker) |
| Formations Involved | ||
|---|---|---|
| Britain |  |
7th Royal Tank Regiment |
| Britain |  |
9th Cameronians |
| Britain |  |
Fife and Forfarshire Yeomanry Armour |
| Germany |  |
12th SS Panzer Regiment |
| Germany |  |
26th SS Panzergrenadier Regiment |
| Germany |  |
2nd "Vienna" Panzer Division |

| Total | |
|---|---|
| Side 1 | 2 |
| Draw | 0 |
| Side 2 | 2 |


| Overall Rating, 4 votes |
|---|
|
3.25
|
| Scenario Rank: --- of 913 |
| Parent Game | Beyond Normandy |
|---|---|
| Historicity | Historical |
| Date | 1944-06-27 |
| Start Time | 18:00 |
| Turn Count | 11 |
| Visibility | Day |
| Counters | 76 |
| Net Morale | 1 |
| Net Initiative | 1 |
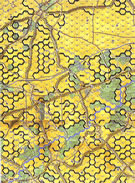
| Maps | 1: BN1 |
| Layout Dimensions | 88 x 58 cm 35 x 23 in |
| Play Bounty | 120 |
| AAR Bounty | 171 |
| Total Plays | 4 |
| Total AARs | 1 |
| Battle Types |
|---|
| Delaying Action |
| Urban Assault |
| Conditions |
|---|
| Off-board Artillery |
| Randomly-drawn Aircraft |
| Reinforcements |
| Smoke |
| Scenario Requirements & Playability | |
|---|---|
| Beyond Normandy | Base Game |
| Introduction |
|---|
|
The capture of the Tourmauville road left the British with the initiative and control of one of the inital objectives of the Epsom offensive. While the 2nd A&SH and 23rd Hussars had advanced down the Colleville-Tourmauville road, elements of 11th Armoured and 15th Scottish Infantry Divisions had attempted a similar move on the bridge ay Gavrus. The Fife and Forfar Yeomany waited for the 9th Cameronians for most of the afternoon. When they finally arrived the two battalions began the belated advance. First they gad to retake Grainville. |
| Conclusion |
|---|
|
The British fought their way into the town, but were heavily engaged by the German defenders, especially the Panthers of 2nd Panzer Division. The loss of three Churchill tanks broke the British attack and at midnight Grainville remained in German hands. |

|
|
|---|
| AFV Rules Pertaining to this Scenario's Order of Battle |
|---|
|
| Army |
|---|
|


| Heer |
|---|
|


| Schutzstaffel |
|---|
|


")
")


| 9 Errata Items | |
|---|---|

|
The "Optional Values" for the 17-Pdr given in an Avalanche Press Daily Content piece on the 17-Pdr Anti-Tank gun (and printed on a replacement counter sheet Download) are now the Official Ratings, published in games like Cassino '44, Grossdeutschland 1946, and Indian Unity, as shown in one of the two counter images. These are: 5-5 / 8-8 MA 0 (Towed). (caryn
on 2012 May 03)
|

|
The "Optional Values" for the Archer---and by extension the Achilles---given in an Avalanche Press Daily Content piece on the 17-Pdr Anti-Tank gun (and printed on a replacement counter sheet Download) are now the Official Ratings, published in games like Cassino '44, Grossdeutschland 1946, and Indian Unity. These are: 8-5 / 8-8 Full Strength and 4-5 / 8-8 Reduced Strength. (caryn
on 2012 May 03)
|

|
All Bren carriers should have a movement value of 7. (Shad
on 2010 Dec 15)
|

|
The "Optional Values" for the Firefly given in an Avalanche Press Daily Content piece on the 17-Pdr Anti-Tank gun (and printed on a replacement counter sheet Download) are now the Official Ratings, published in games like Cassino '44, Grossdeutschland 1946, and Indian Unity. These are: 5-5 / 8-8 Full Strength and 3-5 / 8-8 Reduced Strength. (caryn
on 2012 May 03)
|

|
Ignore the direct fire values. (Shad
on 2010 Dec 15)
|

|
All SPW 251s have an armor value of 0. (Shad
on 2010 Dec 15)
|

|
The reduced direct fire value of the SS HMG is 5-5 in Beyond Normandy and Road to Berlin. (plloyd1010
on 2015 Jul 31)
|

|
The Units in Beyond Normandy were misprinted with a movement factor of 5. The movement factor should be 8. (rerathbun
on 2012 Mar 21)
|
|
|
Liberation 1944's counters are mislabeled 'PzIVF2.' The counter's ratings are correct (Armor 5, Move 8, DF 11-6, AT 6-8). (rerathbun
on 2014 Feb 14)
|
| Too many towns, not enough Brits | ||||||||||||||
|---|---|---|---|---|---|---|---|---|---|---|---|---|---|---|
This scenario was played as a team event by my gaming group. I act as moderator and facilitator for each game, and I do not participate directly as a player. My listing of “winning” is based on the PG HQ site cannot support a neutral role in AARs. In The Gavrus Bridge the British were attempting to take several town hexes from the Germans, and in fact must control all town hexes within a certain radius to win. That ends up including the four hexes of Mondrainville in the center, the eastern hex of Grainville sur Odon on the German left flank, and an unnamed town in woods on the German right flank. The Germans set up most of their starting forces supporting the center, with their tank and some infantry on the left and some infantry to the right. The British outnumber the Germans about three to one in starting forces, but the Germans get strong reinforcements sometime turn 2 or later to make the odds 3:2. By turn 8 of 11 it is night. Most of the British armor cannot move for the first two turns. The game starts with ranged combat in the center while the Brits move forward to put pressure on the flanks. The first three turns see about equal casualties, and the Brits are forcing the Germans out of G-s-O. The unnamed town on the right is under pressure, but steady supporting fire from the German center is preventing the Brits from establishing an assault opportunity. The British are also moving on the center, and in fact have brought their Churchills up to Mondrainville to support any assault opportunities, while knocking out the AT gun in the north end of the town (the eastside gun is still holding back armored vehicles on the British left.) On turn 4 the German reinforcements arrive. After warning the reinforcing player to not place his SPW 251/75mm in harm’s way from the British tanks that have advanced on the center, the German player moves the loaded transport directly into an opportunity fire situation on the road and it dies before it ends moving. Reinforcing German infantry splits between supporting G-s-O and moving north of the British forces. The northern move is really useless, and ties down more German reinforcing troops than British troops, especially when the leader demoralizes. The strong German armor, however, drives up to a position two hexes away from the British Churchills. The British counter by driving three Shermans south to be adjacent but flanking to the German tanks. Turn four ends with equal casualties on both sides, the Brits pressuring G-s-O, threatening Mondrainville, and struggling to reach the town on the German right. Turn 5 erupts with a massive tank battle. The British get initiative and take out the German StuG IVs with flanking fire. The Germans respond by taking out all but one step of Shermans. The fight for G-s-O goes to the British, and they take the town. Assaults go in on Mondrainville, but the defenders trash the attackers. The British left begins demoralizing and running away, with just enough force left to convince them to continue on. Turn 6 initiative goes to the Germans, and they pulverize the remaining Sherman along with some Churchills. Assaults on Mondrainville continue to go bad. Turn 7 sees another German win on initiative, and the Churchills pay the price, as do the Mondrainville assaulters, and the attempt to hit the German right. At this point the British are trashed and realize they cannot support continued attacks. What isn’t dead is significantly shaken. Considering tanks counting double, the British have lost 37 steps to the German 12. As darkness falls, the British withdrawal, and victory goes to the Germans. I rated this scenario a 3. It was fast and action packed, but the British really struggled to take six town hexes in 11 turns. In the end they only took one, but German dice were a little hot while the Brits a little cold. There wasn’t the time to set up a coordinated assault against a weakened position with most of the armor tied down for two turns, so even with three turns of just beating on the Germans the reinforcements saved the day. Both sides made errors. Victory is definitely possible for the Brits, but not on this day. |
||||||||||||||
| 0 Comments |