
|
First Attempt Battle of the Bulge #51 |
||
|---|---|---|
| (Defender) Germany | vs | United States (Attacker) |
| Formations Involved | ||
|---|---|---|
| Germany |  |
130th "Lehr" Panzer Reconnaisance Battalion |
| Germany |  |
130th "Lehr" Panzer Regiment |
| Germany |  |
26th Volksgrenadier Division |
| Germany |  |
78th Grenadier Regiment |
| Germany |  |
901st "Lehr" Panzergrenadier Regiment |
| Germany |  |
902nd "Lehr" Panzergrenadier Regiment |
| United States |  |
10th "Tiger" Armored Division |
| United States |  |
158th Engineer Battalion |
| United States |  |
501st Parachute Infantry Regiment |
| United States |  |
705th Tank Destroyer Battalion |
| United States |  |
9th "Phantom" Armored Division |
| United States |  |
Army |

| Total | |
|---|---|
| Side 1 | 0 |
| Draw | 0 |
| Side 2 | 3 |


| Overall Rating, 3 votes |
|---|
|
3.67
|
| Scenario Rank: --- of 913 |
| Parent Game | Battle of the Bulge |
|---|---|
| Historicity | Historical |
| Date | 1944-12-19 |
| Start Time | 15:30 |
| Turn Count | 26 |
| Visibility | Day |
| Counters | 260 |
| Net Morale | 0 |
| Net Initiative | 0 |
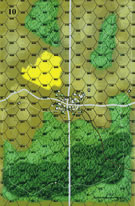
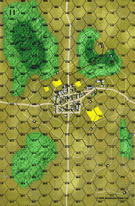
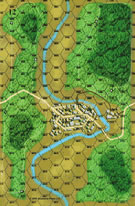
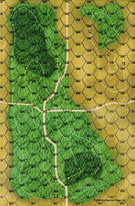
| Maps | 4: 10, 11, 12, 9 |
| Layout Dimensions | 86 x 84 cm 34 x 33 in |
| Play Bounty | 171 |
| AAR Bounty | 171 |
| Total Plays | 3 |
| Total AARs | 1 |
| Battle Types |
|---|
| Urban Assault |
| Conditions |
|---|
| Off-board Artillery |
| Reinforcements |
| Terrain Mods |
| Scenario Requirements & Playability | |
|---|---|
| Airborne - IE | Counters |
| Battle of the Bulge | Base Game |
| Introduction |
|---|
|
Play of this scenario requires counters from two copies of the game. It is a combination of scenarios forty-seven and forty-eight. The first unit of the 101st Airborne Division to reach Bastogne, the 501st Parachute Infantry Regiment, arrived around midnight on the 18th. The commanding officer, Lt.-Col. Julian Ewell, asked for a mission. By morning, it was know that elements of Team Cherry had been cut off. If was decided to send the regiment west "to develop the situation". Told to occupy a position East of Longvilly, no one actually expected Ewell's regiment to get there. To the south, Panzer Division Lehr prepared to attack the positions of CCB, 10th Armored Division and a battalion of the 501st Parachute Infantry Regiment. |
| Conclusion |
|---|
|
The remnants of Task Force Ryerson were brought into the perimeter by the paratroopers. The Germans drove in the American right flanks as Panzer Lehr attempted to reach Bastogne, but could not move the paratroopers despite a night attack by two battalions of the 902nd Panzer Grenadier Regiment. The stiff resistance convinced the Lehr commander, General Bayerlein, that Bastogne should be taken by something other than a direct assault. After the ware Bayerlein admitted he had been shaken by the unexpectedly stiff resistance encountered this day. |

|
|
|---|
| AFV Rules Pertaining to this Scenario's Order of Battle |
|---|
|
| Heer |
|---|
|


| Airborne |
|---|
|


| Army |
|---|
|


| 6 Errata Items | |
|---|---|

|
The reduced direct fire value of the Heer HMG became 5-5 starting with Fall of France. (plloyd1010
on 2015 Jul 31)
|

|
All SS PzIVH tanks should have a movement of 8. (Shad
on 2010 Dec 15)
|

|
The morale and combat modifiers of German Sergeant #1614 should be "0", not "8". (Shad
on 2010 Dec 15)
|

|
All SPW 251s have an armor value of 0. (Shad
on 2010 Dec 15)
|

|
The movement allowance on the counters in Airborne is misprinted. It should be "3." (rerathbun
on 2012 Jan 30)
|

|
The M18 has a special rule in Battle of the Bulge but it applies globally: "A two-step M18 unit can fire one anti-tank shot and move half its movement allowance (retain fractions) in a single impulse. The order in which it does these two actions is the player's choice." (Shad
on 2010 Dec 15)
|
| Battle of The Bulge, scenario #51: First Attempt | ||||||||||||
|---|---|---|---|---|---|---|---|---|---|---|---|---|
Battle of The Bulge, scenario #51: First Attempt I haven’t played a scenario from the Battle of The Bulge for a long time and I noticed no one had played this one yet or least not on PG-HQ and it looked interesting, so why not. With that said I can see why most people have avoided it, as it needs two sets of counters but fortunately I had an extra set of Elsenborn Ridge counters to fill the voids. This scenario also has 260 counters in it, so it takes a while to play might be the other reason. Maybe a third might be the fact that you ignore most of the terrain types but still this looked like a scenario that must be played. I won’t go into great detail, as I spent too much time playing but there are so many different combat groups on both the American and German sides but the Americans were better setup to leave their dug-outs and occupy the town hexes on all the map boards and the Germans reinforcements come in so peace-meal that it hurt their efforts a bit, as each side is awarded different points for both eliminated enemy units and occupied town hexes but if you can get the jump on occupying the town hexes you should have the advantage. In the South both sides armor forces collided early which was interesting and even though the Americans lost more units overall they controlled more town hexes in the end of the scenario for an American Victory but a pretty close one at that. With so many step losses on both sides it was hard to feel good about it, but it was fun to play and it seemed like I had 3 to 4 mini battles happening in different areas of the map at all times and the American had to keep adjusting forces to different areas of the maps as German reinforcements entered. I would rank it a 5 but needing two counter sets, the long playing time and the slow German reinforcements made me rank this as a 4 overall but worth it if you have the time to set it up and play it here and there. |
||||||||||||
| 0 Comments |