
|
Relief at Last! Battle of the Bulge #46 |
||
|---|---|---|
| (Defender) Germany | vs | United States (Attacker) |
| Formations Involved | ||
|---|---|---|
| Germany |  |
104th Panzergrenadier Regiment |
| Germany |  |
39th Grenadier Regiment |
| Germany |  |
4th Fallschirmjäger Regiment |
| Germany |  |
5th Fallschirmjager Division |
| United States |  |
101st "Screaming Eagles" Airborne Division |
| United States |  |
326th Airborne Engineer Battalion |
| United States |  |
4th Armored Division |

| Total | |
|---|---|
| Side 1 | 0 |
| Draw | 2 |
| Side 2 | 2 |


| Overall Rating, 4 votes |
|---|
|
4.25
|
| Scenario Rank: --- of 913 |
| Parent Game | Battle of the Bulge |
|---|---|
| Historicity | Historical |
| Date | 1944-12-25 |
| Start Time | 12:45 |
| Turn Count | 24 |
| Visibility | Day |
| Counters | 136 |
| Net Morale | 0 |
| Net Initiative | 3 |
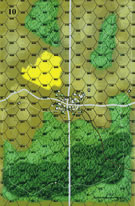
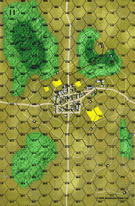
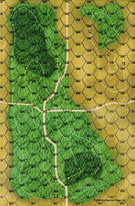
| Maps | 3: 10, 11, 9 |
| Layout Dimensions | 129 x 28 cm 51 x 11 in |
| Play Bounty | 120 |
| AAR Bounty | 171 |
| Total Plays | 4 |
| Total AARs | 1 |
| Battle Types |
|---|
| Urban Assault |
| Conditions |
|---|
| Off-board Artillery |
| Reinforcements |
| Terrain Mods |
| Scenario Requirements & Playability | |
|---|---|
| Battle of the Bulge | Base Game |
| Introduction |
|---|
|
After capturing Bigonville on the 24th, CCR of 4th Armored Division was ordered west where another route into Bastogne was to b e attempted. On Christmas afternoon the combat command attacked the town of Remonville in their drive on Bastogne. |
| Conclusion |
|---|
|
CCR drove the Germans from Remichampagne in the early afternoon of the 25th. It was known that the town of Sibret to the west was strongly held and was feared that a counterattack might develop from that direction. At 1500 at a conference held between Creighton Abrams, commander of 37th Tank Battalion, and George Jaques, commander of 53rd Armored Infantry Battalion, it was decided to send a company of tanks and a company of infantry up the road to Bastogne. The Germans in front of them were heavily bombarded and then engaged by the armored infantry while the tanks made a run for Bastogne. At 1650 the small group of tanks reached the American lines held by the 326th Engineer Battalion. The siege was lifted. |

|
|
|---|
| AFV Rules Pertaining to this Scenario's Order of Battle |
|---|
|
| Heer |
|---|
|


| Luftwaffe |
|---|
|


| Airborne |
|---|
|


| Army |
|---|
|


| 5 Errata Items | |
|---|---|

|
The reduced direct fire value of the Heer HMG became 5-5 starting with Fall of France. (plloyd1010
on 2015 Jul 31)
|

|
The morale and combat modifiers of German Sergeant #1614 should be "0", not "8". (Shad
on 2010 Dec 15)
|

|
All SPW 251s have an armor value of 0. (Shad
on 2010 Dec 15)
|

|
The movement allowance on the counters in Airborne is misprinted. It should be "3." (rerathbun
on 2012 Jan 30)
|

|
Reduce strength direct fire value be came 5-5 in Army at Dawn. (plloyd1010
on 2015 Jul 31)
|
| Greetings, Colonel Abrams! | ||||||||||||
|---|---|---|---|---|---|---|---|---|---|---|---|---|
This scenario re-creates the drive of CCA, 4th Armored, to reach the defensive perimeter of the 101st Airborne at Bastogne on the day after Christmas, 1944. Three boards are laid end-to-end, creating a long, thin playing surface. On the south board is a moderate force of Luftwaffe troops – GREN and HMG with the support of mortars, a 50mm ATG and a 75mm IG. The center board is unoccupied, then in the center of the north board is a smaller collection of Heer troops, again mostly infantry but with a 75mm ATG . Between them and the north edge of the map is a perimeter outpost of PARA plus support from the 101st. Meanwhile, the US armored relief column enters from the south on Turn 1, though only 8 combat units (infantry carried by halftracks or tanks counted as 1 unit instead of 2 for this purpose) per turn can arrive. German reinforcements – a small Heer infantry group accompanied by a 75/41 ATG and a StuG – begin rolling for arrival once the first US troops enter the middle board. The US gets 3 x 24. 2 x 18 OBA, while the Germans get just 1 x 16. The north-board Heer troops are not allowed to move from their setup hexes until non-airborne US units draw near. Rather than advance too close and perhaps suffer adverse results, the paratroopers positioned in the light woods out of 3-hex range from the Germans, but with LOS to them in preparation for when the firing on that part of the board might start in earnest. Thus, until the relief force neared the north, that board would be quiescent. Back to the south, the Luftwaffe 75mm ATG placed at the southern “point” of the town, with range to hit most of the US entry hexes. Fortunately for the US, its opening shot saw no effect - and it was then quickly taken out by “wrath of God” OBA, allowing the mass of US armor and halftrack-borne infantry to arrive in relative security. (The 150mm IG caused some travails to infantry that dismounted upon arrival, before it too was blasted by the big guns.) Approaching the Luftwaffe half-speed (the US M4’s are mechanically worn, and full speed runs a small risk of reducing the tanks by a step) the American armor closed to point-blank and blasted away, then entered the town for multiple Assaults, followed up by infantry to help deliver the knockout blows. German OBA, mortars (until taken out in Assault), HMG’s and, sometimes, GREN were able to take out a couple of steps and create numerous delays with morale situations, diluting the US “soft” attackers for a period of time. However, by the end of Turn 12 – halfway through the contest – the Luftwaffe was pretty much savaged, with step losses of 15 GREN and HMG, plus both mortars, both support guns, and 3 leaders. Two US stacks were still stuck in town assaults, but it was time to start mounting up and moving north – victory in this scenario requires that a certain number of tank and infantry steps exit the north edge of the map, waving at the Screaming Eagles as they do so. By the end of Turn 19 - 1715 hours – the Luftwaffe contingent was down to a handful of leaders scattered about the terrain, being ignored by the Americans. The bulk of CCR was on the northern board, with 4 tank and 2 infantry steps already exited. (In the meantime, the 81mm mortars, plus a handful of infantry/leaders and one Sherman, were back in the environs of the southern town.) The 75mm ATG in the northern town eliminated the M8 armored car platoon as the relief approached, then was taken out by OBA. This allowed the bulk of the AFV’s and loaded halftracks to flank the village with impunity, while the Heer reinforcements were not yet on board. The reinforcements finally showed on the last turn – just in time for the SPW251, towing the 75/41 ATG, to get taken out by a long-range Sherman shot before it could unload. The StuG managed to get one long-range shot off at a Sherman (using the optional move/fire rule for efficient AFV’s) but failed to make a dent. Meanwhile, having exited enough men and materiel to satisfy the victory conditions, the remainder of CCR deposited their cargo at the 101st Airborne’s treeline and began digging in, while the tanks (and then halftracks, once unencumbered) fired at the northern town from 2-hex range, and the OBA (now that CCR leaders were in position) was applied also. In the process of moving into fire range and trying to dig in, a few PARA platoons suffered adverse morale results, but with no losses. The result: a resounding U.S. victory. The Germans did not come close to taking out 12 U.S. steps to secure a draw. The final tallies of step losses: GERMAN: 17 Luftwaffe GREN, 5 Luftwaffe HMG, 4 Luftwaffe leaders, 1 Heer GREN, 2 81mm mortar, 1 50mm ATG, one 75mm IG, one 75mm ATG, one 75/41 ATG, one SPW-251. AMERICAN: 2 M8, 3 INF. Yep, that was it. I’m unsure of the balance in this one, though perhaps it could have been closer to a draw had the reinforcements arrived earlier. But I rate it highly in any case because it is both fun and very evocative of the actual situation. |
||||||||||||
| 0 Comments |