
|
Christnach Battle of the Bulge #36 |
||
|---|---|---|
| (Attacker) Germany | vs | United States (Defender) |
| Formations Involved | ||
|---|---|---|
| Germany |  |
276th Volksgrenadier Division |
| Germany |  |
987th Grenadier Regiment |
| United States |  |
9th "Phantom" Armored Division |
| United States |  |
Army |

| Total | |
|---|---|
| Side 1 | 0 |
| Draw | 0 |
| Side 2 | 5 |


| Overall Rating, 5 votes |
|---|
|
3
|
| Scenario Rank: 729 of 913 |
| Parent Game | Battle of the Bulge |
|---|---|
| Historicity | Historical |
| Date | 1944-12-20 |
| Start Time | 14:15 |
| Turn Count | 16 |
| Visibility | Day |
| Counters | 60 |
| Net Morale | 0 |
| Net Initiative | 0 |
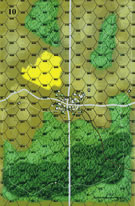
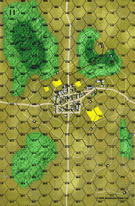
| Maps | 2: 10, 11 |
| Layout Dimensions | 56 x 43 cm 22 x 17 in |
| Play Bounty | 91 |
| AAR Bounty | 159 |
| Total Plays | 5 |
| Total AARs | 3 |
| Battle Types |
|---|
| Urban Assault |
| Conditions |
|---|
| Off-board Artillery |
| Terrain Mods |
| Scenario Requirements & Playability | |
|---|---|
| Battle of the Bulge | Base Game |
| Introduction |
|---|
|
Following the failed American attempt to relieve the surrounded companies of 60th Armored Infantry Battalion, the new commander of the 276th Volksgrenadier Division ordered his reserve formation, 987th Grenadier Regiment, to continue the attack against 9th Armored Division. With the regiment went four precious assault guns, the only "armor support" the entire corps possessed. |
| Conclusion |
|---|
|
The attack fell apart. While the 276th Division's new commander was straightening things out on the 19th, Combat Command A was doing the same thing. In short order the four wrecked assault guns marked the last attempt to widen the "bulge" at its southern base. |

|
|
|---|
| AFV Rules Pertaining to this Scenario's Order of Battle |
|---|
|
| Heer |
|---|
|


| Army |
|---|
|


| 3 Errata Items | |
|---|---|

|
The reduced direct fire value of the Heer HMG became 5-5 starting with Fall of France. (plloyd1010
on 2015 Jul 31)
|

|
The morale and combat modifiers of German Sergeant #1614 should be "0", not "8". (Shad
on 2010 Dec 15)
|

|
The M18 has a special rule in Battle of the Bulge but it applies globally: "A two-step M18 unit can fire one anti-tank shot and move half its movement allowance (retain fractions) in a single impulse. The order in which it does these two actions is the player's choice." (Shad
on 2010 Dec 15)
|
| Fields Littered With Enemy Dead | ||||||||||||
|---|---|---|---|---|---|---|---|---|---|---|---|---|
My second game in my own little Bulge Fest, this scenario has a battalion + of German grenadiers with a single StuG IIIG unit, 50mm and 75mm AT guns, 2 mortars and 30 column total of OBA. US troops are holding the large town on board 11 (hills dont exist so lines of sight/fire are pretty clear) with a company of combat engineers, a single infantry platoon, 3 M-7 Priests, a Sherman company, an M-8 scout, a Scott SP 75 howitzer, an M-5 Stuart,M-15 & M-16 AA halftracks and 2 M-18 Hellcats. I rolled an awful lot of 8s in this and the last game, when firepower should have been wiping Grenadiers out all around, but the Germans approached from both woods on board 8 trying to get to the town from one or the other. Germans in the northwest fared slightly better, coming to grips with and taking the single town hex in the woods west of the big town, chasing off the M-15 that had been holding that town and then moving through the woods to assault the M-15 and M-5 that it had stacked with, finally eliminating the M-15 before being decimated by the M-16 in the next hex. The troops approaching from the northeast ran into fire from the M-7s very quickly, and then fire from everything on the edge of town as they got closer. The German AT guns stayed in the southernmost town hex on board 10 where they could just manage shots at the Shermans, finally taking a single step of them before the Shermans fell back, but it wasn't much of a victory as the StuG III lost both steps. German troops and leaders were falling all over the fields between the northeast woods and the town. As one stack got in position to assault, the defender dice suddenly got hot and all leaders and half of the units in the stack died on more than one occasion. Suddenly the majority of surviving German leaders were trying to rally in the woods on board 10 as small stacks of leaderless troops slowly fell back to what little cover the light woods gave. With the Germans having lost over half of their starting force and the US having lost just 8 points, I called the game, US victory. Good game. |
||||||||||||
| 0 Comments |
| Germans were lacking | ||||||||||||
|---|---|---|---|---|---|---|---|---|---|---|---|---|
This scenario is one that portrays the very end of the bulge expansion. The Germans have no more units to attack so they scraped together as much as they could, but with limited armor any attack would require alot of infantry that the Germans did not have. So from that respect this is historically accurate, but in my play there is not much the Germans could do. They must assault a town that is heavily defended with a mixture of armor units. But without infantry AT weapons the German infantry needs to group and assault. The Americans have good Op fire capabilities. From my old notes the Germans got wiped out just trying to get close to the town. The nine German steps were loss by turn twelve without even getting close to the town. So historically I give it a 5 but game wise a 1. This would also be a good one to try again with infantry AT capabilities. |
||||||||||||
| 0 Comments |
| Christnach | ||||||||||||
|---|---|---|---|---|---|---|---|---|---|---|---|---|
In this scenario, the German must take two or more town hexes on Board 11 (south town). The US must eliminate nine or more German steps. The German has little time, and must make a direct attack without the benefit of cover. The US can’t move until a German unit is within three hexes of a US unit. As the Germans approached, they were spotted, and soon they were being shelled by M-7 Priests. Meanwhile, long-range fire by US M-18s resulted in the destruction of half of the STUGIIIs. In only 30 minutes, the German had lost four steps. The persistent Germans captured the northern hex of the town by 1545, but at significant cost. By now, they had lost 12 steps, which satisfied the US victory conditions. Many demoralized Germans were scattered north of the town, and the US was maneuvering to push the Germans out of the single town hex. Fifteen minutes later, the Germans were able to assault a second town hex, but lost the first one! The US was looking to reinforce the engineers battling the German assault. Meanwhile, American armor was moving to pursue the scattered German units in the north. The chances for the German to even get a draw were looking very poor. At 1615, the surviving Germans withdrew. Their forces had been decimated and most survivors were disrupted/demoralized. US forces had experienced comparatively few losses, and had established a strong line of defense north of town. The reduced STUGIII platoon finally recovered, but US armor dominated the battlefield. This was a quick US victory. |
||||||||||||
| 0 Comments |