Panzer Grenadier Battles on April 27th:
Arctic Front Deluxe #40 - Children's Crusade Broken Axis #14 - Târgu Frumos: The Second Battle Scenario 3: Sledge Hammer of the Proletariat
Army Group South Ukraine #6 - Consternation Road to Berlin #73 - She-Wolves of the SS
Errors? Omissions? Report them!
Kampfgruppe Kunkel
Battle of the Bulge #30
(Attacker) Germany vs United States (Defender)
Formations Involved
Germany 26th Reconnaissance Battalion
Germany 26th Volksgrenadier Division
United States 101st "Screaming Eagles" Airborne Division
United States 10th "Tiger" Armored Division
United States 327th Glider Infantry Regiment
United States 420th Armored Field Artillery Battalion
United States Army
Display
Balance:


Overall balance chart for BaBu030
Total
Side 1 0
Draw 3
Side 2 6
Overall Rating, 8 votes
5
4
3
2
1
3.5
Scenario Rank: 403 of 913
Parent Game Battle of the Bulge
Historicity Historical
Date 1944-12-23
Start Time 12:30
Turn Count 24
Visibility Day
Counters 47
Net Morale 0
Net Initiative 2
Maps 2: 11, 9
Layout Dimensions 56 x 43 cm
22 x 17 in
Play Bounty 87
AAR Bounty 171
Total Plays 9
Total AARs 1
Battle Types
Urban Assault
Conditions
Off-board Artillery
Reinforcements
Terrain Mods
Scenario Requirements & Playability
Battle of the Bulge Base Game
Introduction

At the same time the 901st Panzer Grenadier Regiment was attacking the eastern side of the Bastogne perimeter the 26th Volks Grenadier Division Reconnaissance Battalion was attacking the western side. Defending were the 460th Armored Field Artillery Battalion and some Sherman tanks of the 10th Armored Division.

Conclusion

The Germans advanced cautiously as their objective was limited and even moderate casualties were not to be incurred. Despite a lack of infantry, the American tanks and self-propelled artillery repulsed four attacks. Heavy casualties and the anticipated arrival of the 15th Panzer Grenadier Division in the next day or two convinced the Germans to wait before trying again to drive in the American line.


Display Relevant AFV Rules

AFV Rules Pertaining to this Scenario's Order of Battle
  • Vulnerable to results on the Assault Combat Chart (7.25, 7.63, ACC), and may be attacked by Anti-Tank fire (11.2, DFT). Anti-Tank fire only affects the individual unit fired upon (7.62, 11.0).
  • AFV's are activated by tank leaders (3.2, 3.3, 5.42, 6.8). They may also be activated as part of an initial activating stack, but if activated in this way would need a tank leader in order to carry out combat movement.
  • AFV's do not block Direct Fire (10.1).
  • Full-strength AFV's with "armor efficiency" may make two anti-tank (AT) fire attacks per turn (either in their action segment or during opportunity fire) if they have AT fire values of 0 or more (11.2).
  • Each unit with an AT fire value of 2 or more may fire at targets at a distance of between 100% and 150% of its printed AT range. It does so at half its AT fire value. (11.3)
  • Efficient and non-efficient AFV's may conduct two opportunity fires per turn if using direct fire (7.44, 7.64). Units with both Direct and AT Fire values may use either type of fire in the same turn as their opportunity fire, but not both (7.22, 13.0). Units which can take opportunity fire twice per turn do not have to target the same unit both times (13.0).
  • Demoralized AFV's are not required to flee from units that do not have AT fire values (14.3).
  • Place a Wreck marker when an AFV is eliminated in a bridge or town hex (16.3).
  • AFV's do not benefit from Entrenchments (16.42).
  • AFV's may Dig In (16.2).
  • Open-top AFV's: Immune to M, M1 and M2 results on Direct and Bombardment Fire Tables, but DO take step losses from X and #X results (7.25, 7.41, 7.61, BT, DFT). If a "2X" or "3X" result is rolled, at least one of the step losses must be taken by an open-top AFV if present.
  • Closed-top AFV's: Immune to M, M1 and M2 results on Direct and Bombardment Fire Tables. Do not take step losses from Direct or Bombardment Fire. If X or #X result on Fire Table, make M morale check instead (7.25, 7.41, 7.61, BT, DFT).
  • Closed-top AFV's: Provide the +1 modifier on the Assault Table when combined with infantry. (Modifier only applies to Germans in all scenarios; Soviet Guards in scenarios taking place after 1942; Polish, US and Commonwealth in scenarios taking place after 1943.) (ACC)
  • Tank: all are closed-top and provide the +1 Assault bonus, when applicable
  • Assault Gun: if closed-top, provide the +1 Assault bonus, when applicable
  • Self-Propelled Artillery: do not provide the +1 Assault bonus, even if closed-top (SB)

Display Order of Battle

Germany Order of Battle
Heer
  • Mechanized
United States Order of Battle
Army
  • Mechanized

Display Errata (2)

2 Errata Items
Overall balance chart for 20

The reduced direct fire value of the Heer HMG became 5-5 starting with Fall of France.

(plloyd1010 on 2015 Jul 31)
Overall balance chart for 63

The morale and combat modifiers of German Sergeant #1614 should be "0", not "8".

(Shad on 2010 Dec 15)

Display AARs (1)

Premieres Ardennes
Author Ifig
Method Solo
Victor Draw
Play Date 2007-10-13
Language English
Scenario BaBu030

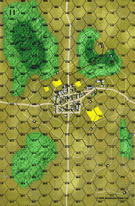
C'est un scénario que j'ai joué en PBEM avec Kalman. Ci-dessous des notes prises pour décrire la fin faite en solo.

Comme Kalman l'a raconté, à la fin du douzième tour, on est tombé d'accord pour déclarer match nul : les Allemands m'ont éjecté sans ménagement de la ville, sauf une infanterie réduite coincée par un assaut, et si on suivait une logique militaire, ils en resteraient là et la ligne de défense US que j'ai reconstruite difficilement au nord-est resterait intouchée. Mais les conditions de victoire sont un peu tordues : si les Allemands perdent huit pas, les Américains gagnent, et ils en ont perdu cinq pour prendre la ville. Le pilonnage des trois pelotons de Priest pourrait alors éliminer encore trois pas et donner la victoire aux US.

Donc, j'ai joué hier l'assaut final des Allemands pour éliminer cette menace. Les pions de carton montent plus facilement à l'assaut que des vrais bonshommes ! Autour des trois Priests se sont repliés un peloton réduit de Shermans, une INF entière et une réduite, et une HMG réduite, ces trois-là étant disruptés.

Les Allemands gagnent les activations et se ruent sur les US pour ne pas leur laisser le temps de reprendre leur moral. Je fais faire des tirs d'opportunité aux US, mais pas trop efficaces sauf sur le bord est de l'attaque qui est démoralisée. C'est l'artillerie finalement qui fait tout péter : un tir élimine deux pas ! Les Sherman à l'ouest de l'attaque arrivent à démoraliser une infanterie. Le tour d'après, les Allemands prennent encore l'initiative et passent à l'assaut, mais ils n'ont aucune réserve derrière. L'infanterie US en ville retient pas mal de forces. Ca passe ou ça casse ! Les assauts tournent plutôt bien pour les Allemands ; au tour 4, ils ont repoussé les unités qui formaient une ligne et les renforts allemands arrivent de la ville. Le Sherman s'est dit qu'il pouvait assaillir l'infanterie démoralisée, mais celle-ci, lors de sa récupération a fait un double 1, et finalement a démoralisé le Sherman à son tour ! Celui-ci a dû s'enfuir et a été éliminé par le "free fire" quand il a quitté l'assaut. Mais l'artillerie a encore éliminé deux pas et les Allemands perdent un pas lors d'un assaut.

Au tour 5, les Allemands passent à l'assaut sur les trois hexagones contigus aux priest et une autre force commence à contourner la ligne pour les attaquer directement. Les Américains finissent par s'enfuir et sortir de la carte au tour 6 ; ils ont perdu toutes leurs forces à part l'artillerie motorisée ! Dix pas de pertes allemands, donc théoriquement match nul, mais je pense quand même que l'avantage est clairement germanique alors que la situation de départ ne leur est pas très favorable ! Un scénario sympa car les deux froces ont des avantages très distincts. Bravo à Kalman, et merci, c'était très sympa.

0 Comments
You must be a registered member and logged-in to post a comment.
Errors? Omissions? Report them!
Page generated in 0.33 seconds.