
|
Wiltz: 19 December, AM Battle of the Bulge #22 |
||
|---|---|---|
| (Defender) Germany | vs | United States (Attacker) |
| Formations Involved | ||
|---|---|---|
| Germany |  |
130th "Lehr" Panzer Division |
| Germany |  |
39th Grenadier Regiment |
| Germany |  |
560th Volksgrenadier Division |
| United States |  |
28th "Keystone" Infantry Division |
| United States |  |
447th AAA Battalion |
| United States |  |
44th Engineer Battalion |
| United States |  |
630th Tank Destroyer Battalion |
| United States |  |
687th Field Artillery Battalion |
| United States |  |
707th Tank Battalion |

| Total | |
|---|---|
| Side 1 | 4 |
| Draw | 0 |
| Side 2 | 6 |


| Overall Rating, 9 votes |
|---|
|
3.78
|
| Scenario Rank: 221 of 913 |
| Parent Game | Battle of the Bulge |
|---|---|
| Historicity | Historical |
| Date | 1944-12-19 |
| Start Time | 07:45 |
| Turn Count | 18 |
| Visibility | Day |
| Counters | 90 |
| Net Morale | 0 |
| Net Initiative | 1 |
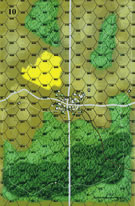
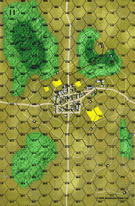
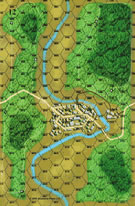
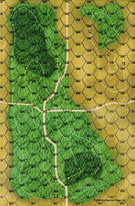
| Maps | 4: 10, 11, 12, 9 |
| Layout Dimensions | 112 x 43 cm 44 x 17 in |
| Play Bounty | 107 |
| AAR Bounty | 159 |
| Total Plays | 10 |
| Total AARs | 3 |
| Battle Types |
|---|
| Covering Action |
| Inflict Enemy Casualties |
| River Crossing |
| Urban Assault |
| Conditions |
|---|
| Off-board Artillery |
| Terrain Mods |
| Scenario Requirements & Playability | |
|---|---|
| Battle of the Bulge | Base Game |
| Introduction |
|---|
|
Although willing to withdraw his division HQ from Wiltz, General Cota refused to give up the town. To the north Panzer Lehr Division sped west. Concerned that the American presence in Wiltz would interfere with the panzer division's flank, German commanders tasked the 29th Regiment of the 560th Volksgrenadier Division to contain them. |
| Conclusion |
|---|
|
Lack of offensive action on the part of the Germans in Erpeldange (Board 11) convinced General Cota that an effort to retake the town and slow the German advance west could succeed. In the morning the 44th Engineer Battalion advanced on the town. The defenders not only repulsed the American advance, but struck back, driving the Americans to the outskirts of Wiltz. |

|
|
|---|
| AFV Rules Pertaining to this Scenario's Order of Battle |
|---|
|
| Heer |
|---|
|


| Army |
|---|
|


| 4 Errata Items | |
|---|---|
| Scen 22 |
The 560th set up instruction makes a lot more sense if you swap the references to boards 10 & 11 (triangular_cube
on 2021 Feb 11)
|

|
The reduced direct fire value of the Heer HMG became 5-5 starting with Fall of France. (plloyd1010
on 2015 Jul 31)
|

|
The morale and combat modifiers of German Sergeant #1614 should be "0", not "8". (Shad
on 2010 Dec 15)
|

|
The movement allowance on the counters in Airborne is misprinted. It should be "3." (rerathbun
on 2012 Jan 30)
|
| The Hazards of Playing Solo too often | ||||||||||||||
|---|---|---|---|---|---|---|---|---|---|---|---|---|---|---|
This is not so much an AAR as it is a report on how easy it is to forget rules with no one there to check you. I’ve got a month where I can play a LOT of PG, so I’m getting better and better. On this scenario, I quickly decided, for better or worse, to secure the first town by using the woods as needed, and by running in from the roads before the entering squads nearby could react. I was counting on some initiative and got it, but to quote the Three Amigos, “I really didn’t expect the first part of the plan to work.” You see, even after 2 years of playing this game system, it being my only large-scale chit format wargame to date, I still have trouble “seeing” hills and terrain, and when I play face-to-face, this is readily apparent. My best friend and opponent quickly gave up the large woods when he realized I owned them and instead used offboards to weaken my moving vehicles; the trade off?: I completely devastated his assaulting troops coming from the east, but he got lucky with his arty and took out in one double-six roll my M16!! This immediately turned the tide a little to say the least, although for the time being the first town was mine. I had hoped and was rewarded that he chose to bring most of his troops from that 40 meter high hilltown as I didn’t want to assault it. The mistake I then made explains the issues solo play creates. I ran my 3 trucks with limbered guns through to be in range of the rapidly-moving wagontrain, but forgot that assaulting loaded trucks is automatic elimination! As a good friend should, he offered to let me move them back, but I don’t care about “winning”. I care about the play and fun of the fellowship, so I demanded to leave them there—it taught me many things. The trucks are then gone, and I also broke a rule about leaving an assault which neither one of us caught. I had moved my m4’s into an assault alone (like an idiot) and then tried to remove them. I gave him the parting shot, but then moved them a full allowance instead of the one hex they are allowed. I would have never caught this playing solo, and he only caught the rule a turn later or so. He plays LOTS of wargames, most recently Downtown, London’s Burning and Tobruk all in the past month, and just forgot some of the PG rules. He won the day by wearing me down, but the point here is that there are a lot of little rules that I just miss because I solo so much. My best friend is getting a camera for his computer so we can skype and play more often! In the meantime, I’m absolutely taking credit for playing the scenario, because I fought in those hills for 5 hours before we closed it out! I love this game! |
||||||||||||||
| 4 Comments |
| The Tides of Battle |
|---|
|
Shad's Note: I'm dumping in a bunch of my old BGG AARs. If you've followed my "work" on BGG then you've read these before... DeploymentThe Germans left most of the reduced troops in the northernmost town to fulfill the Board 11 garrison requirements and settled in for a fight to the death in the southern town on Board 10. A small scout force with a particularly brave sergeant was sent to a lightly-wooded ridgetop SE of town to slow the flank and force the Americans up the road. Within town, the Germans placed their two artillery pieces at the gates to town covering the road intent to fight to the last man. The trucks were dispatched northward, there would be no retreat this day. The rest of the men took position throughout the town with a reserve of HMGs and the ranking officer. If the town could not be held the exposed baggage train behind it would mean little. The Americans loaded every last man they could into their fleet of trucks, set up the full complement of their artillery on the edge of town in Board 12, and prepared for a frontal assault with only a small detachment sent up the right flank. Traffic was going to be a problem, but the armor would lead the way and attempt to draw as much fire as possible giving the infantry time to unload and assemble. Battle BeginsAs the Germans lay in wait, the American convoy set out straight into the maw of the beast. The armor made it to the walls of the town but would go no further. Well-placed AT fire from within the town quickly destroyed them. However, they had done enough and the convoy was given time to fan out and unload. Everywhere infantry, engineers, and HMGs ran towards the southern edge of the village. The Germans quickly found themselves with the unusual problem of having too many targets - there were simply too many men to shoot at for the defenders and by virtue of sheer numbers the Americans were gaining ground. On the flank the American commander sensed weakness and committed his reserve of two small platoons to try and rout the German scouts. If they could be removed the town's defenders would be vulnerable to a quick flanking sprint cutting off their retreat. The German scouts held though, hunkering down under withering pointblank fire only to pop back up and repeatedly land deadly shots against the rapidly closing Americans. Body Count90 minutes passed in the blink of an eye, and the only visible differences on the battlefield were the piles of American bodies. Despite the fanatical supporting artillery fire, the American infantry found themselves time and time again on the wrong end of tightly coordinated German fire. Unable to enter the town proper, men were dieing by the dozens on its outskirts. In the forest outside of town the German scouts, now all but surrounded, continued to inflict appalling casualties on the Americans. The sergeant and his tiny band of men were only finally silenced when the American Lt. Col arrived on the scene and directed a total envelopment of the position. Time was already beginning to become an issue, American casualties were outpacing German ones 3 to 1, and not a single block of the village had been pried from German hands... the attack would not last much longer at this rate, things were looking bleak. Turning PointAnd then it happened - 2 platoons of engineers, brought out of reserve to plug a hole in the line and maintain pressure on the town's defenders, were able to rout the German guns in one swift attack. The first crack in the dam proved to be the last, as more engineers and the best American officers flooded in behind them and dove on any Germans they could find in bloody house-to-house assaults. Finally able to take cover in the town, rather than fight from the fields beyond, the maniacal engineers smashed through the village. A battle which felt like a near-certain German victory only minutes earlier was now characterized by German platoons scattering in all directions and running for the hills and forests. Pressing OnThe relieved American infantry quickly chased after and mopped up the German stragglers, while the heavy artillery in the American rear mobilized for redeployment forward. With the town completely under control and only a small band of German soldiers remaining in a nearby forest, the Americans reorganized their lines and advanced on the smaller town on Board 11. The American infantry advanced slowly on the few Germans remaining in the northern town in order to screen their artillery installations. Their guns were quickly deployed on a hilltop overlooking the Panzer Lehr baggage train's highway, and suddenly convoy truck after convoy truck was exploding in flames. Game End: Turn 15 of 18 German VPs: 17 American VPs: 39 Closing ThoughtsThis was an extraordinarily tense scenario in the beginning as the Americans struggled to bring their superior numbers to bear in unfavorable terrain. For the first half of the game I was expecting a very close finish, or an outright German victory. The total collapse of the German town defense over only ~3 turns was completely unexpected. Both sides drew excellent leaders, the German leaders perhaps a bit better than those of the Americans, so combined fire and morale rallies against incredible odds were the norm. Having swept the southern town the Americans gathered themselves together again and moved in force against the northern town with the intent of establishing AT guns on a ridge and OpFiring on trucks moving down the highway. They succeeded in doing just this and no truck (with -1 armor!) is going to stand any chance against a 3 inch gun with an AT value of 6. Truth be told, victory was already out of reach for the Germans before the Americans began obliterating the convoy due to horrific steplosses and the total loss of the southern town. I picked this scenario because of the interesting mechanic of attacking the convoy, but in hindsight I don't think the Americans need to destroy a single truck to win... unless the German player yields the southern town from the beginning and stacks on Board 11. Nevertheless, this was a very fun scenario with tremendous swings in momentum. It's listed as requiring 4 maps, but in reality you needn't place a single unit on Board 9. I highly recommend this scenario to any Battle of the Bulge players out there, either for solo or face-to-face play. Lastly, and curiously, my result was quite opposite the historical account, which saw the entrenched Germans easily stonewall and then drive back the American attempt at capturing the town and interdicting the baggage train. Explanation on how a town falls in 3 turnsThe town is your standard PG 7 hex circular village. The German guns were placed on the southernmost hex, with infantry flanking them on either side. Units were held in reserve in adjacent hexes to the north. The Americans drove straight north up the road to the German guns and then fanned out, with a little more emphasis on the eastern side of town, creating a 4 hex front and began adjacent direct fire attacks. They were getting pounded by the Germans for about an hour like this without making any progress, the Germans easily recovering any morale hits like you said, until the German guns blew a hole in the American line directly in front of themselves. The 2 American engineer platoons held in reserve were immediately sent forward to plug the gap and on their next attack were able to steploss the guns. With only one gun remaining and that disrupted, the engineers assaulted with an additional HMG platoon on the following turn. The assault was over as soon as it began. Now that they were actually IN the town, things collapsed like dominoes. The Americans still outside the town would pin the Germans with adjacent direct fire coordinated from 2 hexes, if that didn't provide enough of an effect the Americans would follow up with a massive artillery barrage (10 & 3 x 18 firing together from their emplacement in the next town), and lastly would assault with the ENG | ENG | HMG force led by a 10 morale, 2 morale mod ... Lt? Those artillery units are all onboard, and were firing as one with the help of a Lt. That's a 64 base value, down to the 30 column for a town, and sometimes back up to the 42 column for 3 units in the target hex as the Germans struggled to hold the lines. The supporting infantry was using combined fire from two hexes and was usually rolling on the 22 column, being adjacent canceling out the -2 shift for town defenses. Once the German defenders took morale hits the ENG|ENG|HMG squad dove in for assault on the 18 or sometimes 24 column. The town morale bonus is only for recovery rolls - not for initial checks. I was able to grind them down and smash them at a rate of almost one stack per turn once I got the engineers into the town. It was a sledgehammer, the ferociousness of which was only compounded by 2 excellent German leaders falling as casualties. |
| 0 Comments |
| Now a Cakewalk for the Americans | ||||||||||||
|---|---|---|---|---|---|---|---|---|---|---|---|---|
I didn't play the Germans as well as I should have, but the Americans won easily. The Americans avoided a city fight and sent troops along the west and the east map edge to attack the soft line of Lehr trucks and collect as many 2 point VPs as possible. The German anti-tank units were a threat but were easily taken out by an American forward observer and that fat stack of 105s. While the Americans were moving along the east border, the Germans were spreading their line east and had its OBA rain on the Americans. The US hit the German line just south of the east-west "baggage train" road. Once the Americans broke through the Lehr trucks had to be diverted to enter to the north of the road. The M4, which never broke down, got in range and begin shredding each truck that appeared. To garner some VPs the Germans detached two platoons to march south and take out the 105s but it was too little, too late. Even counting all the German controlled town hexes, the US won a huge victory. |
||||||||||||
| 0 Comments |
I love to hear of people playing ftf or head-to-head games as that is really what I do exclusively. I seem quite unable to solo (which is my loss I guess). But you made a point that I often point out. By suddenly playing against an opponent, you find out the rules you played in error or became entrenched in the brain but in the wrong format. You may also learn a few new tricks !
On the skype thing here is a heads up that may save you hassle and a $ or two.
All of us that Skype here in our group (about 7 people now) do not use cameras at all. It is all purely audio, simply relaying the hexes being entered and shouts of 'stop' ! if an opportunity fire chance comes up :-)
Being able to move the full allowance when bailing out of an assault hex sure would be nice! ;-)
On the skype thing here is a heads up that may save you hassle and a $ or two.
Webcams are so cheap these days that he literally might save a $ or two. And what kind of anti-social weirdos opt to buy a mic instead of a webcam with mic? Don't want the NSA to see you haven't been flossing? :-P ;-)
Hey you don't even play, cam or mic ! Give us a bit of leeway ! LOL
So if your still reading Mr Chasseur, point is, a simple mic is good enough :-)
Funny stuff, today! We actually reset the scenario at about turn 14 and replayed the end. He still beat me. I couldn't hit anything! My guns seemed to be set on 7. He still managed to hold out long enough to get more VP's than me. Today i begin Bulge 5 solo, with the new rules better in my head. He is a teacher so summers are easy for him. Me, I'm off Mondays and Tuesdays...