
|
Marnach I Battle of the Bulge #7 |
||
|---|---|---|
| (Attacker) Germany | vs | United States (Defender) |
| Formations Involved | ||
|---|---|---|
| Germany |  |
28th Engineer Battalion |
| Germany |  |
304th Panzergrenadier Regiment |
| Germany |  |
Heer |
| United States |  |
110th Infantry Regiment |
| United States |  |
630th Tank Destroyer Battalion |
| United States |  |
Army |

| Total | |
|---|---|
| Side 1 | 6 |
| Draw | 1 |
| Side 2 | 11 |


| Overall Rating, 16 votes |
|---|
|
3.5
|
| Scenario Rank: 402 of 913 |
| Parent Game | Battle of the Bulge |
|---|---|
| Historicity | Historical |
| Date | 1944-12-16 |
| Start Time | 08:00 |
| Turn Count | 36 |
| Visibility | Day |
| Counters | 59 |
| Net Morale | 0 |
| Net Initiative | 3 |
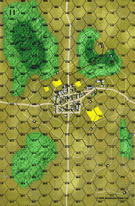
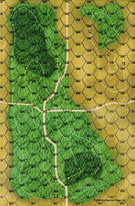
| Maps | 2: 11, 9 |
| Layout Dimensions | 56 x 43 cm 22 x 17 in |
| Play Bounty | 87 |
| AAR Bounty | 147 |
| Total Plays | 18 |
| Total AARs | 5 |
| Battle Types |
|---|
| Exit the Battle Area |
| Inflict Enemy Casualties |
| Urban Assault |
| Conditions |
|---|
| Off-board Artillery |
| Reinforcements |
| Terrain Mods |
| Scenario Requirements & Playability | |
|---|---|
| Battle of the Bulge | Base Game |
| Introduction |
|---|
|
With a first-day objective of the town of Clervaux, the lead elements of the 2nd "Vienna" Panzer Division crossed the Our in the early morning darkness and marched west. By 0800 the Germans were approaching the town of Marnach. In defense were B Company, 110th Regiment, 28th Infantry Division and a platoon from 630th Tank Destroyer Battalion. |
| Conclusion |
|---|
|
The American defense was bolstered by the movement of tank destroyers into direct fire support positions in mid-morning. The town held and the Germans bypassed it. Late in the afternoon a tank platoon joined the defense. Despite the retention of the town, other American positions in the area were being captured. It was only a matter of time before this one fell as well. |

|
|
|---|
| AFV Rules Pertaining to this Scenario's Order of Battle |
|---|
|
| Heer |
|---|
|


| Army |
|---|
|


| 1 Errata Item | |
|---|---|

|
The reduced direct fire value of the Heer HMG became 5-5 starting with Fall of France. (plloyd1010
on 2015 Jul 31)
|
| Germans Roll Through Marnach |
|---|
|
In this scenario, the Germans must control the town and exit nine units off the west edge. The victory condition is met at the end of any turn in which they have accomplished these goals. The Germans already in place started the day by approaching the town as the reinforcements slowly entered from the east. Using artillery, direct fire, and assaults, the Germans took many of the town hexes. The hope was to take the town and exit the units to the west before the American reinforcements arrived. It looked good, but a couple of American infantry platoons held on. The American reinforcements (infantry and two M4 platoons) arrived and approached to contest control of the town. The M4s saw an opening and assaulted a German infantry platoon. They made the mistake of assaulting without infantry support and uphill against a small German force that included an engineer platoon. A great roll of the die resulted in a loss of one step and both M4s ended up demoralized. More German reinforcements arrived in support, and the Americans were dislodged from the town. At 2:00 PM, the Germans were in complete control and had exited nine units from the area. I enjoyed this scenario. I learned that there are serious consequences when armor assaults without accompanying infantry (I won’t likely do that again). That extra bonus for presence of an engineer is also a big factor. |
| 0 Comments |
| Almost lost it! | ||||||||||||
|---|---|---|---|---|---|---|---|---|---|---|---|---|
The Battle for the town (as usual), was the most difficult part of this scenario. Once the town was taken and all the Americans were on the run, it was an easy task to head for the West edge of the map. The only problem with this is the reinforcements from the South edge. IF the Americans had only held on for another couple of turns.... a different outcome? |
||||||||||||
| 0 Comments |
| Battle of the Bulge Scenario 7 | ||||||||||||
|---|---|---|---|---|---|---|---|---|---|---|---|---|
The Americans set up on the east border of the town, on the crest of the level 2 hill in order to intercept the initial German attack, with plans to fall back into the town intself and await their own reinforcements once sufficient Germans were on the board. The Germans deployed opposite them on board 9, on their own level 1 hill in order to skirmish with the Americans, and trust in their stronger, albeit random, OBA to push them back until their reinforcements arrived. The Americans ended up winning the artillery dual, rolling a "2" on bombardment fire with their combined OBA on both turns one and two (lucky devils : ) ). This shattered the German initial force, which fell back to the crossroads on board 9 to wait for reinforcements. The Americans fell back to the level 2 hill crest surrounding the town and dug in. Once approximately half the German reinforcements arrived, they moved forward, sending half the forces up the middle and the other half moving southward in a flanking attack, hoping to be inside the town and contesting it before American reinforcements arrived. The Americans ended up rolling a "12" with an adjacent MG + INF stack that stopped the German move up the center (yeah... lucky rolls this game all over for the Americans). Germans reached the casualty count for VCs and picked up their pieces instead of fighting for a draw with a weak board position and American reinforcements on the way. American victory, losing only their mortars in this one. American artillery gods at work in this one... |
||||||||||||
| 0 Comments |
| Shermans versus Grenadiers | ||||||||||||
|---|---|---|---|---|---|---|---|---|---|---|---|---|
This scenario is really a race against the clock. Despite the first 10 turns going quite well, with major US losses and Germans entering the city, the tide began to turn fairly quickly after that. I was rolling quite well and had about 3/4 of the German reinforcements on the board before the US infantry reinforcements arrived, but they caused the Germans to divert forces assaulting the town to deal with them. Soon after the rolls became bad for the Germans and fantastic for the US artillery, crippling the German advance. On turn seventeen the Shermans arrived and massacred the MG groups who were providing fire from outside the town. By turn 21 the Germans had lost 8 steps and were therefore forced to call off the attack. Despite this, not too unlike the actual battle, the Germans did manage to get the necessary number of troops evacuated by bypassing the town. |
||||||||||||
| 0 Comments |
| A Twist on More of the Same | ||||||||||||
|---|---|---|---|---|---|---|---|---|---|---|---|---|
This scenerio requires the German's to clear and hold a town and exit nine units off the west edge while avoiding eight step loss. The Germans managed to eliminate the US garrision by turn 11. They had three turns before the US reinforcements arrived so the spent that time exiting the nine units and organizing their position in the board's town hexes. This is where the twist occurs. Now the Germans have to defend against assault. Up until now this has been the US's strategy. The US picked an end town hex and poured troops and tanks into it. As the turns passes the Germans continued to feed fresh troops into the hex. The US never managed to clear a town hex, but did manage to eliminate eight German steps. The scenario was pretty static for my tastes, so I gave it a 2. |
||||||||||||
| 0 Comments |