
|
April Fools: Rendeux, South-East of Hotton, Belgium Britain's Bulge #8 |
||
|---|---|---|
| (Attacker) Britain | vs | Germany (Defender) |
| Formations Involved |
|---|

| Total | |
|---|---|
| Side 1 | 0 |
| Draw | 0 |
| Side 2 | 1 |


| Overall Rating, 1 vote |
|---|
|
3
|
| Scenario Rank: --- of 913 |
| Parent Game | Britain's Bulge |
|---|---|
| Historicity | Historical |
| Date | 1945-01-05 |
| Start Time | 06:00 |
| Turn Count | 24 |
| Visibility | Day & Night |
| Counters | 34 |
| Net Morale | 0 |
| Net Initiative | 2 |
| Maps | 1: 23 |
| Layout Dimensions | 43 x 28 cm 17 x 11 in |
| Play Bounty | 163 |
| AAR Bounty | 227 |
| Total Plays | 1 |
| Total AARs | 0 |
| Battle Types |
|---|
| Exit the Battle Area |
| Urban Assault |
| Entrenchment Control |
| Conditions |
|---|
| Entrenchments |
| Minefields |
| Off-board Artillery |
| Scenario Requirements & Playability | |
|---|---|
| Britain's Bulge | Base Game |
| Elsenborn Ridge | Maps + Counters |
| Liberation 1944 | Counters |
| Introduction |
|---|
|
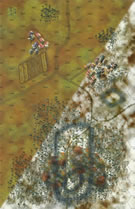
The 116th Panzer Division still held a long defensive line, from the east of Marche to the River Ourthe. However, the division was in very bad shape after the disasters suffered in December. Its reconnaissance battalion, down to two or three hundred men, held positions from the Hamoul Mill near Rendeux to the large woods of Sur Waha, south-east of Hotton. The 60th Panzer Grenadier Regiment’s strength had also fallen to two hundred men and together with the engineer battalion, which had only two companies left, they occupied the rear zone of the road from Marche to La Roche. To the left of XXX Corps, the Americans had already started their assault, but apparently were having trouble with flanking fire and needed the British to clear the area. On 4 January, under heavy clouds full of snow, the 158th Brigade of 53rd Welsh Division advanced into the forested mass of hills south of the road between Hotton and La Roche, in the valley of the Ourthe River. Tank support came from Shermans of the 33rd Armoured Brigade’s 144th Regiment Royal Armoured Corps. North of the village of Rendeux-Bas, the slow advance of the 2nd Battalion/Monmouthshire Regiment stopped when, rounding a sharp bend in the road, they encountered stiff enemy opposition behind a well-sited roadblock with a steep cliff on one side and more open ground on the other, with a water mill (the Hamoul Mill). Machine-gun nests and two dug-in tanks protected the position, and it proved almost impossible to direct effective artillery and mortar fire on the roadblock. The defenders frustrated various flanking moves, leaving the situation deadlocked. Despite determined efforts, 2nd Mons made no progress for the rest of the day. The German resistance had serious consequences for the rest of the battle, as the 160th Brigade was blocked behind the 158th and could not continue the advance. Hard fighting followed throughout the afternoon and evening. The Germans suffered serious casualties and the British fought off an attack against a troop of tanks (but not before a panzerfaust claimed a Sherman), yet the final objective was not secured. A new attack went forward at 0600 on the next day, under cover of darkness. |
| Conclusion |
|---|
|
XXX Corps headquarters ordered maximum Sheldrake (artillery) before daylight. The fire plan, codenamed “April,” called for support from all available field regiments. It would last for about 20 minutes, during which some 5,820 shells would be fired. At 0530, prior to the attack, “April” began. By this time the infantry companies had already moved up. Unfortunately, a proportion of the shells fell short. Tragically, without doing the enemy a great deal of harm, some of the medium shells fell among B Company on the crest, with some casualties. C and D Companies then attacked along the road but by 0730 the assault had been blocked by the minefields and the German resistance centered around the Mill and the St Gilles Chapel. As the day wore on, no tanks could get over the ice and no guns could reach the German lines behind the high hills. With German resistance stiffening, a wide outflanking attack seemed the only effective course of action. At 0830, the Germans repulsed an attempt by the 2nd Monmouths - the “Mons” - to bypass the Hamoul roadblock by attacking across the small Boiceau Brook. The enemy controlled the area from the opposite hill mass, later aptly baptized “Mount Snowdon” by the Welshmen. At 1100, the attack’s failure was obvious and the Hamoul Mill was even reinforced by the Germans at noon. The battalion had not achieved its objective, and eventually the Mons were relieved and pulled back into Hotton. |

|
|
|---|
| AFV Rules Pertaining to this Scenario's Order of Battle |
|---|
|
| Army |
|---|
|


| Heer |
|---|
|


| 3 Errata Items | |
|---|---|

|
All Bren carriers should have a movement value of 7. (Shad
on 2010 Dec 15)
|

|
The reduced direct fire value of the Heer HMG became 5-5 starting with Fall of France. (plloyd1010
on 2015 Jul 31)
|

|
All SS PzIVH tanks should have a movement of 8. (Shad
on 2010 Dec 15)
|