
|
Who Dares, Wins: Bure, South of Rochefort, Belgium Britain's Bulge #3 |
||
|---|---|---|
| (Attacker) Britain | vs | Germany (Defender) |
| Formations Involved |
|---|

| Total | |
|---|---|
| Side 1 | 1 |
| Draw | 1 |
| Side 2 | 0 |


| Overall Rating, 2 votes |
|---|
|
3.5
|
| Scenario Rank: --- of 913 |
| Parent Game | Britain's Bulge |
|---|---|
| Historicity | Historical |
| Date | 1944-12-31 |
| Start Time | 12:00 |
| Turn Count | 12 |
| Visibility | Day |
| Counters | 20 |
| Net Morale | 0 |
| Net Initiative | 2 |
| Maps | 2: 24, 25 |
| Layout Dimensions | 56 x 43 cm 22 x 17 in |
| Play Bounty | 161 |
| AAR Bounty | 171 |
| Total Plays | 2 |
| Total AARs | 1 |
| Battle Types |
|---|
| Hill Control |
| Inflict Enemy Casualties |
| Urban Assault |
| Conditions |
|---|
| Hidden Units |
| Minefields |
| Severe Weather |
| Scenario Requirements & Playability | |
|---|---|
| Britain's Bulge | Base Game |
| Elsenborn Ridge | Maps + Counters |
| Liberation 1944 | Counters |
| Introduction |
|---|
|
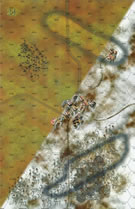
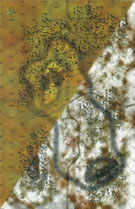
Snow fell all through the last morning of 1944 as the weather continued to deteriorate. Even so, British forces began an advance against the tip of the German salient. The British 6th “Pegasus” Airborne Division sent out numerous patrols to reconnoiter the German positions. Belgian commandos serving in the British Army had recently been converted into a reconnaissance unit mounted on semi-armored jeeps. The unit became the “1st Belgian SAS Recce Squadron” just before they were thrown into the fray in the Ardennes. Under command of the 6th British Airborne Division, the Belgian column of 24 armored jeeps set out along with the 61st Recce Regiment to patrol the road between Wellin and Saint Hubert to cover the British southern flank. On 31 December they reconnoitered the approaches to Bure, a strategic village. |
| Conclusion |
|---|
|
On 27 December, XXX Corps ordered Captain Blondeel’s Belgian Special Air Service (SAS) unit to the village of Froidfontaine south of Beauraing, there to join the 61st Reconnaissance Regiment. That outfit, equipped with light tanks, belonged to the British 6th Airborne Division soon to arrive from England. On 31 December the Belgian paratroopers set out to reconnoiter the village of Bure. Blondeel formed two teams of four jeeps, each equipped with twin Vickers machine guns, one under Lieutenant Van der Heyden, the other under Lieutenant Renkin. Van der Heyden headed for Wavreille, to find access blocked by mines. The men quickly removed those obstacles, but on the outskirts of the village large felled trees blocked the jeeps’ path. Despite these difficulties, the patrol managed to penetrate Wavreille, which it found occupied by the Germans. Van der Heyden withdrew, but before returning to his base he sent Oultremont's jeep to reconnoiter the chapel at Bure where, on the way, they took a prisoner and captured five more Germans in the chapel. For his part, at around 1215 Renkin passed through Resteigne and Tellin, which the Germans had left the night before, then moved towards Bure by gaining the heights to the south of the village. At the top of the hill known to the British as Nipple 360, his jeep came to a stop, its occupants noticing suspicious movements on the edge of the woods. Private Lorphèvre, the rear gunner, jumped from the jeep and strode about 30 meters through the thick snow before the sharp clap of a detonation broke the silence. Covered by his machine guns, Renkin stepped forward but retreated rapidly when an 88mm shell exploded a few meters from the jeep. While descending the hill, a second shell hit the vehicle head-on at about 1500. Paul Renkin, Émile Lorphèvre and Claude Comte de Villermont were killed instantly. Having heard the cannon fire, Lieutenant Van der Heyden headed for the hill, but enemy fire stopped him from reaching it. On 3 January at around 1500 Captain Blondeel and Lieutenant Van der Heyden managed to reach the ridge where Lieutenant Renkin's jeep was hit. They were immediately harassed by mortar shells and machine gun fire which prevented them from retrieving the bodies of their comrades. |

|
|
|---|
| AFV Rules Pertaining to this Scenario's Order of Battle |
|---|
|
| Army |
|---|
|


| Heer |
|---|
|


| 2 Errata Items | |
|---|---|

|
The reduced direct fire value of the Heer HMG became 5-5 starting with Fall of France. (plloyd1010
on 2015 Jul 31)
|

|
The morale and combat modifiers of German Sergeant #1614 should be "0", not "8". (Shad
on 2010 Dec 15)
|
| Recon in Force | ||||||||||||
|---|---|---|---|---|---|---|---|---|---|---|---|---|
This is a clever little scenario depicting a UK reconnaissance action and I think it pulls it off well. I did use hidden units picking two spots for each possible hidden unit and would roll and odd or even to determine if it was actually in the spot when it could be spotted. The Germans focused their defense on Bure and had the mines covering the approach to the town from the east. They defended Chapel Hill with one Grenadier platoon dug-in and a leader with the possibility that the HMG would be there too. Overwatching the hill was the possibility of the ATG on the high ground to the east. The Belgian SAS decided to just go for Chapel Hill, thinking that it would be easy to brush aside one grenadier platoon, capturing five VPs for the Hill and then proceed to recon other areas. This at least should get a Minor Victory. But alas, it was not so as when the attack went I, the Germans popped up the HMG with the grenadiers and rolled a 12 on an opfire against a moving Para platoon killing a step. The SAS then spend most of the scenario trudging through the snow to outflank the hill while a firefight proceeded with the defenders. This got all but one hex of the hill, and the SAS had to close with the Germans to take the hill. They did so taking another step loss and went into a risky last-two-turns assault. They broke the entire German force on the last turn and killed the HMG which gave them three more VPs for a total of eight. But they couldn’t rally the 1 step Para platoon which remained demoralized, which gave the Germans one more VP for a total of five and this ended in a draw. I like this scenario as there are many ways it could be played. |
||||||||||||
| 0 Comments |