
|
La Borquette Lock Airborne #3 |
||
|---|---|---|
| (Defender) Germany | vs | United States (Attacker) |
| Formations Involved | ||
|---|---|---|
| Germany |  |
1058th Grenadier Regiment |
| United States |  |
501st Parachute Infantry Regiment |
| United States |  |
506th Parachute Infantry Regiment |

| Total | |
|---|---|
| Side 1 | 0 |
| Draw | 2 |
| Side 2 | 3 |


| Overall Rating, 5 votes |
|---|
|
3.6
|
| Scenario Rank: 337 of 913 |
| Parent Game | Airborne |
|---|---|
| Historicity | Historical |
| Date | 1944-06-06 |
| Start Time | 05:30 |
| Turn Count | 28 |
| Visibility | Day |
| Counters | 34 |
| Net Morale | 0 |
| Net Initiative | 1 |
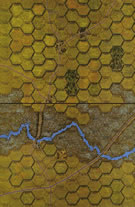
| Maps | 1: 13 |
| Layout Dimensions | 43 x 28 cm 17 x 11 in |
| Play Bounty | 133 |
| AAR Bounty | 165 |
| Total Plays | 5 |
| Total AARs | 2 |
| Battle Types |
|---|
| Rural Assault |
| Surprise Attack |
| Urban Assault |
| Conditions |
|---|
| Off-board Artillery |
| Reinforcements |
| Terrain Mods |
| Scenario Requirements & Playability | |
|---|---|
| Airborne | Base Game |
| Introduction |
|---|
|
The River Douve north of Carentan sported one of the more unique D-Day objectives, the La Borquette lock. D-Day planners believed the lock could be the key to securing the southern and western flanks of the UTAH landing. Controlled by the Americans, the lock could be used to flood the Merderet and downstream portions of the Douve Rivers should German counterattacks prove strong and threaten the bridgehead. If German defenses turned out to be weak, American control of the lock would ensure the rivers were not flooded to prevent the American advance. |
| Conclusion |
|---|
|
The 1st Battalion, 501st Parachute Regiment was badly scattered and the small groups formed after the drop more often than not included men of the 506th Regiment, even more widely scattered that the 501st. Small groups of men under determined leaders set out for their objectives. One hundred and twenty-five men under Colonel Howard Johnson, commander of the 501st, reached the lock just as dawn broke. The few Germans guarding the lock were surprised and it was easily taken, but not so the two nearby bridges. With the arrival of another 100 men, Johnson made plans to capture one of the bridges, but growing German strength forced him to dig in and defend the lock instead. |

|
|
|---|
| AFV Rules Pertaining to this Scenario's Order of Battle |
|---|
| Heer |
|---|
|


| Airborne |
|---|
|


| Army |
|---|
|

| 2 Errata Items | |
|---|---|

|
The reduced direct fire value of the Heer HMG became 5-5 starting with Fall of France. (plloyd1010
on 2015 Jul 31)
|

|
The movement allowance on the counters in Airborne is misprinted. It should be "3." (rerathbun
on 2012 Jan 30)
|
| Each player has an attack opportunity inside a small scenario! |
|---|
|
The Germans set up in the two towns and adjacent to the bridge. The town in 0412 has a lieutenant with morale 6 (random assignment), enticing the Americans to rush the town. The lieutenant in town 0613 (morale 10) succeeds in reinforcing the town, convincing the Americans to withdrawal and take 0711. They then move towards the town, with reinforcements moving into position to pin the Germans in 0412. The slow slog towards the bridge provides time for the 6 morale lieutenant to bring a half step of grenadiers to the bridge. Some arty dropped on the bridge shakes the Germans to a degree, to include demoralizing the 6 morale lieutenant, who flees to 0613 until he finally deserts late in the game. The Germans throw the half step in the path of the Americans, who figure that should be a quick assault. But it takes two turns, and the German morale on the bridge recovers. The Americans go in, expecting heavy assaults to take the bridge. An incredible number of “1” rolls means the bridge is still contested when German reinforcements arrive on the board. The Americans pinning the Germans in 0412 pull back to 0711 to hold the position. The reinforcements split into two groups to deal with the two stacks of Americans, succeeding in reinforcing the bridge just before the Americans seize it. The fighting on the bridge is intense. Each time either side begins to get the advantage, the next assault swings the other direction. In hex 0711 the Americans watch a methodical approach of overwhelming German forces, two platoons of grenadiers and 1.5 of machine guns against three steps of airborne. When the Germans move adjacent, direct fire into the two machine gun platoons results in one step loss and shaking some morale. OBA causes a double demoralization, losing another step and killing the German major. The remaining step is demoralized and splits with a lieutenant in tow. The grenadiers go in anyway, and it’s two hexes of brutal assaults. On the bridge the Americans finally collapse, losing several steps and everyone going to demoralized, including the colonel. The assaults on 0711 finally end with two good steps and one American step demoralized, and the Germans call in their last hope. A mortar barrage knocks off the demoralized step and a lieutenant, but one platoon with a captain hang on to contest the hex. A hard fought draw, with Americans losing one lieutenant and five steps, the Germans losing the major, one captain, one lieutenant, and eight steps. This was a pretty solid scenario, even if it wasn’t one of my favorites of what’s out there. American starting forces should be strong enough to deal with what the Germans have to start, but German reinforcements are just strong enough to counterattack. Each side could afford some losses, but the Americans less so. Time is an issue, but one that forces the action, not drive it. The appearance of who was winning kept swinging back and forth. One or two more turns would probably have been a German victory, but some better assaults earlier by the Americans could have driven a significantly different outcome. I’m not wild about the lack of force variation for the Americans, but those liking small scenarios should try this one. |
| 0 Comments |
| Don't Get Greedy |
|---|
|
The Americans could have had a win on this one, but they got greedy. The paratroopers occupied their first objective before the Germans could move. The Germans quickly occupied the other two. When the American reinforcements arrived, they moved up to take the town objective. They made good progress despite having to assault in the town and gained the advantage over the German defenders. With the second objective under assault, the American artillery went after the German defenders in the third objective just to keep them occupied and prevent them from reinforcing the ongoing assault. They got some very lucky shots on the third objective, leaving the Germans with one reduced platoon in the hex. The paratroopers then stripped the defense of the first objective taken in order to assault and take the third. The idea was to take all three objectives (they only needed two for the win), then redeploy from the assault hexes to hold all three equally. This would force the Germans to retake all three to avoid the draw. The German reinforcements came in early (on the third try) before the Americans could finish taking the town hex. This allowed them to move up and successfully assault the lightly held first objective hex. The scenario ended with the Germans holding one objective hex and the other two still contested. Had the Americans contented themselves with trying for only two objectives, they likely could have kept both of them and won. A good scenario. It came right down to the final turn. |
| 0 Comments |