
|
Eighteenth Brigade Afrika Korps #38 |
||
|---|---|---|
| (Defender) Germany | vs |
Australia
(Attacker)
Britain (Attacker) Italy (Attacker) |
| Formations Involved | ||
|---|---|---|
| Australia |  |
2/12th Infantry Battalion |
| Australia |  |
2/23rd Infantry Battalion |
| Germany |  |
104th Panzergrenadier Regiment |
| Germany |  |
Heer |

| Total | |
|---|---|
| Side 1 | 4 |
| Draw | 2 |
| Side 2 | 0 |


| Overall Rating, 8 votes |
|---|
|
2.88
|
| Scenario Rank: 782 of 913 |
| Parent Game | Afrika Korps |
|---|---|
| Historicity | Historical |
| Date | 1941-05-03 |
| Start Time | 18:30 |
| Turn Count | 27 |
| Visibility | Night |
| Counters | 71 |
| Net Morale | 0 |
| Net Initiative | 2 |
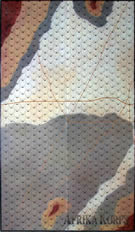
| Maps | 1: AK3 |
| Layout Dimensions | 88 x 58 cm 35 x 23 in |
| Play Bounty | 109 |
| AAR Bounty | 165 |
| Total Plays | 6 |
| Total AARs | 2 |
| Battle Types |
|---|
| Rural Assault |
| Conditions |
|---|
| Anti-infantry Wire |
| Entrenchments |
| Off-board Artillery |
| Reinforcements |
| Terrain Mods |
| Scenario Requirements & Playability | |
|---|---|
| Afrika Korps | Base Game |
| Introduction |
|---|
|
After the failure of the 2/48th Battalion attack on the 1st, General Morshead ordered a larger attack on the Ras el Medauuar penetration of the fortress perimeter. The attack was to be made by 2 battalions of the 18th Brigade. The 2/12th Battalion took the northern flank. |
| Conclusion |
|---|
|
As night fell, the Australian attack dissolved into a series of uncoordinated moves and failed to capture a single German post. The failures had some long-range effects — when word trickled back to Australia, the government in Canberra demanded that their troops be evacuated from the isolated fortress. By the early fall, they had been replaced by British and Polish soldiers. |

|
|
|---|
| AFV Rules Pertaining to this Scenario's Order of Battle |
|---|
|
| Army |
|---|
|


| Army |
|---|
|
| Heer |
|---|
|


| 4 Errata Items | |
|---|---|
| Scen 38 |
In my printing of the Scenario Booklet the visibility is listed as 1830-1945 for full, 12-hex visibility. This is probably a typo which was meant to have 1830-1845 for 12-hex visibility. Note turn 1900 has 8-hex visibility; 1915 4-hex; and so forth. Visibility dropping beginning at 1900 is also consistent with Sc #32 which occurs only two days prior to Sc #38. (Poor Yorek
on 2014 Jan 03)
|

|
All Bren carriers should have a movement value of 7. (Shad
on 2010 Dec 15)
|

|
The reduced direct fire value of the Heer HMG became 5-5 starting with Fall of France. (plloyd1010
on 2015 Jul 31)
|

|
The morale and combat modifiers of German Sergeant #1614 should be "0", not "8". (Shad
on 2010 Dec 15)
|
| There will be Blood Tonight! | ||||||||||||||
|---|---|---|---|---|---|---|---|---|---|---|---|---|---|---|
The Australians take advantage of a strong leader draw (a 10-0-2 and 10-2-1) for the (immobile) 2/23rd Battalion to eschew occupation of all but one of the entrenchments to set up a three-hex firing line aimed at German occupied entrenchment hex 1718. The mobile attacking companies (four) set up as per instructions. German reinforcements arrive on turn one. The first four turns center on repeated heavy DF by the "firing line" vs. the German entrenchment at 1718 and approach of three/four of the mobile companies. One company moves SW ultimately to make an approach/assault of S3(hex 2214). The Australians appear primed for battle double-demoralizing an entrenched HMG. Repeated morale failures allow Australian units to avoid OF whilst German units recover. German reinforcing units manage to assist and block the advance temporarily. German OBA and (single) mortar are unable to crack the firing line units. Middle turns see German successes with OBA and DF bestowing DIS/DEM, but on the other hand, German counter-attack assaults (three) by the reinforcing units all go against the 104th MIR (i.e. despite assaults undertaken with German side on a higher attack col). The panzer III platoon is taken down on two separate assault turns (the accompanying INF having been DEM and fled). On the other hand, however, an Australian counter-assault likewise goes backwards. Still, by turn 11-12, the battle looks very good for the Australians. The Germans wake up around 2200, by rolling three sequential first-fire 6's: ultimately, the defending units (including an ENG) account for 8 steps of Australian infantry. Entrenchment 1718 extracts a very high toll against Australia's finest. German OF and OBA slows, but does not stop the flanking attack and a company of Australian infantry assault a single German INF platoon and the 37mm gun that had self-moved to reinforce. End of Scenario tally: Australians capture one entrenchment hex, S3(2214). Despite the odds, Germans hold 1718 (with a dozen Knight's Crosses awarded!) Germany 14 step losses (four of which are the PzIIIG counting double) Australia 23 step losses. |
||||||||||||||
| 1 Comment |
| Create a Hole in the Africa Korps' Siege Line | ||||||||||||||
|---|---|---|---|---|---|---|---|---|---|---|---|---|---|---|
This was an enjoyable, but frustrating for the Allies, 5-session, face-to-face play-through with the redoubtable, and rapidly-learning, Tubac52 leading the defending German side in yet another of the interminable series of Siege of Tobruk "over the top and take the entrenchment" scenarios. I played the attacking Australians & British who randomly drew a very poor set of random leaders. We played with the defense-favoring FOW optional rule, as well as the excess initiative and smoke-illumination optional rules. My lucky opponent managed a much better leader draw and the Axis reinforcements appeared on the second turn. This is an odd-scenario, as the initial fighting consisted of firing from one set of entrenchments at another. The encounter rapidly degenerated into a die rolling contest, punctuated by the occasional Australian success in taking a position only to lose it in the inevitable German counter attack, while trying to recover morale. The S3 entrenchment in hex 2214 traded hands twice. At one point the Germans had lost 3 of their posts, but two were eventually recaptured in close assaults. Fortunately for the Aussies, the only German tank platoon was eliminated in turn 14 by a pair of successful close assaults, but at the cost of 3 steps of overextended & exhausted Digger infantry. As others have reported, the entrenchment in hex 1718 was a very hard nut for the Australians to try to crack. The sky high German morale was a key factor in this scenario, as was the impact of fighting at night. By the end of our last session of this play-through, the Allies had only managed to take and hold a single entrenchment, and at an unacceptable (24 steps and 6 leaders) cost. The Germans lost only 16 steps and 4 leaders. Twelve of the 27 turns were FOW-shortened, which hurt the attacking Allies far more than the defenders, by derailing the attack sequence. This was a hard-fought German victory, won by a determined and gracious opponent. |
||||||||||||||
| 0 Comments |
PS Modified language as the original wording appeared to say that eight AUS steps had been KIA on three assault defense rolls of '6'. Whilst those three rolls did account for five steps, the cited total of eight steps were lost over the entire course of combat for that entrenchment hex.