
|
Capture of Giarabub Afrika Korps #2 |
||
|---|---|---|
| (Defender) Italy | vs |
Australia
(Attacker)
Britain (Attacker) |
| Formations Involved | ||
|---|---|---|
| Australia |  |
2/10th "The Adelaide Rifles" Infantry Battalion |
| Australia |  |
2/12th Infantry Battalion |
| Australia |  |
2/9th Infantry Battalion |
| Australia |  |
Army |
| Britain |  |
4th Royal Horse Artillery |
| Britain |  |
8th Field Regiment Royal Artillery |
| Italy |  |
Guarnigione di Giarabub |

| Total | |
|---|---|
| Side 1 | 3 |
| Draw | 7 |
| Side 2 | 12 |


| Overall Rating, 23 votes |
|---|
|
2.78
|
| Scenario Rank: 825 of 913 |
| Parent Game | Afrika Korps |
|---|---|
| Historicity | Historical |
| Date | 1941-03-19 |
| Start Time | 16:15 |
| Turn Count | 199 |
| Visibility | Day & Night |
| Counters | 94 |
| Net Morale | 1 |
| Net Initiative | 3 |
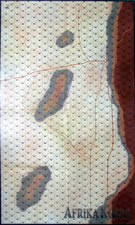
| Maps | 1: AK2 |
| Layout Dimensions | 88 x 58 cm 35 x 23 in |
| Play Bounty | 148 |
| AAR Bounty | 117 |
| Total Plays | 22 |
| Total AARs | 10 |
| Battle Types |
|---|
| Inflict Enemy Casualties |
| Rural Assault |
| Conditions |
|---|
| Entrenchments |
| Severe Weather |
| Terrain Mods |
| Scenario Requirements & Playability | |
|---|---|
| Afrika Korps | Base Game |
| Introduction |
|---|
|
After months spent driving in Italian outlying posts, the Australian-British troops based on Siwa Oasis had forced the Italian garrison at Giarabub into the fort and positions around the oasis of the same name. The hope had been that the bypassed garrison would run out of food and be compelled to surrender. Italian aircraft brought supplies, while the troops applied the desert survival skills learned from decades of fighting the Libyan Arabs. The Allies decided to take the fort by storm, and additional units began to arrive the first week of January 1941. By early March the Italian native troops had almost all deserted and the garrison's daily food ration had been significantly reduced, although the Italians still did not consider surrender an option. The arrival of the 2/9th Australian Battalion, a company of 2/10th and additional British artillery meant it was time to attack. |
| Conclusion |
|---|
|
The sandstorm on the 20th prevented much in the way of operations and the attack resumed on the 21st when the fort was taken. The Australian formation quickly departed as their brigade (18th) was preparing to ship out to Greece. |

|
|
|---|
| AFV Rules Pertaining to this Scenario's Order of Battle |
|---|
|
| Army |
|---|
|


| Army |
|---|
|


| Regio Esercito |
|---|
|


| 4 Errata Items | |
|---|---|
| Scen 2 |
Giarabub Garrison setup: in the third sentence replace "1610" with "1510." (campsawyer
on 2010 Apr 29)
|
| Scen 2 |
The Allied OOB indicates 4 x 25pdrs. There are only 3 in the counter-mix AND only 3 x Brens allocated for the scenario. The 4 shown is a typo and should be 3 x 25pdr's (vince hughes
on 2012 Mar 07)
|

|
All Bren carriers should have a movement value of 7. (Shad
on 2010 Dec 15)
|

|
The L3/35 with ID# 1505 has the incorrect movement factor printed on it. The movement factor should be 7, not 8. (plloyd1010
on 2014 Nov 24)
|
| Close fought battle. | ||||||||||||
|---|---|---|---|---|---|---|---|---|---|---|---|---|
The Aussies, after a mismanaged first day's fight, got their act together and send the Italians streaming for the exit. With a well defended original line the Italians held their own for a while but the line was broken during the second day. Not, however, before the Aussies lost their shirt in frontal assaults. On the other hand, there was no other way to go. Once the line gave way, the units in the open were easy pickings. |
||||||||||||
| 0 Comments |
| Wrangle At Giarabub | ||||||||||||||
|---|---|---|---|---|---|---|---|---|---|---|---|---|---|---|
IntroductionAnother solid scenario in Afrika Korps. The key to victory for the Commonwealth forces here is patience. Historically, Giarabub was a classic set-piece battle, a kind of fight at which the Australian Army was without par, but two principal factors complicated the situation for the Commonwealth commanders. Firstly, the Italian Army was also in its element---a prepared defensive position in the North African desert. Secondly, the Australians were needed in Greece, which was deemed a more important theatre of operations than the Giarabub Oasis. Tactically, the reinforced 2/20/9 (9th Battalion, 20th Infantry Regiment, 2nd Australian Imperial Force, more commonly 2/9), trained for exactly this sort of fight, gave the Commonwealth forces an advantage over the Italians, whose excellent defensive position was undermined by leadership ranking somewhere between mediocre (best case) and appalling (worst case), and materiél shortages. Strategically, the fight for Giarabub should have benefited the Axis, and this is reflected in the Victory Conditions---thus the severe restriction on Australian losses. In reality, the Axis was not much of an alliance, and it's doubtful that the Italian Army consoled itself over the defeat by noting its forces had held up and weakened important Australian units for the benefit of their German Ally in Greece. The PlansThe two forces could not have more divergent aims in this fight. The Australians need to take the fortress and its supporting Oasis without taking moderate losses. The Italians need to hold the fortress and its Oasis against a force with the time and the materiél to overwhelm them. Realistically, operational conditions like these make this sort of battle a losing proposition for both sides. For the Commonwealth, the decision to hasten the assault and take the Oasis was informed by the worsening situation in the Balkans; for the Italians, holding the ground had become pointless, as their forces there could no longer operate effectively. By this point, however, both sides had passed the point where reasonable Staff assessments could retrieve the situation. The Commonwealth PlanThe Commonwealth forces have a resources problem---the Germans in the Balkans are a much more important foe than the Italians in Giarabub Oasis. This means that the Commonwealth commander has conflicting orders; take Fort Giarabub while suffering only light casualties, and do so in under three days' time. The choice is therefore between rushing the Italian positions, or advancing by stages using fire and manoeuver to attrit the Italians until a final push can be made. Given the casualty restrictions, the slow-but-steady approach is the only one having hope of victory for the Commonwealth forces. The problem is that the Australians have a very limited mobility. The British 25-Pdrs must be got into position, as must the HMGs and 3-Inch Mortars. Only then can the Australians tell off a mobile reserve to exploit their superiority in numbers. The Italian PlanFor the Italians, planning comes down to deployment decisions, as they need to both hold the fort and tear up the attacking Australians. The Australians have better morale, better Leaders, more troops, and better supporting weapons. But the Italians have a few key strengths. Their troops have Entrenchments, which confer fairly significant advantages to the defender, the Italians have a mobile armoured unit and three trucks, the Australians start out divided, movement during night Turns is extremely foolish, and the Italians have plenty of Leaders to provide for a solid defence; and above all, they are on the defensive. Admittedly, these are fairly slender reeds to hang a hope of victory on, given the huge amount of time and the very powerful Australian force. The BattleThis is a long, long, long battle. Despite a willingness to concede, the players agreed to move the game to a side table and continue slogging it out to the end. The Italians could do little to interfere with the Commonwealth forces as they disposed to attack the fort, and the availability of Night Turns allowed the Australians to dig in while within range of the Italians without receiving fire. The 25-Pdrs gave the Commonwealth 14 Turns of dominance, and the Commonwealth player used them wisely; the fort proper was taken under a hail of 25-Pdr fire. The Italians were effectively pinned by two powerful groups of Australian Rifle platoons, while the small mobile force, mounted in the four Bren Carriers, kept the Italians off-balance. An attempt by the Italians to use their three trucks and the L3/35 to knock out the 3-Inch Mortars was quite successful, but led to recklessness; an attempt to push on against the 25-Pdrs came to grief on the guns of the 2-Pdr battery and an HMG platoon. ConclusionIn the end, the Italians were eliminated and the Australians tactically victorious. Operationally, their losses---8 Steps---were too severe to call Giarabub a victory. This seems the most likely outcome, and is the historical one. |
||||||||||||||
| 0 Comments |
| Textbook reduction of a fort | ||||||||||||
|---|---|---|---|---|---|---|---|---|---|---|---|---|
In this scenario, a large Australian force is tasked with reducing an Italian occupied fort. The scenario is very long but should not take the full 199 turns to complete (I've played this three times now and the longest I've gone is turn 68). This was actually an interesting scenario in that it allowed for a good amount of doctrine and a disciplined approach to be employed. I used a textbook approach to reducing the fortress. As the Australians advanced, they started to prep the fortress with fire from the on-board 25pdrs. Once the Italian defenders were disrupted, the Australians closed in and applied direct fire to further disrupt and demoralize the defenders. Casualties were surprisingly light as most of the defenders were compelled to surrender. The same tactic was applied to the Italian dug-in positions. Australian mortar fire was used to great effect as they were able to see their targets (increasing column shift on the bombardment chart). Same, effect and same end result... disruptions, followed by further disruptions/demoralization, and ultimately, surrender. It was a good scenario to experiment with different tactics as time is on the side of the Australians. The end result is inevitable for the Italians although they can secure a victory with aggressive play. I might replay this (yet again) with a more aggressive Italian posture. |
||||||||||||
| 0 Comments |
| Aussies crush Italians with minimal losses | ||||||||||||
|---|---|---|---|---|---|---|---|---|---|---|---|---|
The Italians focused the bulk of their strength at the fort, with all HMG units in and around it, as well as the arty units. Prior to the sandstorm, at night, the Aussies crawled forward, setting up to the north and the south of the Axis position, and then they dug in. After the sandstorm, the action started. It took 22 turns for the Italians to be beaten. For nearly the entire attack, the Australians just blasted away, waiting for units to break and be whittled down. One the -2 morale leader was killed, the rot set in for the Italians. In the last few turns, the Australians advanced en masse. They lost 3 steps, well under the 6 to prevent a win. A handsome win in the end, but a scenario that the Italians had little chance in, in terms of play balance. |
||||||||||||
| 0 Comments |
| Italians hope for the draw. | ||||||||||||
|---|---|---|---|---|---|---|---|---|---|---|---|---|
Note: errata – Set-up forces call for 3x BREN, but 4x 25-pdrs. Only 3x 25-pdrs are in the counter-mix, so I suspect this is a typo. Only the 3x 25-pdr were used. Late Afternoon Day one The Australians advance to the west and camp just outside the Italian artillery range. The 25-pdr are ready to bombard. To the north, D Company digs-in for the night. The Australian decide to hold their position until nightfall. The Italians move their south-east observers closer to the fort. By 2300 their repositioning is complete. Night 2300 March 20-0400 March 21 The Australians use the cover of night to advance their main force 1200m. By 0400 all forces are repositioned and Dug-in Day Two A large sandstorm hits the area and all forces are at a standstill. The storm lasts for 26 hours and finally clears the next morning. When the sand settles, the Australians and Italians find themselves facing one another under the morning Sun. The Battle begins… Day Three British 25-pdrs fill the sky and concentrated Australian HMG fire attacks the Italians. The forward Italian HMG is lost and their AA crew are eliminated. Italians respond by advancing their L3/35 in the north to disrupt D Company, while their own mortars and artillery attempts to silence the British guns. The 20th Australian Brigade advances 200m as a lucky bombardment of Italian artillery and mortars takes out one of the three British 25-pdrs! (1) Italian HMG in the fort begin to engage in long range fire against the Australians as they dig into a new line. The Australian 20th completes its digging-in, but not before half a platoon is lost to the fort HMGs (2) British BREN carrier picks up the Australian 2-pdr (in anticipation to use against the L3/35. The frontal Italian HMG platoon is demoralized and flees upon taking fire from a mass of Australian HMGs. Australian foot troops advance again and are now 400m from the foot of the Italian fort. Australian infantry storms to the wall of the fort. Australian HMG fire reaches the Italian 65mm Artillery and eliminates a battery. British 25-pdr eliminates an Italian Mortar. The assault on the fort begins. Demoralized Italian infantry refuse to surrender and flee to the northwest. D Company advances on the L3/35. The L3/35, concerned about her safety, flees back to the Italian line. Fleeing Italian infantry is hit by the British 25-pdrs. The Australians lose two half platoons by the fort! (4) Australian demoralized infantry flees the fort and is hit by Italian HMG fire (5) Australian forces eliminate the Italian mortars, artillery, leaders and trucks trying to flee. A lucky Italian HMG shot at extreme range eliminates half an Australian HMG platoon. (6!!!) The L3/35 is assaulted by D Company and loses half of its tanks. Two Capitanos surrender along with their infantry. The L3/35 is destroyed by D Company. An Australian HMG platoon is eliminated at the fort (8) An Italian HMG rolling another (1,1) eliminates half an infantry platoon. This time in the north. (9) An assault in the fort with the British engineers loses another half infantry platoon (10). With that, the Italians surrender and the battle is over. AftermathThis scenario was aborted at this time, as I saw no way that the Italians could stop the Australians succeeding in their objective, which would technically constitute a draw. The Australians were too reckless and consequently took too many casualties. The self-spotting of the 25-pdrs is not worth the risk of putting themselves under the Italian mortar/artillery fire. Better to hold the 25-pdrs back and use the spotting of one of their leaders until the Italian guns are silenced. As it seems absolutely impossible for the Italians to survive two days of fighting against a much superior force (in numbers, arms and morale) it is virtually a given that the Australians will succeed in their objective. Consequently, the best the Italians can hope for is a draw by eliminating 6+ Australian steps. I suggest that the victory condition should be tweaked to: Australians win if no Italian unit is left on the map AND they have lost fewer than 6 steps. If the Australians don’t win, the Italians do. |
||||||||||||
| 0 Comments |
| Patience is a Virtue | ||||||||||||
|---|---|---|---|---|---|---|---|---|---|---|---|---|
On my second go at this Scenario the Australian were able to win. The following were key to their success:
Full Pictoral Report can be found here: http://www.boardgamegeek.com/thread/390988/ |
||||||||||||
| 0 Comments |
| This time the Italians were ready | ||||||||||||
|---|---|---|---|---|---|---|---|---|---|---|---|---|
In first looking at this scenario I was worried that this would be one to last a month or more, but then I looked at the SSR's. This looks long 199 turns, but 40% of them are unplayed due to a sandstorm. Also there are night turns that restrict the units as well. Beyond this it looked interesting as the Aussies need to capture and destroy all the Italian units, but the Italians just need to kill 6 Aussie steps. I thought that this was a bit low, but I was to realize how low it is as the game played out. The Italian setup was grouped around the entrenchments with some units on the edge of the oasis just to the east of the entrenchments. These units would look to protect the backside of the Italian fort from the Aussie's that setup to the north. The goal was to keep all the Italian units together to maximize their firepower. The Aussies setup to the northeast and southeast corner of the map. The southwest group has a long march to get to the Italian fort while the northern units should be able to engage to picket units near the oasis. Well, as the Aussies get close the Italian fire opened up, initially with some disruption results, but then the 81mm Mortars got into the action. This killed two Aussie INF steps within two turns. Italian direct fire eliminated a third step. This gave the Italians a big boost and forced the Aussies for step up their attack, but this resulted in 3 more step losses due to OP fire and a Italian assault. Six steps lost by the Aussies, game over after 7 turns. |
||||||||||||
| 0 Comments |
| Annichilazione | ||||||||||||
|---|---|---|---|---|---|---|---|---|---|---|---|---|
Scenario veramente lungo. Ma, dirò subito, per nulla interessante. Le forze in gioco sono fortemente sbilanciate a favore dell'alleato che non può che vincere. La strategia più comune è quella di avanzare con calma, prendere posizione il più vicino possibile alle linee nemiche e sferrare l'attacco dopo un sostenuto bombardamento. Gli australiani avanzano con calma. Una prima scaramuccia si ha senza grandi risultati con le posizioni avanzate della compagnia D. Gli alleati avanzano anche di notte a dispetto della disorganizzazione che si ottiene (hanno tutta la notte per recuperare). Gli italiani da parte loro, tentano qualche attacco tentando di eliminare qualche step. Nella prima fase di avanzata del primo giorno l'artigleria inglese riesce a utilizzare 6 colpi creando non pochi problemi alle unità italiane trincerate. Dopo il primo giorno le unità italiane hanno perso 5 step. Gli alleati intanto si dispongono, durante la notte, a 2 hex dall'italiano. Preparano posizioni difensive (DUG-IN) con unità pronte a pesante fuoco diretto sulle posizioni difensive italiane. Dopo un potente bombardamento inglese e potenti attacchi diretti australiani le unità italiane vengono eliminate con assalti chirurgici o costrette alla resa. L'alleato vince. Scenario veramente inutile. Forse solo interessante dal punto di vista storico. Gli iatliani possono vincere solo con una forte dose di fortuna. Ma mi domando .... E se l'italiano sin dal primo turno va a caccia dellla compagnia D ? |
||||||||||||
| 0 Comments |
| An unexciting rare win for the good guys | ||||||||||||||
|---|---|---|---|---|---|---|---|---|---|---|---|---|---|---|
Played over 3 sessions this is one of the more unusual scenario's played over the course of three days it is very long, however a sandstorm take place on the second day which rules out all movement and combat, a lot of the turns are at night and a special rule has all units who move at night disrupting so that really means that over there is only one full day of fighting. The Italian garrison sets up in one corner of the map and that for them is it in terms of movement, on the evening of the first day the Aussies move up to the Italian lines and under the cover of darkness virtually surround the Italian's. The Aussie's then dig in and sit out the sandstorm and wait for the orders to attack. This took two smallish session and is quite tedious in many ways, the Italians shell the Commonwealth force as they move up but at fail to cause any casualties, there is a lot of rallying units and shuffling of lines but to be honest the whole scenario could have started at 0615 on the final day with just a little adjustment of set up instructions. As the Commonwealth player if I had written down my ideal deployment it would have been very similar to how my forces had ended up after the sandstorm, I had suffered no losses and now it was just a question of wrinkling the Italians out of their dugouts I had plenty of time to do this and all then required is the patience to wait for the right die rolls. The British Artillery has only limited ammunition enough for 14 shots but I was determined to hit the enemy on board artillery first getting rid of any A/T capability thus releasing the Bren carriers to support the infantry in their attacks. I was also prepared to fire on the 16/11/7 direct fire columns for a long as it took to get results. The plan such, as it was, worked perfectly and I was blessed with instant success, lucky die rolls and before 3 hours had elapsed 10 plus Italian steps had been eliminated and when a very lucky A/T shot took out the Italian tankette Vince had had enough and conceded. I am sure that there would have been some Aussie losses in the final assault as Vince still had six entrenched HMG's to be dealt with but I would have kept to the game plan of taking as little risk as possible and used firepower to overwhelm the final Italian units, That is the issue with this scenario it is a big scenario but there is little for the Italian player to do except grin and bear it. Of course if the Aussie player charges in adjacent to the Italian dugouts and entrenchments then he will lose but a cautious, deliberate attack should win the day for the Allies. |
||||||||||||||
| 0 Comments |
| Bored, Bullied & Beaten - I Just Gave Up ! | ||||||||||||||
|---|---|---|---|---|---|---|---|---|---|---|---|---|---|---|
This scenario was played over skype in 3 sessions with wayne Baumber. I chose this scenario because when I saw the 199 turns demanded, I thought it might be fun as it would probably be like a mini-campaign game ? ...... Wrong ! Instead we were left with a scenario where the first 47 turns (yes 47 !) could have been ignored as they involved the Aussies (under Waynes command) slowly moving up and getting into positions that could have been part of a set-up in a much lesser length scenario. As the Italian commander, I tried to disrupt this advance as much as was allowed, but most times, it ended in the loss of an artillery spotting leader or a shot up platoon. By the time the scheduled sandstorm arrived, the Australians were very much in a position to launch their assault as they wanted. When the Aussie assault got under way, they simply loaded up fire-groups and patiently blatted away until each hex crumbled. This continued for sometime with the Italian line slowly disapating. It was quite depressing to see this go on before my very eyes with little recourse to any meaningful answer. My aim was to wait for the required Australian assault on the entrenchments to inflict losses on him, but Wayne being the experienced PG player he is was not going to waste the remaining 70 odd turns in a hasty assault when he could continue whittling me down. The final straw came with an AT shot of some distance. Requiring an 11+ to knock out some Italian L3/35 tankettes, I erroneously thought that a difficult shot was in prospect for him. Having already suffered a number of X results from direct fire, surely this one could not go against me too. Of course, that turned out to be in error as the 2pdr shells ripped throught the dug-in AFV's at 1600m. Enough was enough, I could not take any further beyond the mass of turns already played and see my forces wiped out with such little to dish out in return. This was a consumate win by Wayne without mistake. A player of his experience showed how a simple methodical approach to this scenario should slowly grind down the Italians. Could I have knocked out 6 Australian steps ? Well, I had achieved none by the time game ended and I really don't think he would have sent his men willy-nilly with bayonets fixed into my trenches ............. I think I saved myself a bit of free time by conceding as well as a lot of frustrated angst ! Hated this one. A lot of invested time for a miserable and unexciting scenario (IMO) a bland '1' rating from me. |
||||||||||||||
| 0 Comments |