
|
Like a Stone Wall Aachen 1944 #9 |
||
|---|---|---|
| (Defender) Germany | vs | United States (Attacker) |
| Formations Involved | ||
|---|---|---|
| Germany |  |
116th Panzer Division |
| United States |  |
29th "'Blue and Grey" Infantry Division |
| United States |  |
2nd "Hell on Wheels" Armored Division |

| Total | |
|---|---|
| Side 1 | 0 |
| Draw | 1 |
| Side 2 | 0 |


| Overall Rating, 1 vote |
|---|
|
4
|
| Scenario Rank: --- of 913 |
| Parent Game | Aachen 1944 |
|---|---|
| Historicity | Historical |
| Date | 1944-10-13 |
| Start Time | 08:45 |
| Turn Count | 20 |
| Visibility | Day |
| Counters | 130 |
| Net Morale | 0 |
| Net Initiative | 2 |
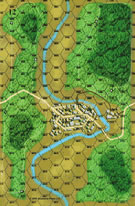
| Maps | 2: 12, 23 |
| Layout Dimensions | 56 x 43 cm 22 x 17 in |
| Play Bounty | 173 |
| AAR Bounty | 171 |
| Total Plays | 1 |
| Total AARs | 1 |
| Battle Types |
|---|
| Inflict Enemy Casualties |
| Urban Assault |
| Conditions |
|---|
| Off-board Artillery |
| Randomly-drawn Aircraft |
| Reinforcements |
| Terrain Mods |
| Scenario Requirements & Playability | |
|---|---|
| Aachen 1944 | Base Game |
| Battle of the Bulge | Maps |
| Cassino '44 | Counters |
| Elsenborn Ridge | Maps + Counters |
| Road to Berlin | Counters |
| Introduction |
|---|
|
When Gen. Leland Hobbs claimed his division was too weak to leave their defensive positions, the Stonewallers were ordered forward instead. The 116th Infantry Regiment was the direct descendant of the 2nd Virginia, which had been the senior regiment in Gen. Thomas Jackson's brigade at Manassas the day he earned the moniker Stonewall. They had taken their licks in the first wave to hit Omaha Beach on D-Day, and they had learned quite a bit since then. They'd need all that hard-won knowledge today against an equally determined foe. |
| Conclusion |
|---|
|
The Stonewallers quickly reached Wurselen, where unbeknownst to them the 116th Panzer Division had concentrated yesterday. Heavy fighting developed and the American advance stopped cold. Captain James Burt of Company B/66th Armored Regiment would earn the Medal of Honor for his exploits here during the next few days. |

|
|
|---|
| AFV Rules Pertaining to this Scenario's Order of Battle |
|---|
|
| Heer |
|---|
|


| Luftwaffe |
|---|
|

| Schutzstaffel |
|---|
|

| Army |
|---|
|


| 5 Errata Items | |
|---|---|

|
The reduced direct fire value of the Heer HMG became 5-5 starting with Fall of France. (plloyd1010
on 2015 Jul 31)
|

|
All SS PzIVH tanks should have a movement of 8. (Shad
on 2010 Dec 15)
|

|
The morale and combat modifiers of German Sergeant #1614 should be "0", not "8". (Shad
on 2010 Dec 15)
|

|
The SK 7/2 appearing in 1940: Fall of France is actually a SK 6/2, but misprinted by APL. Hence it should be unarmored in that game. The SK 7/2, which appears in other games is correctly printed with an armor of 0. (plloyd1010
on 2022 Apr 28)
|

|
All SPW 251s have an armor value of 0. (Shad
on 2010 Dec 15)
|
| Stonewall Brigade stopped short | ||||||||||||
|---|---|---|---|---|---|---|---|---|---|---|---|---|
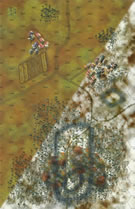
This solo effort was very interesting with plenty of Americans including M4/76s to try to take on the German tanks. The scenario highlights the Stonewall Regiment, made famous by its history during the American Civil War. In this engagement they are attacking the German 116th Panzer Brigade, it to had build up a history during the war. This scenario has the American Regiment attacking two towns that the 116th is holding. The Americans have the numbers in INF, HMG, ENG and armor. The morale is equal for both sides and the Americans have twice as much artillery and also ground attack aircraft. The Germans have the setup and can pin the Americans back to the edge of the board if played well. The American advance is tricky as the Germans can pin them back and there are three approaches to the towns. The first is right up the middle of the boards. This is more direct but open to cross fire from both towns and reserve positions behind the towns. The second is on board 10 through the light woods on the hill. This will be protected but it is the farthest away from the towns. The last is on the east side of the board this has some cover but will be open to fire from Germans on the small hill, but it will be quick to get to the first town. This is the approach the Americans took to attack. The American advance had combined stacks of armor, INF and HMG's to push on the hill. Germans OP fire was well trained and started to cause disruptions and demoralizations quickly. The mass of Americans were able to get to the hill and with some heavy assaults and OBA cleared the hill and moved toward the town. But casualties were heavy and the Americans had to pause to recover units. Small groups continued to push toward the town and the remnants of the Germans streamed back to the town. The towns defenders had some advantages, such as a 75/41 AT gun, remnants of an armored car platoon and good leaders. The Americans massed there troops including a M4/105 to assault the town with. Once the assaults began the Germans had a hard fight, the American numbers were taking a toll on the Germans, but they still managed M1 and M2 to disrupt the American assault teams. There hope would come from the reinforcements of Panthers, PzIVH's and Grenadiers. These appeared on turn 12 and went straight into the battle for the town. The PzIVH moved behind the town to prevent the American tanks venturing into the assaults. The Panthers positioned on the north-south road just outside of the M4/76 range. The started hitting the advancing Americans. The Americans had pushed up the middle of the board but were hit with OP fire from the other town and the Panthers. They made the best of it taking some of the dugin German positions outside of town but could not press on. In the other town, fight was out of control. American assaults destroyed several GREN's but they were disrupted. German counterattacks took the control of the newly won town hexes. Even a German PzIVH ventured into the the town to face the M4/105. Winning the initiative, both shots missed and the M4/105 escaped. Assaults continued and the Americans were able to win only two town hexes and contest the other three. The other town was left in the German hands in the the VP's were equal 45 VP's each. Leaving the game as a draw. A very good medium-large counter scenario with plenty of twists and turns with the urban assault. The Americans must press their advantage of numbers while the Germans must keep plugging holes and counter attack at every chance to hold the Americans. I am not sure they can win a major victory unless they get some great OBA or OP fire rolls as the Americans have a very large number of troops. The Americans fought to a draw due to some key initiative losses that let the Germans counterattack and stop their initiative. If the rolls went another way the Americans could have had a win. |
||||||||||||
| 0 Comments |