
|
Charge of the Light Company Aachen 1944 #3 |
||
|---|---|---|
| (Defender) Germany | vs | United States (Attacker) |
| Formations Involved | ||
|---|---|---|
| Germany |  |
183rd Volksgrenadier Division |
| United States |  |
2nd "Hell on Wheels" Armored Division |

| Total | |
|---|---|
| Side 1 | 4 |
| Draw | 4 |
| Side 2 | 2 |


| Overall Rating, 8 votes |
|---|
|
3.25
|
| Scenario Rank: 574 of 913 |
| Parent Game | Aachen 1944 |
|---|---|
| Historicity | Historical |
| Date | 1944-10-06 |
| Start Time | 10:00 |
| Turn Count | 8 |
| Visibility | Day |
| Counters | 52 |
| Net Morale | 1 |
| Net Initiative | 1 |
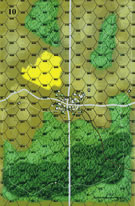
| Maps | 1: 10 |
| Layout Dimensions | 43 x 28 cm 17 x 11 in |
| Play Bounty | 137 |
| AAR Bounty | 135 |
| Total Plays | 10 |
| Total AARs | 7 |
| Battle Types |
|---|
| Inflict Enemy Casualties |
| Urban Assault |
| Conditions |
|---|
| Entrenchments |
| Off-board Artillery |
| Severe Weather |
| Terrain Mods |
| Scenario Requirements & Playability | |
|---|---|
| Aachen 1944 | Base Game |
| Battle of the Bulge | Maps + Counters |
| Cassino '44 | Counters |
| Introduction |
|---|
|
Combat Command B of 2nd Armored Division was having a difficult time subduing Waurichen. The muddy conditions had restricted all vehicle movement to the one road leading into town, so with little chance of being outflanked the defenders concentrated all their anti-tank weapons on the road. Twenty-one Sherman tanks were destroyed, but before accepting defeat the Americans decided on one last desperate gamble. |
| Conclusion |
|---|
|
The Americans led with their Stuart light tanks, sending them down the road toward the town at full speed. Surprisingly, they made it into Waurichen! There they encountered a platoon of Sturmgeschutz, so they just kept going at full speed and danced around creating confusion. This allowed the rest of CCB to enter the town and engage the enemy. After stiff fighting and a German counterattack, the Americans emerged victorious. With only 3 Stuarts lost the desperate ploy was praised as an outstanding tactical success. |
| Additional Notes |
|---|
|
Allow the M5's to enter the map on any hex, but must pay extra MP for each off-road and non-town hex. |

|
|
|---|
| AFV Rules Pertaining to this Scenario's Order of Battle |
|---|
|
| Heer |
|---|
|


| Army |
|---|
|


| 5 Errata Items | |
|---|---|

|
The reduced direct fire value of the Heer HMG became 5-5 starting with Fall of France. (plloyd1010
on 2015 Jul 31)
|

|
Strongpoints are single step units and can be eliminated with X results like any other single step unit. (Shad
on 2010 Dec 15)
|
|
|
The standard mix of strongpoints may be downloaded from Avalanche Press: http://www.avalanchepress.com/German_Strongpoints.php This is the standard mix found in Airborne, Airborne-IE, and Edelweiss Expanded. The strongpoint mix in Cassino '44 is different from that of other PG games. (plloyd1010
on 2012 Feb 01)
|
|
|
Strongpoints are affected by the terrain in their hex just like any other unit.
Even though they can't move, they can attack using Assault Combat if an enemy unit moves into their hex.
They may not dig in or benefit from entrenchments.
(rerathbun
on 2014 Apr 21)
|

|
The movement allowance on the counters in Airborne is misprinted. It should be "3." (rerathbun
on 2012 Jan 30)
|
| Charging in Concrete Shoes | ||||||||||||
|---|---|---|---|---|---|---|---|---|---|---|---|---|
The German defenses were strong. Entrenchment and strongpoints created a layer in front of the town with infantry, AT guns and Stugs inside the town. The US deployed infantry heavy to their right, looking to hook the German flank in to the town. Initially, the US had success, disrupting the German ATGs and getting their armor in front of the town. However, German OBA disrupted US infantry trying to get to the town and the strongpoints held up the US advance. The German AT guns recovered and eliminated a M5 and then a M4 platoon. The US took a couple of entrenchments on their right, but the Germans kept most of the town for the victory. |
||||||||||||
| 0 Comments |
| Scenario mods make a difference | ||||||||||||
|---|---|---|---|---|---|---|---|---|---|---|---|---|
Rate 3 for this play. The rating at the top is the average for all of my plays. Usually I don't play a bad scenario twice, but this this one I had to make some mods to make this one better. I tried a couple of mods, with the one making the most impact was adding a visibility restriction for the first two turns. Restricting LOS to 2 hexes for the first two turns will allow the Americans to get established on the board, but they cannot get too close otherwise the will get pounded by the Germans. It still is not easy for the Americans, they will still need to close and assault the Germans in the bunkers. In my play here is what happened: Turn 1 Infantry moves on the board on the right side of the road, while the M4's and M4/76 move up the road staying 3 hexes out. Germans check their ammo and bore sight their guns. Turn 2 The infantry move up two hexes from the German line. German Op fire starts to take a toll with disruptions and demoralizations. American OBA strikes at the AT gun and demoralizes it which triggers the tanks to move forward. The Germans hold the AT fire for the next activation and use their OBA to get the first step loss of the game. (Note at this point I was wondering about the visibility rule). The German Stug gets a shot at the M4/76 and kills one step. Fow ends the turn. Turn 3 American units start to recover as American AT fire kills a step of the Stug and demoralizes the remnants. Germans turn to the OBA to try to strike at the Americans, more INF and HMG are disrupted. With the German AT limited, the M5's move up to try to get close to the entrenchments. German HMG fire misses and the American units that were disrupted and demoralized start to recover. Turn 4 The Germans start with direct fire on the M5's but again miss. The M4's turn to support fire for the infantry and M5 assault. They demoralized the 20mm AA gun and disrupt the GREN with them. The American Major orders an INF and ENG to move to assault the 20mm AA gun and GREN. The M5's assault the demoralized AT gun and supporting GREN. They score a kill but two M5's are disrupted. A reinforcing GREN sneaks into the entrenchment. Other American units recover as well as the reduced Stug recovers to a disrupted status. Turn 5 The American INF and ENG assault the 20mm AA and GREN scoring a step loss but fail to inflict damage on the Americans. German OBA hits some of the recovering INF units and disrupts them again. American OBA hits the bunker with the HMG and disrupts it. German leaders struggle to recover their disrupted units and provide OP fire against the advancing Americans. Turn 6 Big turn for the Americans. The M5's, recovered during the last turn score a 2 step loss, knocking out the GREN that snuck into the hex in the prior turn. The AT remains disrupted as well as the reduced GREN. The INF/ENG assaulting the 20mm AA and GREN score a kill and the Germans loss the 20mm, the remaining GREN is demoralized despite the help of the German LT in the hex. The Germans look to hold the the town and have a good chance. Both strongpoints are 5-3 and 4-4 respectively. Behind them German GREN's and the STUG struggle to recover. Turn 7 M5's attack again with another step loss, this time the AT gun is lost and the reduced demoralized GREN, double demoralizes leaving the bunker in American hands. M4 support fire on the town disrupts the 5-3 strongpoint. The Germans look to recover more units, but first first the OBA at the advancing American INF's scoring another step loss. But the Americans take the other entrenchment that they had assaulted. American HMG's move up to take the next assault on the town. Turn 8 Final turn, the M5 moves into the town to attack the 5-3 strongpoint, reduced for being demoralized. They demoralize the strongpoint as the second group attacks the other town with the 4-4 strongpoint. The combine assault team of INF/HMG/ENG make the difference, step loss so they take the town hex. A third group of M4/INF/HMG go after the HMG bunker and score disrupt the HMG and GREN, but the INF get demoralized. Final score Germans 18 Americans 15. This is a better score than the first game which the Germans had over 20 points to the American 1. |
||||||||||||
| 0 Comments |
| Suicide Charge | ||||||||||||
|---|---|---|---|---|---|---|---|---|---|---|---|---|
Rated 1 for this play. The rating at the top is an average for my plays This is a short scenario, but this one needs some work, it is definite unbalanced in favor if the Germans. The Americans are restricted by weather conditions and time to make a frontal attack on a fortified position. The Germans have entrenchments, setup and the advantage of cover to stop the American attack. The Americans have a slight advantage in morale, but this is not enough to overcome the movement restrictions. German setup is simple entrenchments in front of the town, strongpoints to back them up. German Stug in the town and the AT gun in the entrenchments with the HMG and 20mm AA gun. GRENs support the units in the entrenchments and leaders setup for best control. The Americans must enter the board under fire. The vehicles are restricted to the road into town so all the Stug and 75mm AT need to do is bore-sight on the road. The Germans also have OBA that will disrupt and demoralized the Americans even before they get to the towns edge. In my play the American M4's were wipe out when they entered the board, some M3's made it in but were soon dispatched by HMG and AT fire. The infantry was cut up and demoralized, yet a couple made it to the first entrenchments in front of the town, but we locked in assaults that they could not finish. In the end the Germans had a Major victory without a problem. This scenario needs some setup restrictions for the Germans as well as the American movement restrictions. It is too easy for the Germans to put up a wall of troops behind the entrenchments and town hexes and the Americans have little option to overcome them. Even the historical outcome is impossible to achieve with this scenario with the way that this is currently written. Rated 1 |
||||||||||||
| 0 Comments |
| Change from Mike Perryman | ||||||||||||
|---|---|---|---|---|---|---|---|---|---|---|---|---|
After seeing my report of this scenario, Mike Perryman emailed and gave me another option to try to make this a bit more playable and I am happy to report it does. The change was to allow the M5's entry on any hex and pay an extra point for all off-road and non-town hexes. This played out with an American win, but it now gives the Germans something to think about in there defense of the town. The Americans can flank the town which will require the Germans to shift men from there front to the sides. This will make the front slightly weaker, but more important it gets the Germans moving not just firing at the Americans. |
||||||||||||
| 0 Comments |
| Aachen 1944, scenario #3: Charge of the Light Company | ||||||||||||
|---|---|---|---|---|---|---|---|---|---|---|---|---|
Aachen 1944, scenario #3: Charge of the Light Company *When I set this scenario up, I noticed you should pull the counters from Elsenborn Ridge not Battle of the Bulge as it requires an M4/76 and I pulled my German counters from Cassino for the Strong Point counters. I also thought how can the Americans win this, with only eight turns, Mud that keeps all the Vehicles on the South Road and both side with equal Artillery? *Ok, let give it a shot and see? I tried doing what the historical conclusion said in the scenario and charged all three units/counters of M5-Stuarts right down the Road but with different results, as the StugIIIG & the 75mm gun took out all 6 steps worth. Now I am thinking this will be a waste of effort but I must continue trying. So I moved 2 M4 & 1 M4/76 Sherman Counters adjacent to the Germans, as everything that could hurt them, already activated, so I would hope to activate first next turn and keep all my Infantry loaded in the M3 Halftracks, safe from German Artillery but close to the jumping off point for action. However I did unload one stack of Infantry, to spot for their Artillery. The Germans had I nice defense, with entrenchments, Strong-Points and city hexes but their forces are not very strong. *With some luck, the Americans rolled very high on their next activation, taking out the StugIIIG with six shots from the stack of 75mm & 76mm Shermans, then the American Artillery demoralized the German 75mm gun as well. Now things are looking a little better for the Americans and a hole is being to open for them. *With the proceeding turns they are able to take Three entrenchments, and two town hexes and leave two town hexes being contested. With the combine Infantry, Artillery & Armor, they work a little magic. *The Germans lost the following steps: 2-StugIIIG, 1- 75mm, 1-strongPoints , 4-Infantry, 2-HMG, 1-20mm, 2-Wagons, 2-Leaders, which equaled 13 point for the Americans. *The Americans lost the following steps: 6-M5/Stuarts, 1-Infantry, Which equals 13 points for the Germans. *Remember tanks steps count double! *Town hex points: 6-German, 6-American, (2- hexes contested, no point for those). *Entrenchment points: 6-American, 2-German. *Total points: Americans 25, Germans 21. Only a four point difference which results in a draw! So close for the Americans, as one more point would have done it, but time ran out. *This played out much closer then I thought it ever would and with only eight turns, the Americans are very hard pressed, especially in the muddy conditions. But this is a fast playing scenario to try out and is a good one to play solo, with a low unit count. You never know what scenarios might surprise you! |
||||||||||||
| 0 Comments |
| Into the Valley of death..... |
|---|
|
The objective is to control the town and kill enemy units. The majority of the American units are mechanized units, (tanks and half tracks) that are restricted to only entering road or town hexes, As the Germans know this, they set up their AT defenses along the southern outskirts of the town. This included entrenchments and strongpoints. The Americans attacked with the armored units up the road with one group of infantry advancing along the trail and the other east of the road. The Americans lead of with the half-tracks down the road to draw the German AT fire. This they did, wiping out 2 of the three units. The Americans the followed up with the M5's, losing 2 steps in the process. Meanwhile, the infantry platoons advancing to the east of the road were hit with OBA and small arms fire, disrupting or demoralizing all the infantry and eng units except for the HMG. On their one good die roll the Americans got 2 activations on turn 2 which allowed on of the M5's to knock out a step on the Stug, prior to the other remaining M3 and half-track assaulting the entrenched Germans Stug and infantry platoon. The result was morale checks which all units passed. The remaining Stug step was eventually eliminated by the Shermans firing on it from the outside but not before they themselves lost a platoon to AT fire. The American infantry east of the road and a platoon of Shermans failed their moral check. The Americans advancing along the trail, had one platoon disrupted prior to their assault on the entrenchments outside of town which resulted in the disruption of another platoon and no effect upon the Germans. I eventually called the game after 4 turns as I could see no way the Americans could win. The result was a major German victory. The German were helped by having 2 of the 4 officers with plus 2 morale and drawing a strongpoint with AT. The mud restriction in this scerario makes it very difficult for the Americans. The Germans get 2-3 turns of small arms fire on the infantry as they try to close to assault plus their mechanized units are unable to maneuver. |
| 0 Comments |
| SSRs uber alles |
|---|
|
I rarely find myself throwing in the towel early on a scenario. No matter how ridiculous there is usually some kind of "hail Mary" that I can throw for the losing side that makes continuing play at least worth the time. On this one, however,... The Americans, with a ton of armored support (a company of Stuarts, a company of Shermans and a slew of M3s enter the board and need to attack a German force located in the town immediately to the front. Unfortunately for the Americans, their vehicles can only be on the road given the muddy conditions which causes the tanks to stack up and the M3s to be held back. The StuG in the town along with the AT gun gets to fire at this tasty target for several turns as the Germans have craftily built up an entrenchment along the road which must be taken out before the Americans can enter the town. Much mangled metal later the American commander calls off the attack. In viewing the other AARs it would seem that a similar experience was had by many. The German defense is just too strong to have the relatively free set up for the Germans and immobility of the Americans. Given that, in reality, the Americans were successful I would suggest that the road be clear into the town meaning that no entrenchments could be on or adjacent to the toad entering the town and at least the first hex of the town be clear to permit an armored entry as happened in real life. I would also permit the vehicles to enter hexes adjacent to the town at a MP cost of 3, otherwise wrecks will prohibit the armor from participating in the battle. Without some adjustments in the SSRs the Americans simply have no chance. |
| 0 Comments |