
|
Task Force Benson An Army at Dawn #40 |
||
|---|---|---|
| (Defender) Germany | vs | United States (Attacker) |
| Formations Involved | ||
|---|---|---|
| Germany |  |
5th Light Panzer Division |
| United States |  |
1st "Old Ironsides" Armored Division |

| Total | |
|---|---|
| Side 1 | 0 |
| Draw | 0 |
| Side 2 | 5 |


| Overall Rating, 6 votes |
|---|
|
4.17
|
| Scenario Rank: 56 of 913 |
| Parent Game | An Army at Dawn |
|---|---|
| Historicity | Historical |
| Date | 1943-03-31 |
| Start Time | 16:00 |
| Turn Count | 14 |
| Visibility | Day & Night |
| Counters | 89 |
| Net Morale | 0 |
| Net Initiative | 1 |
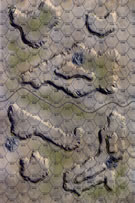
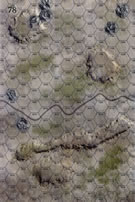
| Maps | 2: 77, 78 |
| Layout Dimensions | 56 x 43 cm 22 x 17 in |
| Play Bounty | 147 |
| AAR Bounty | 165 |
| Total Plays | 5 |
| Total AARs | 2 |
| Battle Types |
|---|
| Exit the Battle Area |
| Inflict Enemy Casualties |
| Conditions |
|---|
| Off-board Artillery |
| Randomly-drawn Aircraft |
| Smoke |
| Terrain Mods |
| Illumination |
| Scenario Requirements & Playability | |
|---|---|
| An Army at Dawn | Base Game |
| Introduction |
|---|
|
Gen. Bernard Montgomery’s British 8th Army turned the German flank at the Mareth Line, forcing a significant retreat. The Americans received orders to become more aggressive to keep the pressure on both German flanks. This played right into the hands of II Corps’ new commander, General George Patton. He quickly became disenchanted with the 1st Armored Division’s commander, Orlando Ward, over Ward’s aversion to leading his division from the front. Colonel Clarence C. Benson, more of a fighter, soon received the nod from Patton to take over the task force designated to spearhead the breakout. |
| Conclusion |
|---|
|
The new commander delayed the attack until late afternoon to coordinate the various supporting arms. Colonel Benson showed the aggression that Patton had hoped to see, when he pushed the tankers through the gaps in the minefields despite the infantry being unable to follow. The infantry held their ground until relieved the following afternoon. The attack destroyed four dual-purpose 88mm guns as well as a number of antitank guns and six panzers. |

|
|
|---|
| AFV Rules Pertaining to this Scenario's Order of Battle |
|---|
|
| Heer |
|---|
|


| Army |
|---|
|


| 3 Errata Items | |
|---|---|
| Scen 40 |
As written, the scenario makes mention of the US Task Force Commander, Colonel Clarence C. Benson. Yet, there is no Colonel in the leader set. Add a single Colonel to the US leaders. (treadasaurusrex
on 2022 Oct 26)
|

|
The reduced direct fire value of the Heer HMG became 5-5 starting with Fall of France. (plloyd1010
on 2015 Jul 31)
|

|
The morale and combat modifiers of German Sergeant #1614 should be "0", not "8". (Shad
on 2010 Dec 15)
|
| The Planes Are Killer Today | ||||||||||||
|---|---|---|---|---|---|---|---|---|---|---|---|---|
This one has a large task force of infantry, armored infantry, Lees and Shermans, with supporting mortars, gunned halftracks, (half of which I just realized I left off) and air support attacking a spread out line of Germans, who include an 88 battery, a 50mm AT, a 75mm Inf, Panzers III and IV, a Marder III and about 2 companies of infantry. Both sides are equal on OBA coming in on the 30 column. Germans start dug in. The US are trying to take at least 10 steps of enemy casualties, get at least 10 steps off the board and avoid taking 10 or more casualties themselves. I spread the Germans in a line from north to south along the ridges, with the 88 on the 40m hill where he could start shooting to good effect pretty much as soon as US armor started coming on the board, as long as they came in somewhat towards the center of the board. The rest of the AT capable guns got spread out to support the infantry positions. The air support played a much larger roll in this game than my usual run of luck, coming in on the first 3 turns. On turn 1 the P-38s did no damage, but on turns 2 and 3, they rolled 2s, with the B-25s on turn 2 wiping out the 88s and more P-38s on turn 3 killing the 50mm AT gun. This helped quite a bit in giving the halftracks and US armor a bit more breathing room. Even though the US lost half of the Shermans, the Lees moved along the north edge of the board with the goal of getting as much off the board as possible, and the infantry in trucks followed that rout while the armored infantry tried to pin down German troops in the middle. US losses doubled the 10 steps but they still had a good shot at getting a majority of infantry and armor off the east edge, and with having eliminated 16 steps of Germans, including all the German armor and the big AT guns, I called the game a US minor victory at the 9 turn mark. Doing another turn might have eliminated another stack of truck loaded infantry, but it would also have just about doubled the number of steps exiting the board, and the US mortars, OBA and air cover were doing a good job of killing dug-in Germans, especially when a German stack left cover to try to move north and block the US move. While the game didn't last to the bitter end, it was a cliff-hanger right up until the point that the trucks and Lees were past the Germans on the north end of the ridge, so I gave it a 5 as a very enjoyable game. |
||||||||||||
| 0 Comments |
| Force a Breakout, Colonel! | ||||||||||||||
|---|---|---|---|---|---|---|---|---|---|---|---|---|---|---|
This was a 5-session play-through with the dynamic and clever, goosebrown, as the defending German Commander. I played the US Commander of an over-extended, scratch force aiming to effect a breakthrough. We did not use the FOW rule, but did use the smoke/illum, consolidation, extended assault, strategic movement and excess initiative optional rules. We also experimented with 4 mutually-agreed-upon house rules that are described below. The 1st session (game turns 1-3) consisted of two extended American, movement-to-contact approaches on the north (left flank) and south (right flank) margins of the battle map. Both hugged the lee sides of the available hill masses and the American self-propelled artillery established two separate firing positions on the west margin of Map 78. US air raids were mostly ineffective, but these onboard SPA units proved deadly and eliminated both a 50mm AT and a 81m Mortar platoon on the second turn. The left (north) flank prong of the US dismounted attack came into range of the dug-in German infantry on the next ridgetop. After being teased by the maneuvers of several playful American halftrack units, the German armored company finally opened up and immediately eliminated 3 steps of American tank destroyers on the northern edge of the battle map at the end of the session. By the end of turn three, both sides had lost 3 steps and the US left hook was about to become decisively engaged. The second session (game turns 4-5) featured decisive engagement in the north and continued movement-to-contact in the south for the advancing Americans. American artillery garnered mixed results, but the on-board mortar company was able to effectively screen the most dangerous Axis AT self-propelled and towed assets with smoke. The German tank company wisely withdrew before they could be close assaulted. They chose a dominating position in the middle of the long-north-south ridgetop. At the end of the session, the Germans had lost a total of 4 steps and the US side had lost 3. The third session (game turns 6-7) was relatively grim for both sides with the Germans losing another 9 steps and the Americans losing another 4. Both American close assaults on the long north-south ridge on Map 78 were successful and the Landsers began retreating east to the next 20-meter hill as the dusk gathered and visibility was reduced. A platoon of fleeing Pz-IIIJ tanks was eliminated in a close assault exit action. US artillery concentrations also eliminated the 88mm AT gun platoon, but US air support proved ineffective and both strikes failed to locate their assigned targets. A company plus-sized German infantry force began moving to the west from the large, 40-meter hill mass on Map 77. This action attracted sporadically accurate OBA and onboard artillery concentration which slowed their progress as American reserves moved up. In the south margin of Map 77, another US close assault was successful after a 2-turn slugfest atop the ridgetop. An overeager Marder III charged forward in support of the German migration west, covering the infantry company’s left flank. By the end of this session of wild maneuvers, the step loss count was 13 for the Germans, and a total of 7 steps lost for the Americans. Thus, checking off one of the three US objectives: inflicting at least 10 step losses on the 21st Panzer. The 4TH session (game turn 8) was a frustrating one for the attacking US side as cold dice and clever counter moves by the German Commander, undid a number of otherwise likely successful close assaults and OBA concentrations in both the north and the southern portion of the battle map. The German counter attack in the center of the game board was effectively stymied, though it continued to slowly migrate east. On the northern ridgetop the remaining Afrika Korps’ Pz-IVH was pinned in an assault hex and demoralized in an extended assault action. In the south, a bold counter attack by the remaining Boche infantry close assaulted an unsupported company of Lee tanks and thereby set up a possible close range AT targeting shot by the opportunistic Marder III platoon that quickly mounted the ridge top. The fifth session (game turns 9-10) was characterized by a couple of target illuminations and deadly close-range AT fire and assaults. The Germans got the drop on the Americans in the initiative roll, and the Marder III platoon destroyed a step of M-3 Lee tanks in the ridgetop assault (Hex 77-0312). Both players then threw futile combat 7-die rolls in the follow-on close assault! A bold German movement in the center of the map intended to engage the US mortars & infantry on the northwest hill of Map 77 was unable to get into range due to the rapidly diminishing visibility. The supporting dug-in Boche infantry gun platoon was destroyed by American OBA. In the north, a German Lieutenant was captured, and the other ridgetop assault (Hex 78-0912) was cleared by a US combined arms team, while other infantry and HMG units crested the adjoining ridge. At the end of game turn 9, the cumulative step losses for the Germans was at 20, and the Americans had lost 11. By mutual agreement we called this exciting, relatively-balanced, and fun-filled scenario at the beginning of the 10th game turn with a concession by the German Commander. I give this one an enthusiastic rating of 4, and happily recommend it for shared play. NOTE: In addition to the standard 4th Edition rules we experimented with the following 4 house rules in this scenario: 1) Tank Leader Forward Observation Efficient tank leaders (full strength only) may spot for ALL artillery & air strikes in accordance with the normal spotting rules (8.0, page 19). Just as in the case of leader units spotting, this action does not require an activation. 2) Standardized Movement for Mechanized Units All mechanized units may move through clear hexes at a movement cost of only 1 movement point (MP) per hex, instead of 1 1/2. Add one to this cost if moving up or down clear slope hexes. 3) Dug In Units are Automatically in Limiting Terrain in Desert Games Unless prohibited by special scenario rules, ALL units that are dug-in on hill, slope or wadi & gully hexes are considered to be in limiting terrain and are only spotted if enemy units approach to within 3 hexes, or 4 hexes for reconnaissance units – unless they fire or move. 4) Anti-Tank (AT) Gunnery Enhancement Unless prohibited by special scenario rules, ALL dedicated, dug-in, entrenched, or town-occupying AT gun units including Self-Propelled AT guns may fire in opportunity fire (OPFIRE) TWICE just like tanks in the standard rule set. For example: dug-in, German PaK 36 (37mm); PaK 38 (50mm); PaK 40 (75mm), or British 2-pdr and 6-pdr towed AT gun platoons would therefore be able to fire TWO times per unit in opportunity fire situations. |
||||||||||||||
| 0 Comments |