Panzer Grenadier Battles on April 27th:
Arctic Front Deluxe #40 - Children's Crusade Broken Axis #14 - Târgu Frumos: The Second Battle Scenario 3: Sledge Hammer of the Proletariat
Army Group South Ukraine #6 - Consternation Road to Berlin #73 - She-Wolves of the SS
Errors? Omissions? Report them!
Kasserine Pass: A Terrible Price
An Army at Dawn #36
(Attacker) Germany
(Attacker) Italy
vs United States (Defender)
Formations Involved
United States 1st "Old Ironsides" Armored Division
Display
Balance:


Overall balance chart for AAAD036
Total
Side 1 5
Draw 1
Side 2 0
Overall Rating, 7 votes
5
4
3
2
1
3.86
Scenario Rank: 151 of 913
Parent Game An Army at Dawn
Historicity Historical
Date 1943-02-22
Start Time 10:15
Turn Count 14
Visibility Day
Counters 75
Net Morale 0
Net Initiative 1
Maps 2: 77, 78
Layout Dimensions 56 x 43 cm
22 x 17 in
Play Bounty 142
AAR Bounty 165
Total Plays 6
Total AARs 2
Battle Types
Exit the Battle Area
Inflict Enemy Casualties
Conditions
Off-board Artillery
Smoke
Scenario Requirements & Playability
An Army at Dawn Base Game
Introduction

During the night Battle Group DAK swung to the south in order to hit the Americans in the rear. Unfortunately for them Panzer Grenadier Regiment Afrika became disoriented in the dark and found themselves seven miles south of Djebel Hamra at dawn. Instead of striking the main American positions, the grenadiers routed the Americans on Hill 812 and captured a large number of artillery pieces and vehicles. This left them in a very exposed position, so the Germans threw the rest of the force at Djebel Hamra to distract the Americans.

Conclusion

Karl Bülowius, commander of Panzer Army Afrika’s engineers, had temporarily taken command and ordered Battle Group DAK’s Italian contingent to attack because, he said, their morale was close to breaking. Just how a futile attack would improve their morale, he did not say, and the Italians suffered enormous casualties from well-directed American artillery fire. The attack distracted the American attention from the grenadiers on Hill 812 before they broke off at noon.


Display Relevant AFV Rules

AFV Rules Pertaining to this Scenario's Order of Battle
  • Vulnerable to results on the Assault Combat Chart (7.25, 7.63, ACC), and may be attacked by Anti-Tank fire (11.2, DFT). Anti-Tank fire only affects the individual unit fired upon (7.62, 11.0).
  • AFV's are activated by tank leaders (3.2, 3.3, 5.42, 6.8). They may also be activated as part of an initial activating stack, but if activated in this way would need a tank leader in order to carry out combat movement.
  • AFV's do not block Direct Fire (10.1).
  • Full-strength AFV's with "armor efficiency" may make two anti-tank (AT) fire attacks per turn (either in their action segment or during opportunity fire) if they have AT fire values of 0 or more (11.2).
  • Each unit with an AT fire value of 2 or more may fire at targets at a distance of between 100% and 150% of its printed AT range. It does so at half its AT fire value. (11.3)
  • Efficient and non-efficient AFV's may conduct two opportunity fires per turn if using direct fire (7.44, 7.64). Units with both Direct and AT Fire values may use either type of fire in the same turn as their opportunity fire, but not both (7.22, 13.0). Units which can take opportunity fire twice per turn do not have to target the same unit both times (13.0).
  • Demoralized AFV's are not required to flee from units that do not have AT fire values (14.3).
  • Place a Wreck marker when an AFV is eliminated in a bridge or town hex (16.3).
  • AFV's do not benefit from Entrenchments (16.42).
  • AFV's may Dig In (16.2).
  • Open-top AFV's: Immune to M, M1 and M2 results on Direct and Bombardment Fire Tables, but DO take step losses from X and #X results (7.25, 7.41, 7.61, BT, DFT). If a "2X" or "3X" result is rolled, at least one of the step losses must be taken by an open-top AFV if present.
  • Closed-top AFV's: Immune to M, M1 and M2 results on Direct and Bombardment Fire Tables. Do not take step losses from Direct or Bombardment Fire. If X or #X result on Fire Table, make M morale check instead (7.25, 7.41, 7.61, BT, DFT).
  • Closed-top AFV's: Provide the +1 modifier on the Assault Table when combined with infantry. (Modifier only applies to Germans in all scenarios; Soviet Guards in scenarios taking place after 1942; Polish, US and Commonwealth in scenarios taking place after 1943.) (ACC)
  • Tank: all are closed-top and provide the +1 Assault bonus, when applicable
  • Tank Destroyer: do not provide the +1 Assault bonus, even if closed-top (SB)
  • Self-Propelled Artillery: do not provide the +1 Assault bonus, even if closed-top (SB)
  • Anti-Tank Gun Carrier: half-track with anti-tank gun, NOT a Tank Destroyer
  • APC – Armored Personnel Carrier: These are Combat Units, but stack like Transports. They can transport personnel units or towed units. They are not counted as combat units for the +1 stacking modifier on the Direct Fire and Bombardment Tables (4.4). They may be activated by regular leaders and tank leaders (1.2, 3.34, 4.3, 5.43). They do not provide the +1 Assault bonus (ACC).
  • Portees: Trucks with mounted Anti-Tank guns, Anti-Aircraft weapons, or artillery. Stack as combat units. Move like trucks, but fire like guns. Do not limber or unlimber. Have the truck's -1 armor value. Truck and gun are treated as a single unit, and do not transport other units. (SB)

Display Order of Battle

Germany Order of Battle
Heer
Italy Order of Battle
Regio Esercito
  • Mechanized
  • Motorized
United States Order of Battle
Army
  • Motorized

Display Errata (1)

1 Errata Item
Overall balance chart for 41

All SS PzIVH tanks should have a movement of 8.

(Shad on 2010 Dec 15)

Display AARs (2)

By the Skin of Their Teeth
Author thomaso827
Method Solo
Victor Draw
Play Date 2015-08-07
Language English
Scenario AAAD036

This one started out pretty much with a bang. The US are holding two boards with 2 companies of infantry, 2 HMGs, 2 Mortars, a 37mm AT, a 90/M1, 2 Shermans, 2 Lees, a T30, 2 M3/75s, and enough halftracks and trucks to transport everyone and everything. They start dug in, with just one outpost of an infantry and an HMG with their halftracks on a hill in the northeast where they can fire or call OBA from the beginning, while the rest set up well back, with most infantry and the 90mm holding the last long ridgelines, the Shermans and Lees in between where they can move to hot spots. The Germans have a battalion of Bersaglieris with their 2 HMGs, an Engineer platoon, 2 81mm mortars, 2 47mm and a 75mm guns, an AC90/53, 3 Semovete 75/18s, a Semovente 47/32 and trucks to tow the guns, as well as a German armor task force of Pz IIIJs, a PzIVF2, and a PzIVH. By coming in only on the southern of the two boards, the Italian/German force was able to concentrate their forces, the infantry coming in en mass around the Major, while the armor came in to either side of the infantry, and the trucks towing the guns to the extreme south, hoping to skirt all the trouble and head for the west edge. The German armor got far enough ahead of the rest that the US 90mm gun was able to fire and immediately take out a step of Pz IIIs, and OBA was called in on the tell-tale dust cloud left by the dug-in US gun, and an extremely efficient OBA strike killed the gun and it's truck. That was on turn 1 mind you. Italian infantry moved forward turn after turn, taking the single step loss or demoralization, but staying pretty intact until closing on the line of dug in US troops where direct fire, OBA and guns took their toll. The Semoventes rolled along the southern flank and engaged the US troops in a leap-frog fashion, allowing half to move forward while half stopped and fired. While the majority of the Italian infantry were starting to suffer pretty heavy casualties, one Capitano, an Infantry and an HMG, supported by a Pz IVF2 moved in to assault a US position, which initially took the brunt of the attack badly. Both sides added troops, only to get hit with demoralization results and a step loss here and there. All the while, the Semoventes and towed guns, along with one Pz IIIJ made it off the west side of the board. US armor was stuck, some regrouping and some engaging Italian infantry, so they were unable to have any effect on the Italian exodus. But the Italian losses to infantry and armor still on the board were enormous. As the game came to turn 12, the Italians were no longer in a position to break through or cause more casualties, while US troops were still holding the high ground and causing the occasional bit of discomfort to the Italian infantry, now at the extreme limit of DF range. I looked at the casualty numbers, added up the exit points, and called the game at a draw, 33 points to 25. 2 more turns might have added a point or two to each side, but not likely enough to change the outcome. Well fought, good scenario, that I look forward to trying again in face-to-face.

0 Comments
You must be a registered member and logged-in to post a comment.
Storm Forward as Fast as Possible!
Author treadasaurusrex (Germany, Italy)
Method VASSAL
Victor Germany, Italy
Participants Daedalus
Play Date 2023-04-06
Language English
Scenario AAAD036

An Army At Dawn Scenario 36: Kasserine Pass: A Terrible Price

Storm Forward as Fast as Possible!

This was an extended 5-session play-through with the careful and crafty, Daedalus, leading a defending scratch task force consisting of elements of Combat Command B of the US 1st Armored Division. I played the attacking German Commander of a combined arms German & Italian battle group. We played with the smoke/illum, extended assault, tank riders, strategic movement and excess initiative optional rules. We ignored the FOW optional rule in this encounter. In addition, we experimentally used the following four house rules: 1) Road Movement for Mechanized & Foot Units All FOOT & MECHANIZED units may move on roads at the rate of 1/2 a Movement Point (MP) per road hex, just like MOTORIZED units 2) Standard Movement for Mechanized Units All mechanized units may move through clear hexes at a movement cost of only 1 movement point (MP) per hex, instead of 1 1/2. Add one to this cost if moving up or down slopes hexes. 3) Dug In Units are Automatically in Limiting Terrain in Desert Games Unless prohibited by special scenario rules, ALL units that are dug-in on hill, slope or wadi & gully hexes are considered to be in limiting terrain and are spotted if enemy units approach to within 3 hexes, or 4 hexes for reconnaissance units – – unless they are marked with a spotted marker, see 8.22. 4) Tank Leader Forward Observation Efficient tank leaders (full strength only) may spot for ALL artillery & air strikes in accordance with the normal spotting rules (8.0, page 19). Just as in the case of leader units spotting, this action does not require an activation. Nonefficient tank leaders may also attempt to spot for ON BOARD ARTILLERY ONLY by throwing a single die per attempt to spot a target. This action does require an activation. They spot the intended target on a die roll of 4-6.

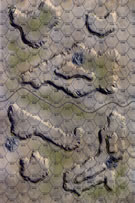
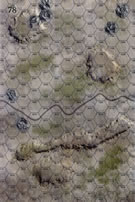
The initial session (game turns 1-3) was basically dominated by the Italo-German movement-to-contact to the west in 2 columns across Map 78. Almost immediately, the Italian AC90/53 portee AT platoon was eliminated by accurate, long-range American AT fire. The northern column moved on board and to the northwest onto the southeast margin of Map 77 with a company of Semovente assault guns leading the way. The southern column came straight across the southern portion of Map 78 to the southernmost 20-meter hill, where they consolidated during game turns 2-3. This column and their accompanying German armor, exchanged long-range fire with the American tank destroyers and company of US tanks. This was a costly business for both sides, resulting in 8 steps lost for the attacking Italo-Germans and 10 for the defending Americans. Highlights of this slice of the attack, included the German Pz-IVH company eliminating 2 platoons of M-3 Tank Destroyers as well as a platoon of Lee tanks in a single game turn.

The second session (game turns 4-5) featured continued movement to contact in both the north & south wings of the advancing Italo-German force, as well as the migration in both directions by US units to counter these moves. Accurate American OBA and AT fire resulted in the elimination of both Italian towed AT gun platoons in the southern (left flank) pincer. In the North, stalwart American defenders were able to disorganize the Italian advance with both direct and opportunity fire. What little success the Axis force was able to achieve focused on the elimination of an American Sherman platoon in the south atop the major north-south ridge of Map 78 during game turn 5. To-date this scenario has been costly for both sides, with an updated total of 11 steps lost for the attacking Italo-Germans and 16 for the defending Americans. Unexpectedly, only a pair of combat 7-die rolls were thrown this session.

The third session (game turns 6-8) was a particularly grim one for the attacking Axis force who lost an additional 9 steps, to only 4 steps lost for the defending US side. Both sides had good luck in morale recovery die rolls and only a single combat 7-die roll was thrown by the Americans. The Ital-German advance in the north essentially collapsed with the loss of 2 platoons of Semovente assault guns thanks to heavy & accurate American AT fire, coupled with excellent, single-hex close range fire at the accompanying Italian infantry. In the South, Axis fortunes were slightly better as the first German armored unit exited the west edge of the battle field, and the Italian infantry attack on the north-south ridge came into decisive combat range. This in spite of an extended barrage of very poor Axis combat die rolls. By the end of this session, the victory point tally was nearly tied at 23 for the Italo-Germans and 20 for the American side.

The 4th session (game turns 9-11) was another grim one for the steadily-weakening, Axis force who lost an additional 6 steps, as well as for the defending Americans who lost 7 steps. The Italian attack in the north collapsed ignominiously and began to pull back, pursued by the remaining American units. In the south, the defending Americans began retreating north along the ridge spine, taking heavy casualties from multiple adjacent-hex fire fights and short-range AT fire. A few more Italo-German steps were able to exit the west edge of the board, bringing the total of steps exited to: an even 10. Total step losses were a very close, 27 for the defending Americans and 26 for the attacking Italo-Germans. By the of the session, the Victory point count was 38 for the Axis and 26 for the US side.

The final session (game turns 12-14) was another grim & bloody episode for both sides, but the Italians were able to exit 21 steps as time ran out. The remaining fiendish US AT gun platoon was eliminated on the final turn. By the end, the Victory point count was 50 for the Axis and 29 for the US side, resulting in an Axis major victory. A combined SEVEN combat 7-die rolls were thrown during this 3-turn session.

I give this one a 4, mostly because it was fun to play with the hard-charging & tenacious Daedalus. Our set of house rules that we tried, worked very well in this fast-paced situation. In truth, this scenario should have rated a 3, since this gamey encounter favors the slightly better-equipped attacking Italo-Germans. However, we found it suitable for both SOLO, and/or SHARED play. Beware though, playing the US side successfully is a significantly harder pull.

0 Comments
You must be a registered member and logged-in to post a comment.
Errors? Omissions? Report them!
Page generated in 0.553 seconds.