
|
Kasserine Pass: Duel at Dawn An Army at Dawn #34 |
||
|---|---|---|
|
(Attacker)
Germany
(Attacker) Italy |
vs | United States (Defender) |
| Formations Involved | ||
|---|---|---|
| Germany |  |
33rd Reconaissance Battalion |
| United States |  |
1st "Old Ironsides" Armored Division |

| Total | |
|---|---|
| Side 1 | 7 |
| Draw | 0 |
| Side 2 | 0 |


| Overall Rating, 9 votes |
|---|
|
3.89
|
| Scenario Rank: 137 of 913 |
| Parent Game | An Army at Dawn |
|---|---|
| Historicity | Historical |
| Date | 1943-02-21 |
| Start Time | 05:00 |
| Turn Count | 14 |
| Visibility | Day & Night |
| Counters | 44 |
| Net Morale | 0 |
| Net Initiative | 1 |
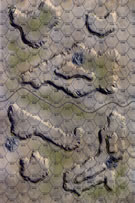
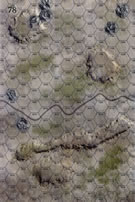
| Maps | 2: 77, 78 |
| Layout Dimensions | 56 x 43 cm 22 x 17 in |
| Play Bounty | 132 |
| AAR Bounty | 153 |
| Total Plays | 7 |
| Total AARs | 4 |
| Battle Types |
|---|
| Exit the Battle Area |
| Inflict Enemy Casualties |
| Conditions |
|---|
| Off-board Artillery |
| Smoke |
| Illumination |
| Scenario Requirements & Playability | |
|---|---|
| An Army at Dawn | Base Game |
| Introduction |
|---|
|
The Italian advance overran a huge number of American artillery pieces and supply vehicles, and finally came to a halt sometime before dawn – they appear to have been slowed overnight by the sheer quantity of weapons, vehicles and supplies found intact and abandoned along the American retreat route. Just before dawn they encountered an American rearguard thrown out by 1st Armored Division’s Combat Command B. |
| Conclusion |
|---|
|
Lloyd Fredendall, commander of the American II Corps, made a bad situation worse by suddenly placing all troops defending Kasserine pass under British Brigadier Charles Dunphie, then on the north sideof Kasserine Pass with his 26 Armoured Brigade, but not sending Dunphie any additional communications equipment or personnel. That left Col. Paul M. Robinett and his Combat Command B adrift on the south side of the pass. Without orders or direction, the American rear guard offered brief resistance and then fell back to join the rest of Robinett’s troops. |

|
|
|---|
| AFV Rules Pertaining to this Scenario's Order of Battle |
|---|
|
| Heer |
|---|
|


| Regio Esercito |
|---|
|


| Army |
|---|
|


| 1 Errata Item | |
|---|---|

|
All SPW 251s have an armor value of 0. (Shad
on 2010 Dec 15)
|
| An Army At Dawn, scenario #34: Kasserine Pass: Duel at Dawn | ||||||||||||
|---|---|---|---|---|---|---|---|---|---|---|---|---|
An Army At Dawn, scenario #34: Kasserine Pass: Duel at Dawn A fun scenario to play, where the mixed German & Italian forces have three victory objectives and the Americans must stop them. As the Axis I have to figure out if I should go for all three objectives and as the Americans how to defend this large desert area terrain. Both sides have kind of a cool mix of odd units, which makes this scenario very interesting. The Germans have: INF, MTC, SK231/8, SK233 & SPW251s, the Italians have: BERS, 81mm, AB41, M14/41, SEM 47/32 & Trucks, the Americans have: INF, M3/81, M6, T30, STUART & M3s. The Americans decide to defend a thin line across map 77 and adjust according to how the Axis units enter the map. The Axis are able to isolate one group of American units pretty much destroying them before the American can react, thus creating a large hole to exit unit off the west edge of the map and destroying enemy steps. The American reaction force including Stuart tanks & an assortment of AT trucks and halftracks are pretty easy pickings for the Italian M14/41 tanks which are better armored and the German SK233 and Italian Sem 47/32 have a nice bite as well, against these weak American armor units. In the end the Axis exited 34 steps off the west edge of the map, eliminated 18 American steps and only lost 6 steps for a Major Axis Victory. The Axis only lost two steps of Sem 47//32 which counted as double and one German MTC step and one Italian 81mm step. But even though it was a major Axis victory, this was a fun scenario to play. I feel if I hadn’t spread-out my American units so far and maybe bunched them into one large attack group, they would have had a better chance. I’ll try this one again someday, to see? |
||||||||||||
| 0 Comments |
| Hey diddle diddle straight up the middle... and the flanks | ||||||||||||||
|---|---|---|---|---|---|---|---|---|---|---|---|---|---|---|
I led the attacking combined Italian & German Battle Group in the pre-dawn gloom. Treadasaurusrex (Septisaurus as it turned out... ) led an outnumbered, scratch rearguard of Combat Command B of the US 1st Armored, in what turned out to be a fun-filled 1-session play-through. We ignored the FOW, but used the smoke/illum, consolidation, excess initiative, extended assault and strategic movement rules. As has become our pattern, we experimentally used the following five house rules: 1) Road Movement for Mechanized & Foot Units, All FOOT & MECHANIZED units may move on roads at the rate of 1/2 a Movement Point (MP) per road hex, just like MOTORIZED units 2) Standard Movement for Mechanized Units, All mechanized units may move through clear hexes at a movement cost of only 1 movement point (MP) per hex, instead of 1 1/2. Add one to this cost if moving up or down slopes hexes. 3) Dug In Units are Automatically in Limiting Terrain in Desert Games Unless prohibited by special scenario rules, ALL units that are dug-in on hill, slope or wadi & gully hexes are considered to be in limiting terrain and are spotted if enemy units approach to within 3 hexes, or 4 hexes for reconnaissance units – unless they fire or move. 4) Tank Leader Forward Observation, Efficient tank leaders (full strength only) may spot for ALL artillery & air strikes in accordance with the normal spotting rules (8.0, page 19). Just as in the case of leader units spotting, this action does not require an activation. Nonefficient tank leaders may also attempt to spot for ON BOARD ARTILLERY ONLY by throwing a single die per attempt to spot a target. This action does require an activation. They spot the intended target on a die roll of 4-6. 5) Anti-Tank (AT) Gunnery Enhancement, Unless prohibited by special scenario rules, ALL dedicated, dug-in, entrenched, or town-occupying AT gun units including Self-Propelled AT guns may fire TWICE just like tanks in the standard rule set. For example: dug-in, German PaK 36 (37mm); PaK 38 (50mm); or British 2-pdr and 6-pdr towed AT gun platoons would therefore be able to fire TWO times in either AT fire or OPFIRE. My esteemed enemy set up what few units he had in depth along the north and south of the board with a Stuart and a 37mm portee ATG in the center to block the roadway. He placed infantry more toward the center and a rear area reserve in the wadi at the far west of the map. OK. So this all happens at night... 5am to be exact with dawn at 7:15. So know how grandma says nothing good happens after midnight? Well Grandma was right. In pregame discussion, Treadasaurusrex pointed out that using strategic movement at night meant that the Germans and Italians could move across the entire board in one or two movement segments. It seemed a little "Gamey" to try that but it made sense with the victory conditions. I didn't have that many troops, they were all mounted and my opponent didn't have enough troops to cover all the routes across the board as I could stay out of their spotting range of 3 and their firing range of 2 (based on the die roll for visibility). So off we went. The Italian column from the Centurato division moved along the north edge of the map to a patch or rocky ground in front of which the Italian infantry and mortars offloaded and got ready to dig in. The armor followed closely behind but left enough space to respond to a Stuart deployed on the hill closest to the Italian infantry. In the south the German recon forces from the 33rd Recon Battalion pushed straight across the southern edge of the board with one platoon exiting the west edge and three more platoons ending up within 3 hexes. The halftracks followed gamely along getting a little over halfway across the board. This is all in the first turn. Treadasaurusrex was now in a position where he had to divide his forces and attack in strength to the north or the south. Since the Germans were most of the way across the south board edge, he chose to consolidate there and move the rest of his forces to the north to counter the Italians. Treadasaurus moved in his mechanized infantry and built a hedgehog around the Italian front and developed a defensive position. Using artillery, he then proceeded to throw 4 combat 7s yeilding almost no results but a small set of morale losses which the Italians more or less shrugged off. In turn two, I continued moving the Germans off the board edge, technically winning the game at the end of the turn. In the North though I resisted activating my troops until he had activated most of his focusing on the Italian infantry in front of the rough patch at the top of the board. Once his forces had substantively moved, I peeled my armor from its supporting deployment on a wild night charge down from the north to the center of the board avoiding all his armor and preparing a movement strait up the centeral road to the western board edge. I really enjoyed shifting my whole schwerpunkt south from the map edge into his now lightly defended center along the road. In turn three the Americans were tied down in the north and consolidating in the south, but tried to move mechanized infantry and one of the Stuarts into a blocking position on the east-west road in and on the edges of the wadi at the western edge of the board. The Italians successfully made a lunge around the end of the defensive line and exited more armor. At this point, my opponent and I agreed to end the battle in a decisive Axis victory as most of the forces had already exited and there really weren't that many left to shoot at. I really enjoyed the low unit density and the ability to fix my opponent and then maneuver into a new axis of attack. So often it seems these scenarios are slogs through assault after assault. Here there was very little fighting but a lot of interesting maneuver. If this battle had been in daylight it would have ended a lot differently. Thank you Treadasaurusrex as always for an interesting game and a memorable evening. |
||||||||||||||
| 0 Comments |
| Well 2 out of 3 ain't bad | ||||||||||||
|---|---|---|---|---|---|---|---|---|---|---|---|---|
This small scenario of 14 turns has small elements of US, German and Italians, each with only 1 Captain and 1 LT. The US are defending with 4 infantry, an M3/81, an M6, a T-30, 4 Stuarts and enough halftracks to transport the infantry. Germans have 2 infantry, 2 Motorcycle infantry platoons, 2 SK231/8s, a SK233 and halftracks for the foot troops. Italians have 3 Bersagliari, an 81mm Mortar, an AB41 armored car, 4 M14/41s, a Semovente 47/32 and enough trucks for the infantry and mortars. The scenario starts out with night visibility until turn 7 when dawn slowly starts raising the limit to the full 12. Italian/German forces need to achieve 2 of 3 objectives for a minor victory or all 3 for a major one: Exit at least 12 steps off the west edge (armored cars, tanks and motorcycles count double); eliminate at least 10 US steps (tanks count double); lose no more than 10 steps (tanks count double). I set up the US troops in good defensive positions, with 2 Stuarts out front in rough ground on board 78, and another one north and south on the easternmost hill hexes on board 77. The US infantry were dug in on the hills easternmost hexes covering the east-west road, the M6 tank destroyer set up just north of the northern Stuart and the M3 weapons carriers on the heights of the big hill south of the road where the mortar could observe for itself and the T-30 could range in on it's own DF targets. That all assumed there would be some targets they could see. With that long dark spell, the Italians were able to get the needed 12 steps off the west edge but lost more than the 10 steps in the process. The Italian/German force split up initially into 3 elements, with the tanks and assault guns moving down the road, the Italian infantry and armored car along on the north and the German infantry in halftracks with armored cars and motorcycles moving along the south. The Stuarts in the rough ground to either side of the road were able to get adjacent shots at the Italian tanks as they passed and the Italians lost half of their armor force all too quickly. US troops on the hill south of the road assaulted one single-step Italian survivor and eliminated that while the Stuarts got another turn to finish off another surviving step, but in the dark, nothing else could fire on the rest of the Italian armor. In the south, realizing that they needed to eliminate some US forces, the German armored cars circled around the southern US outposts while the German troops deployed from their halftracks to assault the Stuart there. The German motorcycles continued on their way to the west and off the board to finish the 12 steps of exit victory conditions. The Italians in the north moved west in the dark and dismounted to assault the M6 and the northern Stuart. Assaults have a tendency for me of bogging down and costing time often without results, but the Germans in the south and the Italians in the north wore down the US defenders while the German armored cars went hunting and killed the T-30 and a surviving Stuart step, and the assaults moved towards an inevitable Axis victory over the defenders as one leader died and the other fled, and in the south, only a pair of halftracks remained while in the north, the whole stack of US survivors were demoralized and just waiting on another Italian victory. With the needed 12 steps off the board and the needed 10 US casualties, the game ended. Surviving US troops had been pushed back from both flanks and were bottled up in the center around the road, but continued fighting seemed pointless since it wouldn't alter the outcome. Great little battle. |
||||||||||||
| 0 Comments |
| Get out before sunrise! | ||||||||||||||
|---|---|---|---|---|---|---|---|---|---|---|---|---|---|---|
First I'll say this is a very difficult scenario for the Americans. Kudos to my opponent for sticking to it to the completion of the Axis victory conditions. I gave this scenario a 2 because of the extremely lopsided opening caused by the first 6 turns being night. The scenario begins 10 turns before dawn. A combined Axis force enters from the east with the intent of transiting the map. Normally this would be quite a challenge, but this is February in North Africa, so it is dark. We were using illumination rounds. That helped the Americans a little, but they not enough. Italian motor infantry drove up near the American blocking position while my tanks moved out on the flanks. The German armored cars and krad ran to the north, while my Italian car cut south. A brief tank battle began in the center as starshells illuminated the armor. The weakness in the scenario became apparent as the darkness allowed strategic movement, so long as I avoided contact with the Americans. My opponent realized the danger and moved to counter me as best he could. This created a skirmish between my krad and armored cars and 2 of his tank platoons. The Americans simply did not have adequate presence to contain the Axis movement. If not in assault, the Axis units drove around them, with limited visibility, assault opportunities were limited. In the end it became a broken-field run to the western edge. American tank losses were heavy and the Axis armored cars were loose. An Axis victory. The scenario could be improved by upping the Axis exit requirements, like units instead of steps, or allowing more illumination rounds, but still few enough to require prudence. |
||||||||||||||
| 0 Comments |