
|
Kasserine Pass: Gore Force An Army at Dawn #32 |
||
|---|---|---|
| (Attacker) Germany | vs |
Britain
(Defender)
United States (Defender) |
| Formations Involved | ||
|---|---|---|
| Germany |  |
10th Panzer Division |
| Germany |  |
Afrika Panzer Grenadier Regiment |
| United States |  |
26th Infantry Regiment |
| United States |  |
6th "Regulars" Armored Infantry Regiment |

| Total | |
|---|---|
| Side 1 | 2 |
| Draw | 0 |
| Side 2 | 1 |


| Overall Rating, 4 votes |
|---|
|
2.75
|
| Scenario Rank: --- of 913 |
| Parent Game | An Army at Dawn |
|---|---|
| Historicity | Historical |
| Date | 1943-02-20 |
| Start Time | 08:30 |
| Turn Count | 16 |
| Visibility | Day |
| Counters | 167 |
| Net Morale | 0 |
| Net Initiative | 1 |
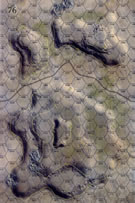
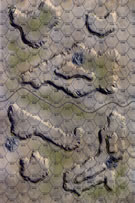
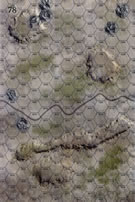
| Maps | 3: 76, 77, 78 |
| Layout Dimensions | 84 x 43 cm 33 x 17 in |
| Play Bounty | 175 |
| AAR Bounty | 165 |
| Total Plays | 3 |
| Total AARs | 2 |
| Battle Types |
|---|
| Exit the Battle Area |
| Hill Control |
| Inflict Enemy Casualties |
| Conditions |
|---|
| Minefields |
| Off-board Artillery |
| Reinforcements |
| Smoke |
| Scenario Requirements & Playability | |
|---|---|
| An Army at Dawn | Base Game |
| Introduction |
|---|
|
According to the U.S. Army’s official history of the campaign, “what happened during the night of 19-20 February cannot be clearly reconstructed from the records.” While not being able to piece together the sequence of events, they knew situation on Djebel Semmama took a definite turn for the worst. German infantry infiltrated in such numbers down the Thala road behind the hill that British First Army headquarters ordered Lt. Col. A.C. Gore to take a small force from 26 Armoured Brigade and clean them out first thing in the morning. |
| Conclusion |
|---|
|
Gore had too few troops to clear up the infiltrators, and the Germans methodically worked their way forward all morning. Rommel berated Col. Otto Menton of the Panzer Grenadier Regiment Afrika – a close personal friend and comrade from the First World War - for the slow progress, then sent in additional panzers and infantry. The forward Allied defenses quickly fell apart, trapping a Combat Command B Armored Infantry Battalion attached to Gore Force on Djebel Semmama. The Germans quickly appropriated the halftracks the Americans left behind in the pass. Gore Force lost all their tanks while slowly being forced back but maintained discipline and hampered all German efforts to get around them. |

|
|
|---|
| AFV Rules Pertaining to this Scenario's Order of Battle |
|---|
|
| Army |
|---|
|


| Heer |
|---|
|


| Army |
|---|
|


| 5 Errata Items | |
|---|---|

|
Two British infantry have their full strengths printed on the back. They should both be "2-3" when reduced. (Shad
on 2010 Dec 15)
|

|
The reduced direct fire value of the Heer HMG became 5-5 starting with Fall of France. (plloyd1010
on 2015 Jul 31)
|

|
All SS PzIVH tanks should have a movement of 8. (Shad
on 2010 Dec 15)
|

|
The morale and combat modifiers of German Sergeant #1614 should be "0", not "8". (Shad
on 2010 Dec 15)
|

|
All SPW 251s have an armor value of 0. (Shad
on 2010 Dec 15)
|
| Another Not Properly Play Tested Scenario | ||||||||||||||
|---|---|---|---|---|---|---|---|---|---|---|---|---|---|---|
I played the attacking German Battle Group and the ferocious Wayne Baumber was the Allied Commander of a large, scratch force charged with holding Djebel Semmama in this 4-session play through. We used the FOW, smoke, strategic movement, excess initiative and tank riders optional rules. Tragically, we did not use the extended assault rule. We also used the following two house rules: 1) Road Movement for Mechanized & Foot Units All FOOT & MECHANIZED units may move on roads at the rate of 1/2 a Movement Point (MP) per road hex, just like MOTORIZED units 2) Dug In Units are Automatically in Limiting Terrain in Desert Games Unless prohibited by special scenario rules, ALL units that are dug-in on hill, slope or wadi & gully hexes are considered to be in limiting terrain and are spotted if enemy units approach to within 3 hexes, or 4 hexes for reconnaissance units – unless they fire or move. After a bit of a fumbling start, the first session (game turns 1-2) was characterized by an immediate commencement of close range fire on the western flank of Djebel Semmama thanks to the odd setup instructions that allowed mass German infiltration atop this hill mass. A great deal of adjacent direct fire ensued, causing the forward deployed elements of the US 6th Armored Infantry to pull back out of reach of the advancing Landsers. The few remaining units of Task Force Stark were demoralized and also forced to abandon their initial hilltop positions. Axis armor surged forward onto the map board from the east edge on turn 2. At the end of the session; step losses were 2 for the Germans, and 6 for the Allies. A combined total of NINE combat 7-die rolls were thrown by both sides this session (6 German, 3 Allied). Victory points now amounted to: 15 for the rampaging Germans, and 6 for the Allies at this early point in the battle. The second session (game turns 3-5) included multiple costly close assaults on the slopes of the Djebel Semmama, as well as instances of accurate long-range AT fire and heavy direct fire engagement, as the Germans slowly pressed forward in the center, against weakening US strength in that sector. In the north, German probes began crossing onto Map 78, while at the same time, they strengthened their grip on the southernmost hill mass on Map 76. An eager M-4 Sherman platoon in the far south surged forward to challenge the rapidly deploying Landsers in this sector as the session ended. At the end of the 5th game turn, total step losses were 7 for the Germans, and 12 for the Allies. The updated victory point totals were: 43 for the advancing Germans; thanks to nearly-clearing Djebel Semmama of elements of the 6th US Armored Infantry; and 7 for the Allied force. The third session, just after New Year’s Day (game turns 6-9) featured continued German movements-to-contact in the north, center & south of Map 76. Landser infantry and armor began to spill over on to Map 78 in the south and north, with the obvious aim of occupying the 20-meter hill (north) and the long, east-west ridge in the southern half of the battle map. In all, this session was a relatively grim one for the Allies, with a further 8 steps lost, while the Germans lost 2 more steps. Most of these occurred as the remains of Task Force Stark continued their fighting withdrawal in the north. There were a combined FIVE combat 7-die rolls by the end of game turn 9. At session’s end, the victory point totals were: 51 for the advancing Germans and 9 for the Allies. The 4th session (game turns 10-13 ) was a grim one for the defending Allied side with an additional 15 steps lost! We called this bloodletting early, as a major German victory in this flawed & hopelessly unbalanced scenario after a great deal of close range combat. Highlights included some accurate long-range AT fire by the Germans and multiple fiercely contested close assaults atop the northeastern 20-meter hill on Map 78. The final victory point totals were: 66 for the Germans and 22 for the Defending Allies. There was 9 FOW-shortened game turns during this play-through. I give this one a 2, because it was fun to play with a gracious and resolute opp[onent. However, the setup instructions were flawed, indicating that it was not properly play tested. It is virtually impossible for the Allies to win this one as published. This awkward scenario is best played in SOLO mode, since there are 3 different morale levels for the Allied force. |
||||||||||||||
| 0 Comments |
| Poor scenario, perhaps an error in set up instructions | ||||||||||||||
|---|---|---|---|---|---|---|---|---|---|---|---|---|---|---|
Played against old Treadhead himself, this was one the most lopsided, average scenario's I have played for many a year. Considering the designer is Mr Perryman who I consider to be one of the best I think something must have gone wrong in the printing of this scenario. The Germans have to take the 60m hill "Djebel Semmama" and its surrounding 40m hillsides, they get 1 vp for each 40m hill and 2 vp for each 60m hill. On top of this hill is a miniscule US force about to be totally overwhelmed by a large combined arms battle group from the 164th Light Division, there is no way Allied forces and stop the Germans capturing the hill and outnumbered and outgunned as they are any counterattack is bound to fail. **I normally play scenarios almost to the bitter end no matter what the VP score is looking like but by GT11 I had had enough and although I played another two turns I was not enjoying this one, which is very unfair on my redoubtable opponent who played a good hand with aplomb. I am sure that with some tweaking that this could be a decent scenario until that happens stay clear* |
||||||||||||||
| 0 Comments |