
|
None Returned An Army at Dawn #25 |
||
|---|---|---|
| (Defender) Germany | vs | United States (Attacker) |
| Formations Involved | ||
|---|---|---|
| Germany |  |
10th Panzer Division |
| Germany |  |
5th Light Panzer Division |
| United States |  |
1st "Old Ironsides" Armored Division |

| Total | |
|---|---|
| Side 1 | 3 |
| Draw | 3 |
| Side 2 | 0 |


| Overall Rating, 7 votes |
|---|
|
4
|
| Scenario Rank: 114 of 913 |
| Parent Game | An Army at Dawn |
|---|---|
| Historicity | Historical |
| Date | 1943-02-15 |
| Start Time | 12:30 |
| Turn Count | 20 |
| Visibility | Day |
| Counters | 110 |
| Net Morale | 1 |
| Net Initiative | 0 |
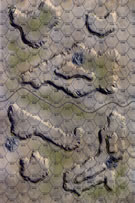
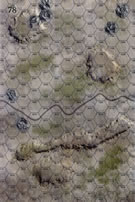
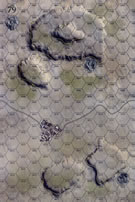
| Maps | 3: 77, 78, 79 |
| Layout Dimensions | 84 x 43 cm 33 x 17 in |
| Play Bounty | 158 |
| AAR Bounty | 159 |
| Total Plays | 6 |
| Total AARs | 3 |
| Battle Types |
|---|
| Exit the Battle Area |
| Inflict Enemy Casualties |
| Road Control |
| Urban Assault |
| Conditions |
|---|
| Off-board Artillery |
| Randomly-drawn Aircraft |
| Reinforcements |
| Smoke |
| Terrain Mods |
| Scenario Requirements & Playability | |
|---|---|
| An Army at Dawn | Base Game |
| Introduction |
|---|
|
The Allied army commander, Dwight Eisenhower, convinced himself that the German main thrust would come in the north due to a misunderstanding of an ULTRA intercept. He compounded his misunderstanding by belittling the II Corps’ intelligence officer during a visit to II Corps. With Eisenhower fretting over a nonexistent threat in the north, this meant that II Corps had to devise their own solution to the very real problem in the south. Knowing Hightower’s earlier counterattack lacked enough strength to dislodge the enemy, II Corps planned a stronger one to reach the trapped infantry on Djebel Ksiara and Garet Hadid. The commanders of Combat Commands A and C, accompanied by a number of other officers and newsmen including the famed Ernie Pyle, climbed Djebel Hamra to watch Lt. Col. James Alger’s Sherman battalion teach the Germans a lesson. |
| Conclusion |
|---|
|
The watching Americans learned a lesson they did not expect. A small German blocking force, heavily equipped with antitank guns, pinned the Americans in place, though Company D managed to briefly enter Sidi Salem before being forced back out when panzers fell on both their flanks. When summing up the day’s action the tank battalion’s diary noted that out of the 52 Shermans sent forward, “none returned.” The infantry managed to avoid encirclement and pulled back at 1800 hours. Headquarters advised the infantrymen they had been sent to rescue to make their way back to friendly lines as best they could. In two days the Americans suffered 1,600 casualties, while losing 29 artillery pieces, 57 halftracks, and 98 Shermans for negligible gains. The commanders were not learning very quickly. |

|
|
|---|
| AFV Rules Pertaining to this Scenario's Order of Battle |
|---|
|
| Heer |
|---|
|


| Army |
|---|
|


| 4 Errata Items | |
|---|---|

|
The reduced direct fire value of the Heer HMG became 5-5 starting with Fall of France. (plloyd1010
on 2015 Jul 31)
|

|
All SS PzIVH tanks should have a movement of 8. (Shad
on 2010 Dec 15)
|

|
The morale and combat modifiers of German Sergeant #1614 should be "0", not "8". (Shad
on 2010 Dec 15)
|

|
All SPW 251s have an armor value of 0. (Shad
on 2010 Dec 15)
|
| An Army At Dawn: scenario #25: None Returned | ||||||||||||
|---|---|---|---|---|---|---|---|---|---|---|---|---|
An Army At Dawn: scenario #25: None Returned This one looked very good on paper so I had a go at it and was in the mood for a desert battle. The Germans have a small blocking force with some Infantry and a lot of AT guns of various sizes while the American have a very large mobile force of all kinds of armor with 22 steps of Sherman tanks as well, plus Infantry on M3 halftracks that enter on the west edge of the map on turn one. The Germans have sizable reinforcements including armor that can arrive on turns 3 and 8 with the right dice rolls. The Americans have a large enough force, that I divide them into three groups; the north flank, the center and the south flank, so they have room to maneuver. Maybe they can exit units off the eastern edge of map 79 for victory points, and control the center trail on maps 77 & 78, eliminate enemy steps and control the town hexes on map 79 for more victory points. The Problem, the Germans roll well for their reinforcements and neither group was delayed, with one coming on from the north and the other from the south, while the center German group that started on the map delayed the Americans. The Americans now became a sandwich on three sides. The Germans also rolled well on activating first many times and the German Luftwaffe made two airstrikes with three counters or air-group at the prefect times. Not much to say after this, the Germans finished with something like 71 points to the Americans 39 points for a major German Victory. I even quit one turn early, as the Germans would only get more points and could have move onto the trail on map 78 to subtract another 8 points for the Americans, but there was no point in this at this point. With all this said, this is a fun scenario to play, as the American didn’t have very much luck with both German reinforcement groups coming in without delays and the Germans rolling so well on the activation dice, that I wanted to break the dice. I really believe the Americans need to use the upgraded, 4 valued armor factor, Sherman tank counters to have a better chance in this scenario. Someday I might try it out. But like the scenario title is called: None Returned, at least I had some retreat home but not many. |
||||||||||||
| 0 Comments |
| Get Le Boche off my Lawn! | ||||||||||||||
|---|---|---|---|---|---|---|---|---|---|---|---|---|---|---|
This was a 4-session play-through with the careful & wily, goosebrown, leading three German combined arms battle groups. I led elements of Combat Command C of the US 1st Armored Division. We played with the consolidation, smoke/illum, extended assault, tank riders, strategic movement and excess initiative optional rules. We ignored the FOW optional rule in this encounter. In addition, we experimentally used the following four house rules: 1) Road Movement for Mechanized & Foot Units All FOOT & MECHANIZED units may move on roads at the rate of 1/2 a Movement Point (MP) per road hex, just like MOTORIZED units, 2) Standardized Movement for Mechanized Units All mechanized units may move through clear hexes at a movement cost of only 1 movement point (MP) per hex, instead of 1 1/2. Add one to this cost if moving up or down slopes hexes, 3) Dug-in units are Automatically in Limiting Terrain in Desert Games Unless prohibited by special scenario rules, ALL units that are dug-in on slope hexes are considered to be in limiting terrain and are spotted if enemy units approach to within 3 hexes, or 4 hexes for reconnaissance units – unless they are marked with a spotted marker, see 8.22, 4) Tank Leader Forward Observation Efficient tank leaders (full strength only) may spot for ALL artillery & air strikes in accordance with the normal spotting rules (8.0, page 19). Just as in the case of leader units spotting, this action does not require an activation. Nonefficient tank leaders may also attempt to spot for ON BOARD ARTILLERY ONLY by throwing a single die per attempt to spot a target. This action does require an activation. They spot the intended target on a die roll of 4-6. The initial session (game turns 1-3) the beginning of a relatively lengthy American movement-to-contact across the northwest quadrant of Map 77 and onto the north margin of Map 78. This advance was met with accurate AT fire from the forward-deployed 50mm AT gun position on the northernmost 20-meter hill of Map 78. This fire resulted in the elimination of a section of overeager M-3/75 tank destroyers. This was quickly followed by a pair of American OBA strikes that eliminated that fiendish AT gun platoon during the 2nd game turn, as well as the capture of a platoon of trucks. Most German defenders remained quiet in their many dug-in positions, not wanting to fire and expose their positions. The session ended with single step losses for both sides. The second session (game turn 4) was a costly one that featured the dramatic entry of German Battle Group Gerhardt on the north margin of Map 77. This combine arms advance was well-supported by two successful Luftwaffe air strikes and made an immediate dent in the American positions. By the end of this bloody turn, step losses for the Americans was 9, and the Germans had now lost 10. These casualties resulted in both sides having their initiative reduced to one. Another fiendish German At gun was eliminated by accurate American OBA, but two others managed to eliminate a pair of steps of American Self-Propelled (SPAT) vehicles. A German leader was captured in an armored probe of an abandoned AT gun emplacement in the northwest corner of Map 79. The end of the session saw the Germans holding a slim lead in victory points of 10 to 9. The third session (game turn 5) was another blood-spattered episode for both sides with multiple, close-range AT firefights in the northwest corner of Map 77. There were also two Luftwaffe air strikes in the same section of the battle map. By the end of the game turn, the advance of Battle Group Gerhardt had been stymied in-place on the map margin – though at a considerable cost to the defending GIs. In addition, the northernmost German position on the 20-meter hill on Map 78 was secured via a combined arms attack, supported by accurate OBA. The step loss count increased to: 20 and 3 leaders for the attacking Germans, as well as 18 for the American defenders. As a result, both sides had their initiative reduced to zero. The victory point totals were nearly tied at 20 to 18, slightly in favor of the American side. The fourth session (game turns 6) was interrupted by the onset of a shared case of ennui, and we mutually agreed on a draw and enjoyed several sips from the Absinthe Fountain. The finals steps lost was: 23 for the Americans, and 25 for the Germans in this artificially truncated play-through. We experienced a great deal of adjacent-hex and AT crossfires in the northwest corner of the map that - while fun - were fairly pointless in terms of the likely outcome of the game. I give this one a rating of 4 and recommend it for SHARED play. This was entertaining to play, so we may switch sides & try it again. |
||||||||||||||
| 0 Comments |
| Push the Americans Back and Hold Sidi Salem | ||||||||||||||
|---|---|---|---|---|---|---|---|---|---|---|---|---|---|---|
This was a fun-filled, 9-session play-through with the wily & indomitable, Capt. Chaos, commanding the bulk of Combat Command C of the US 1st Armored Division in the attack. I led three widely dispersed, defending German battle groups made up of mobile elements of both the 21st and 10th Panzer Divisions. Both sides drew decent leaders, and we played with the FOW, consolidation, smoke/illum, extended assault, tank riders and excess initiative optional rules. In addition, we used the following four house rules: 1) Road Movement for Mechanized & Foot Units All FOOT & MECHANIZED units may move on roads at the rate of 1/2 a Movement Point (MP) per road hex, just like MOTORIZED units, 2) Standardized Movement for Mechanized Units All mechanized units may move through clear hexes at a movement cost of only 1 movement point (MP) per hex, instead of 1 1/2. Add one to this cost if moving up or down slopes hexes, 3) Dug In Units are Automatically in Limiting Terrain in Desert Games Unless prohibited by special scenario rules, ALL units that are dug-in on slope hexes are considered to be in limiting terrain and are spotted if enemy units approach to within 3 hexes, or 4 hexes for reconnaissance units – unless they are marked with a spotted marker, see 8.22, and 4) Tank Leader Forward Observation Efficient tank leaders (full strength only) may spot for ALL artillery & air strikes in accordance with the normal spotting rules (8.0, page 19). Just as in the case of leader units spotting, this action does not require an activation. Nonefficient tank leaders may also attempt to spot for ON BOARD ARTILLERY ONLY by throwing a single die per attempt to spot a target. This action does require an activation. They spot the intended target on a die roll of 4-6. The initial session (game turn 1) featured the beginning of a lengthy & large scale American movement to contact from the west edge of the battle map. The second session (game turns 2 and a part of 3) featured the continued lengthy US movement to contact, on a broad front, but with a shift to the large hill mass in the center of Map 77. Three, semi-successful, Axis air strikes, heralded the entry of Battle Group Gerhardt on the northern fringe of Map 77 at the start of the 2nd game turn. This approach immediately drew fire and caused a shift in direction of the American advance to the northern half of Map77. US armor began migrating north, in part, to block a German flanking move on the western margin of the battle map. Accurate American OBA strikes resulted in the destruction of a pair of forward-deployed German infantry artillery and AT guns, and a sudden German extended assault on an exposed Sherman platoon resulted in its elimination, atop the northeastern most, U-shaped, 20-meter hill on Map 77. By the end of this session, step losses amounted to: 2 for the Germans, and 4 for the highly mobile, American Combat Command C force. The third session (a portion of game turn 3- game turn 7) was a somewhat grim one for the advancing Americans, as the entry of Battle Group Gerhardt continued as a major distraction in the NW quadrant of Map 77. This was coupled with the last 2 successful Luftwaffe air strikes and some relatively accurate long-range AT fire from the mostly stationary panzers on Northeast 20-meter hill on Map 77. A 3-turn, ultimately successful, German close assault in Hex 77-0201 caused the collapse of the American counter attack in the northwest corner of the battle map, at the cost of a single SPW platoon. US armor and APCs continued to probe forward along the several east-west trending wadis on maps 77 and 78. American OBA and mortar fires in support of these probes was mostly ineffective during this session. The American side finished with 23 step losses, to 3 for the defending German side. A combined SIX combat 7-die rolls were thrown this session. The updated victory point tally was now: 26 for the Germans; and 3 for the attacking American side. The scenario’s outcome is still very much in doubt. The fourth session (game turn 8) was a costly one for both sides that included a great deal of long-range AT fire, and some very accurate American OBA bombardment. The US force continued probing forward in the central and southern portions of the battle map, while fierce tank vs. tank fighting raged in the hilly, northern portions. More dug-in German AT guns were revealed and a brisk US counterfire halted a German counter attack on the northwestern hill in Map 77. Both sides suffered reduction in their respective initiative levels due to significant casualties. The updated step loss count was 32 for the US side, and 7 for the defending Germans. Only a pair of combat 7-die rolls were thrown by the American side. The overall victory point score was now at 25 for the Germans, and 7 for the struggling Americans. Only eight steps of Sherman tanks remained in play, mostly due to the need for these battered AFV’s to serve as scouts thought this gamey scenario. The fifth session (game turn 9) was a rather grim one for the advancing American side in several critical regions of the battle map. In the west, the German grip on the northwestern most hill tightened substantially, and their armored spearhead began investing the large, 40-meter hill mass that lay just southeast on Map 77. A German infantry probe was repulsed on the opposite margin of the same hill mass. A substantial amount of long-range, AT fire was exchanged throughout Maps 77 & 78 with the advantage going to the surging German armor. Axis reinforcements in the form of Battle Group Stenkoff were again delayed and did not enter the southern margin of Maps 77 & 78. In the center, the major east-west wadi on Map 78 remained a focus for intensive maneuver by the Americans, and for defensive, cross-fire AT shots by the remaining German AT guns on hill slope emplacements within range of the wadi. By the end of the session, step losses were 40 for the Americans, and 10 for the defending Germans. The updated victory point score was now at 40 for the Germans, and 9 for the struggling Americans. Only TWO combat 7-die rolls were thrown by the German side. Our sixth session (game turns 10-11) was a very grim & costly episode for the slowly-advancing Americans with intense combat taking place in 3 areas of the battle map. Once again, Battle Group Stenkoff did not arrive to reinforce the slowly-diminishing number of German Landsers and tanks. In the west, the Axis grip on the hills in the northwest portion of the map continued tightening with 2 successful close assaults, and a pair of adjacent-hex, firefights that resulted in relatively heavy US casualties. Exchanges of long-range AT fire, and an American tank assault in the mixed terrain of the northern half of Map 78 eliminated another German SPW and an AT gun platoon in the long east-west wadi. A successful, 10th Panzer AT cross-fire eliminated another platoon of Sherman tanks in the same area, while thunderous, US OBA caused a substantial morale issues for the remnant Axis artillery emplacements. In the south, a renewed American push was stymied by heavy fire and the disruption of advance elements of Combat Command C. By the end of the session, step losses were now 59 for the Americans, and 11 for the Germans defenders. The updated victory point score was: 62 for the Germans, and 11 for the struggling Americans. A combined SIX combat 7-die rolls were thrown. Eight reduced, US combat platoons remained on the battle map by the end of turn 11. The seventh session (game turns 12-14) was an awful, 3-turn battering for the American side, and German Battle Group Stenkoff finally showed up on the south margin of Map 77 at the start of game turn 14. While the bulk of the US force slowed to a crawl this session; the first US tank platoon managed to exit the east side of the battle map resulting in 4 victory points; and a new American probe entered the embattled northwest quadrant of Map 77. The step loss tally increased to: 14 for the defending Germans, and a remarkable 76 for the Americans. This caused the German initiative to fall to level 1. Fighting was still mostly concentrated in the north half of the battle map and 10th Panzer troops continued consolidating their gains on the hills in the NW corner of the battle map. Only 2 half-strength Sherman tank platoons remained on the battle map. The adjusted victory point score was now: 79 for the Germans, and 18 for the slowly-sinking American side. Sadly, a combined SIX combat 7-die rolls were thrown. The 8th session (game turn 15) was highlighted by continued fighting on both Maps 77 & 78 as the collapse of the broad American advance gained momentum due to increasing casualties among their mobile units. Surprisingly accurate, German long-range, AT fire made this a grim game turn for the remaining GIs with an additional 6 steps lost. Previous American successes at splitting the fire of the German tank and artillery units was no longer feasible at this point in the battle. There was only a single step of Sherman tanks and 3 M-3 halftrack platoons still on the battle map by the end of this session. The updated victory point score stood at: 85 for the Germans, and 18 for the much-diminished American side. Our ninth session (game turns 16-17) was also a rather grim one that featured the demise of all remaining American transport units and some surprisingly effective Allied OBA that fell on various German units on Map 77. In game turn 16, long-range AT fire eliminated the last American tank destroyer platoon. By session end, 7 additional steps of GIs were eliminated, along with 3 more German steps. The new victory point tally was: 92 for the Germans, and 21 for the now-seriously-outnumbered, and badly scattered American side. A combined SIX combat 7-die rolls were thrown. During the 9th session (game turn 18) we came to the mutual decision to end the scenario as a German Major victory. There were only 4 FOW-shortened turns of 18 in this play-through. We agreed that this scenario’s victory conditions should be revised as too much is expected of the American player in this slightly gamey and relatively unbalanced battle that favors the defending German side. My diligent & gentlemanly opponent likely could have just bludgeoned his way directly east across the battle map to exit enough units to win this battle, and would have learned very little in the process. This would have been very costly, but might have resulted in at least a gamey draw. As published, this one is far better suited to SOLO play. I give this one a generous rating of 4, as it is a good way to learn to maneuver a combined arms team across the mountainous terrain of Northern Tunisia. |
||||||||||||||
| 0 Comments |