
|
Battle Group Schutte An Army at Dawn #24 |
||
|---|---|---|
| (Attacker) Germany | vs | United States (Defender) |
| Formations Involved | ||
|---|---|---|
| Germany |  |
5th Light Panzer Division |
| United States |  |
1st "Old Ironsides" Armored Division |

| Total | |
|---|---|
| Side 1 | 5 |
| Draw | 0 |
| Side 2 | 2 |


| Overall Rating, 9 votes |
|---|
|
3.44
|
| Scenario Rank: 438 of 913 |
| Parent Game | An Army at Dawn |
|---|---|
| Historicity | Historical |
| Date | 1943-02-14 |
| Start Time | 12:00 |
| Turn Count | 16 |
| Visibility | Day |
| Counters | 66 |
| Net Morale | 0 |
| Net Initiative | 2 |
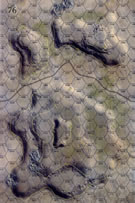
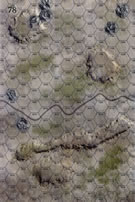
| Maps | 2: 76, 78 |
| Layout Dimensions | 56 x 43 cm 22 x 17 in |
| Play Bounty | 139 |
| AAR Bounty | 165 |
| Total Plays | 7 |
| Total AARs | 2 |
| Battle Types |
|---|
| Exit the Battle Area |
| Hill Control |
| Inflict Enemy Casualties |
| Conditions |
|---|
| Off-board Artillery |
| Randomly-drawn Aircraft |
| Smoke |
| Terrain Mods |
| Scenario Requirements & Playability | |
|---|---|
| An Army at Dawn | Base Game |
| Introduction |
|---|
|
While 10th Panzer Division swung to both sides of Djebel Lessouda they left the Americans on Djebel Ksiara alone. The 21st Panzer’s arrival changed all that. The boys on the hilltop were in for a hot time: placed much too far from the other American forces to expect any support, the outnumbered, outgunned and out-generaled troops on Djebel Ksiara were on their own. Fredendall had not visited the front lines and remained in his headquarters 80 miles from the fighting. |
| Conclusion |
|---|
|
Fredendall refused Col. Thomas Drake, the American commander on the scene, permission to retreat when he requested it at 0800. Drake sent some of his force four miles west to Garet Hadid to set up a fall back location. Fredendall ordered Drake to plan a counterattack to help the beleaguered troops on Djebel Lessouda, but the appearance of Kampfgruppe Schutte put an end to that nonsense. Even when half of the advancing German tanks veered off to take Sidi Bou Zid from the south things didn’t look much better. But the Americans managed to hold their ground while delaying the attack on Sidi Bou Zid. By the time the sun set the Germans had inflicted heavy casualties on three of the five Combat Command A battalions, and completely surrounded two more. |

|
|
|---|
| AFV Rules Pertaining to this Scenario's Order of Battle |
|---|
|
| Heer |
|---|
|


| Army |
|---|
|


| 4 Errata Items | |
|---|---|
| Scen 24 |
US Setup for the first element of 2 Infantry and 1 LT say they set up on board 77. The scenario uses boards 76 and 78, so I presume the setup should have said board 78. Everywhere else in this scenario the board numbers match. (thomaso827
on 2015 Nov 13)
|

|
The reduced direct fire value of the Heer HMG became 5-5 starting with Fall of France. (plloyd1010
on 2015 Jul 31)
|

|
The morale and combat modifiers of German Sergeant #1614 should be "0", not "8". (Shad
on 2010 Dec 15)
|

|
All SPW 251s have an armor value of 0. (Shad
on 2010 Dec 15)
|
| Stalled Attack | ||||||||||||
|---|---|---|---|---|---|---|---|---|---|---|---|---|
This one gives the Germans 3 companies of infantry with 2 PzIIIH tanks, an SK10/4 halftrack, hmgs, mortars and a 75 infantry gun, with enough halftracks for 2 companies and trucks for the rest. The US are set up dug in, 2 platoons and an LT on the southern board on any hill, and the rest on the big hill mass on board 76 with 6 infantry, 2 HMGs, 2 Mortars, 2 37mm AT guns, a 75mm gun and 3 trucks. Germans get points for causing casualties, getting troops off the north edge of the board, and taking hill hexes on the big hill mass, Garet Hadid. Both sides have fair OBA, with the Germans having a total on the 30 column while the US has just the one on the 21 column. Mortars and on board arty give the US a slight advantage while the Germans still have their mortars loaded in the trucks. I placed the southern US outpost about midway on the north-south ridge so that an infantry platoon is dug in to face either direction, the LT being with the western infantry, which gives the US a good outpost to call arty and possibly force the Germans to deploy and attack early. The Germans arrived in two companies in halftracks, each company supported by one of the MkIIIs and the eastern company got to add the SD 10/4, while the rest slowly came up the trail behind them. The two panzer grenadier units split up with the western force lead by the Major going towards the southwestern US outpost on the target hill mass while the eastern force headed onto the ridge to push the US outpost there north or try to eliminate them. The US outpost chose to pull up stakes after being surrounded on 4 sides and headed north for a few turns before being stopped in their tracks by German arty. The Western German force succeeded in reaching a US outpost and dismounting, but then found themselves stuck in assault, neither side really winning but the Germans having a few more platoons to keep up the pressure through losses. German trucks were targeted by US OBA and on board guns and mortars, and this caused a few demoralized stacks but no real casualties. The dismounted eastern force of Germans struck the US troops from the eastern side of the hill, where the two 37mm AT guns sat, hoping to get some shots at anything that headed past them for an exit victory. The US AT guns simply couldn't hit anything at all. Shooting time after time at assaulting halftracks, they rolled 2s and 3s, which would have been nice in any other fire. Overall, the US had a bad time with bent rifles, as the fire simply didn't do that much damage. The German panzers and halftracks survived to the end while US dug-in guns and trucks held longer than anticipated but still collapsed, giving the Germans the eastern side of the hill. I failed to mention that the Germans get airpower on any two consecutive turns. I brought it in early, turns 1 and 2, trying to nail that US outpost on the ridge with the first attempt and failing. The second attempt went after the 75mm battery on the 60m hilltop and again failed to hit anything. Germans started taking step losses in assaults while US took platoon losses. In the end, it was surprising to see that the Germans lost one less platoon than the US did. The Germans did manage one exit unit, the 75mm Infantry gun that I often find to be useless in anything but a defense, still being towed by it's truck. The Germans simply didn't get enough hill hexes to make a difference. Points at the end, 98 US to 34 German for a US major victory. The way the Germans (or either side on one of these 'king of the hill' scenarios) should go would be to dismount and try to avoid assault, simply moving through as many unoccupied hexes as possible, relying on poor firepower from the defenders, or to use the armor to roll through those hexes while the attacking infantry try to take defended hexes in assault. In my game, the US had evacuated troops who had fled earlier and placed them after rally onto the 60m hilltop, where the Germans would have had to fight for every hex, while the 20m and 40m hills were wide open between dug-in defenders, and the attacker should manage a lot more hex points this way. |
||||||||||||
| 0 Comments |
| Push the Americans Off Garet Hadid! | ||||||||||||||
|---|---|---|---|---|---|---|---|---|---|---|---|---|---|---|
This was a 5-session play-through with the determined and resolute, Daedalus, as the defending US Commander of elements of Combat Command A of the 1st Armored Division. I played the attacking German Commander of a combined arms battle group from the 21st Panzer. We ignored the FOW rule, but used smoke, extended assault, tank riders and excess initiative optional rules. We also experimented with a new house rule for mechanized unit movement that allows them to move at 1 movement point per clear hex. In addition, we reverted to the 2nd edition rule in which dug-in units on hills are in limiting terrain and are not spotted unless the spotter is within 3 hexes, or 4 if a recon element. The initial session (game turns 1-3) was all about a pair of German separate movements-to-contact across the breadth of the battle map in the direction of the 60-meter high, Garet Hadid the Northwest quadrant of Map 76. Multiple long-range OBA and onboard artillery shots were exchanged against both the German strong-side, left flank pincer, and the weak-side, right flank pincer. Both German air strikes found their target hex and the resulting morale derangements against the dug-in American 75mm pack howitzer platoon were rapidly resolved. We threw a combined THREE, combat 7-die rolls. No steps were lost by either side. The 2nd session (game turns 4-6) featured the closing-in of the German left flank pincer on the lower, southern elevation margin of the Garet Hadid hill mass. This effort was supported by a column of SPWs climbing up the first terrace of Garet Hadid, just to the west of the summit. In the meantime, a bitterly-contested assault continued in Hex 76-1211, on the north edge of the main, north-south ridge, SE of the Garet. The armor of the right wing German approach pivoted to the right and plunged into the wadi network, east of the Garet Hadid, while the balance of this wing moved to engage the scattered American positions on the southeast margin of the looming Garet. Total steps lost by the Germans were 2, encompassing an overeager pair of SPW halftrack platoons destroyed by close assault. The American side lost only one step in the form of a 37mm AT gun platoon, eliminated by an unexpectedly accurate OBA concentration. A combined, FIVE combat 7-die rolls were thrown in this session. During the action-packed, third session (game turns 7-9) the multi-pronged, German approach continued on the upper reaches of the Garet Hadid. The Landsers had some success in driving the surviving American troops further uphill from the south. In the meantime, the surviving German halftracks circled around to the right behind the Garet’s craggy hilltop, and began close assaulting the quickly-deploying US infantry on the hill top. Boche OBA eliminated the US Commander forcing a slightly chaotic decapitation process. US troops continued their migration north to the southern margin of the hilltop. By the end of the session, total steps lost by the Germans were now 5, costing them an initiative level. The Americans had lost 6 steps, reducing their initiative levels, as well. A combined, FIVE combat 7-die rolls were thrown during this session. The hard-fought, fourth session (game turns 10-13) was marked by continuing close assaults on the summit of the Garet Hadid, along with the multi-turn ongoing assault on the dug-in American company on the north-south ridgetop on Map 78. Oddly, there were very few casualties in this session, thanks in part to the excellent morale recovery rolls for the US force, as well as the repeated failure of the assaulting German troop stacks to achieve decisive results. Highlights included the final demise of the America 75mm pack howitzer emplacement on the hilltop, and a major US counter attack in assault Hex 76-0611, which pinned the remaining German tank company in-place. Total steps lost by the Germans were now 6, to the American total of 7 steps. A combined, SIX, utterly fruitless combat 7-die rolls were thrown during this session. In the very grim final session (game turns 14-16) all but one of the remaining US positions on the summit of the Garet Hadid were finally secured by the, now, more numerous German attackers. The final step losses were 9 for the Germans and 19 for the Americans, and most of these occurred in a series of close assaults. Only TWO, utterly fruitless combat 7-die rolls were thrown during this session. The ending victory point tally was 64 for the attacking Germans and 37 for the defending Americans, resulting in a major Axis victory. I give this unbalanced scenario a 3, thanks primarily to it being fun to play with an inventive & gracious opponent as our last play-through in 2022. This one is probably a better option for solo play. |
||||||||||||||
| 0 Comments |