
|
Back to Sened Station An Army at Dawn #21 |
||
|---|---|---|
| (Defender) Italy | vs | United States (Attacker) |
| Formations Involved | ||
|---|---|---|
| Italy |  |
50ª Brigata Speciale |
| United States |  |
1st "Old Ironsides" Armored Division |

| Total | |
|---|---|
| Side 1 | 1 |
| Draw | 0 |
| Side 2 | 7 |


| Overall Rating, 9 votes |
|---|
|
4.44
|
| Scenario Rank: 15 of 913 |
| Parent Game | An Army at Dawn |
|---|---|
| Historicity | Historical |
| Date | 1943-02-01 |
| Start Time | 13:30 |
| Turn Count | 15 |
| Visibility | Day |
| Counters | 74 |
| Net Morale | 1 |
| Net Initiative | 1 |
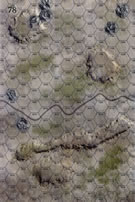
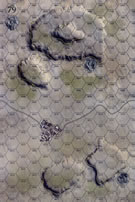
| Maps | 2: 78, 79 |
| Layout Dimensions | 56 x 43 cm 22 x 17 in |
| Play Bounty | 141 |
| AAR Bounty | 159 |
| Total Plays | 8 |
| Total AARs | 3 |
| Battle Types |
|---|
| Inflict Enemy Casualties |
| Urban Assault |
| Conditions |
|---|
| Minefields |
| Off-board Artillery |
| Randomly-drawn Aircraft |
| Smoke |
| Scenario Requirements & Playability | |
|---|---|
| An Army at Dawn | Base Game |
| Introduction |
|---|
|
The success of the raid on Sened Station reached fantastic proportions in the mind of Maj. Gen. Lloyd Fredendall, II Corps’ commander. Even now, with the Germans threatening to drive his corps out of the Eastern Dorsals, all he seemed concerned about was launching another attack on Maknassy. The first part of the attack called for his forces to return to the place of the previous week’s success. |
| Conclusion |
|---|
|
The intelligence reports provided to Combat Command D described 250 defenders equipped with four antitank guns and a couple of 75mm field pieces. Despite the inaccuracy of the estimate, the Americans managed to slowly work their way into town before an Italian counterattack drove them out. The Americans came on again and attacked a second time shortly before 1700, securing the town by nightfall. |

|
|
|---|
| AFV Rules Pertaining to this Scenario's Order of Battle |
|---|
|
| Regio Esercito |
|---|
|


| Army |
|---|
|


| I Feel Like Italian for Dinner Tonight | ||||||||||||
|---|---|---|---|---|---|---|---|---|---|---|---|---|
This interesting scenario played in the nailbighting mode right to the end, hence the 5. A large US force has to cross the width of 2 boards and take as much of the 3-hex town of Sened Station as possible. Casualty points means they have to do it with as few casualties as possible, because taking the town and losing their armor would still result in an Italian victory if they dont kill enough Italians along the way. Italians are spread pretty thin, so I defended the town in 2 of the 3 hexes with the Bersagliari, and set up the on-board arty and AT guns as a guantlet that US troops and armor had to run. Mines were placed in the two clear hexes direcly east of the town and blocking the space on board 78 between the two rocky ground hexes, making a less adventurous force go around rather than risk losses or delays on the road. The US sent the tanks in ahead, the M-6 on the north flank and the T-30 on the south (and as I write, I realize I missed getting out the M-3/81, but I didnt miss it in this game). A line of infanry centered on a captain entered in the north so they could take advantage of the wadi there, while another small force entered in the center, while the main infantry force, centered around the Major, entered south of the southern wadi and taking advanage of the hill to protect them from Italians taking cover in that wadi. The first blood drawn was one of the Stuarts when it lost a step to the Italian tank, but the other Stuarts quickly eliminated the Italian armor and ran through the limited AT fire, ending up at the west of the town where they could start pounding with DF from a place of relative safety. The Major moved his large force along, leaving behind the occasional demoralized infantry and a demoralized LT while maintaining the momentum, and with the central and northern forces moving forward, the Italians were pressured all allong the front, using OBA and the 2 on-board 75s with little more effect than the occasional disruption or demoralization. US troops succeeded in assaulting a dug-in Italian force on the south-central hill, destroying the Italian mortars, an AT gun and a 75 located there, but the Italian Major commanding managed to slip away with a disrupted LT and made his way around the large US force that had moved on to envelope the town from the south. With the central and northern US forces having cleared out the Italians on the north side of the valley with the loss of one step from the M-6, the southern force went for an assault on 2 of the 3 town hexes on the last turn, succeeding in taking one but leaving the other contested, while US OBA had demoralize and reduced the Bersagliaris in the 3rd hex, keeping them from being able to strike back. Italian losses were very high, so in the end, the US won, 25 to 7, countng one town hex for each side and the 3rd contested. A few more turns might have seen the town fall completely, but with the Italians having rolled an 11 on the 3 column a couple of times, it was also possible the US might have lost more troops if not the town hexes gained. Great game. |
||||||||||||
| 0 Comments |
| Familair Spot, Different Result | ||||||||||||
|---|---|---|---|---|---|---|---|---|---|---|---|---|
Battle Report: Units from the 1st Armored Division CCD, returned to Sened Station on the afternoon of February 1st, 1943, but the town was still defended by the Italian 50th Special Brigade. The town was well garrisoned with an M14/41, 47mm, and INF and HMG platoons commanded by Maggiore Rizziti. INF and Bersaglieri platoons were on the hills south of town with a mortar and 75mm platoon lurking behind the south hill. INF were also in the wadi north of town, so the Americans had their hands full and met with stiff resistance, particularly in the hills south of Sened Station. Minefields that arced east of the town compounded the situation. By 1500 hours, American units were assaulting the east end of the town and both hills south of town, which were all heavily contested by the Italians, and the Americans were pushed out of town by 1530. But not for long. About that same time, a strong attack by an American M3/75 platoon scored several critical hits on the M14/41 platoon in SW Sened, and they retreated north to the wadi to recover with the Americans occupying the sector. By 1615, the entire western end of the town was in American control, and Maggiore Rizziti’s remaining troops were basically surrounded. They battled bravely until 1700 hours when surrender was in order, giving the Americans a major victory. Rizziti’s AAR to the hierarchy identified the lack of air support from the Regia Aeronautica; although they had three separate flyover attacks, they failed to hit a single target. Analysis: The objectives of this brief 15-turn scenario are to control Sened Station and eliminate enemy units. Morale for both sides is low (7/6) except for the more seasoned Bersaglieri units, which tends to favor the Italians as defenders. The Bersaglieri were used to man key real estate in town and on one of the south hills. The scenario was very well balanced with victory possible for either side up until the last turn, and the American advance was really driven by how quickly units were taken from good order and how quickly they could recover. Fewer than half the US officers had a morale bonus, so some units that were hit early and demoralized never did get back in the fray. When the Americans took out the single Italian tank, life got easier for them in their advance to the station. By turn 12, they had two of the three town hexes, but the Italians had a chance to wrest control; however, slow recovery now became their downfall. The tide of battle also shifted with swings of initiative; the Italians had it 6 of the first 8 turns, but the Americans took it for each of the last 7 turns, many of which allowed critical first hits. The US ended up with 25 VP’s, 19 from lost Italian steps and 6 from town hex occupation, while the Italians had 15 VPs. That 10-VP differential was enough for a major American victory. This was a very well-balanced and enjoyable scenario that gave the feel of the battle as described in the monograph. |
||||||||||||
| 0 Comments |
| Push the Italians Back & Liberate Sened Station | ||||||||||||||
|---|---|---|---|---|---|---|---|---|---|---|---|---|---|---|
This was a 6-session play-through with the indomitable and quick thinking, Daedalus, leading a force of dug-in Italian infantry holding in defensive positions in the vicinity of Sened Station. I led elements of Combat Command D of the green, US 1st Armored Division. We played with the consolidation, smoke/illum, extended assault, tank riders and excess initiative optional rules. We ignored the FOW optional rule in this encounter. In addition, we experimentally used the following four house rules: 1) Road Movement for Mechanized & Foot Units All FOOT & MECHANIZED units may move on roads at the rate of 1/2 a Movement Point (MP) per road hex, just like MOTORIZED units, 2) Standardized Movement for Mechanized Units All mechanized units may move through clear hexes at a movement cost of only 1 movement point (MP) per hex, instead of 1 1/2. Add one to this cost if moving up or down slopes hexes, 3) Dug In Units are Automatically in Limiting Terrain in Desert Games Unless prohibited by special scenario rules, ALL units that are dug-in on slope hexes are considered to be in limiting terrain and are spotted if enemy units approach to within 3 hexes, or 4 hexes for reconnaissance units – – unless they are marked with a spotted marker, see 8.22, and 4) Tank Leader Forward Observation Efficient tank leaders (full strength only) may spot for ALL artillery & air strikes in accordance with the normal spotting rules (8.0, page 19). Just as in the case of leader units spotting, this action does not require an activation. Nonefficient tank leaders may also attempt to spot for ON BOARD ARTILLERY ONLY by throwing a single die per attempt to spot a target. This action does require an activation. They spot the intended target on a die roll of 4-6. The initial session (game turns 1-3) included a large-scale American, right flank, movement-to-contact starting from the northeast quadrant of Map 79. The bulk of this veering thrust was up the 40-meter hill mass and to the south along its eastern margin. The first Italian minefield was encountered in the wadi adjoining the southern edge of the large hill mass. Opportunity fire from Sened and Axis OBA accounted for 1 step loss to the attacking American side. The advancing GIs were rapidly closing on the garrison in the northeast portion of Sened. Only 3 combat 7-die rolls thrown in this session. The second session (game turns 4-5) was a grim one for the attacking Americans and featured multiple short-range fire fights as they continued closing on Sened Station from the north and east. The north margin of Sened was particularly deadly for the Americans and their advance verged on collapse during both turns of this session, thanks in part, to a successful Italian air strike. Desultory long range AT fire was exchanged, and the sole Italian tank platoon was reduced to a section as a result of a lucky hit. The revised step loss tally was 8 for the US side, as well as 1 leader; and 4 for the defending Italians. Both sides lost a step of initiative. The victory points were now 17 for the Italians and only 4 for the US side. A major Italian victory at this point in the play-through. The third session (game turns 6-7) featured the slight contraction & consolidation of the Italian defenses in and around Sened Station. Only 3 besieged dug-in positions remained on the north margins of the town to act as buffers. Multiple, adjacent-hex firefights took place along the town’s north & east edges resulting in the loss of another US infantry platoon and numerous morale checks for both sides. US OBA and a single Italian air strike proved ineffective. Long-range American AT fire eliminated a second Italian 47mm ATG platoon before it could be emplaced in the long east-west wadi on Map78. Both sides lost single leaders this session, and the Italian initiative fell to zero. The updated step losses were: 9 for the Italians, and 11 for the advancing Americans. The victory point tally was now 20 for the defending Italian side and a mere 9 for the US side – still a major Italian victory at this point. The fourth session (game turns 8-10) consisted of numerous close range firefights in the North & East margins of Sened Station as the Italian defenses slowly contracted, and the American grip tightened. US step losses came to 9 in game turn 10. The American combat engineers completed clearing the first Axis minefield and began work on a second set of mines north of Sened. However, they also became a frequent target for Italian OBA and mortar fire. Many morale recovery rolls were required by both sides in this session and a combined SEVEN combat 7-die rolls occurred. Three steps of Italian units were eliminated, by either adjacent-hex fire, or accurate US OBA. In the last turn, the senior Italian leader was eliminated. The updated victory point totals were now: 18 for the Italians, and 12 for the Attacking US side. This equates to an Italian minor victory at this stage in the battle. The fifth session (game turns 11-13) for the attacking GIs was a frustrating repeat of the previous session with multiple close range firefights on the margins of Sened. The Americans tried setting up a crossfire situation against the last step of Italian tanks only to have 4 (+1) AT shots miss! Then, the return fire eliminated a section of M-3 Stuart tanks in the wadi west of the town! A combined FIVE combat 7-die rolls were thrown. American OBA was virtually worthless throughout the session and the PG fates favored the defending Italians with frequent morale recoveries. Steps losses were: an even 13 for both sides at the end of game turn 13. The updated victory point totals were now: 22 for the Italians, and 13 for the Attacking US side. This equates to a major Italian victory at this stage in the battle. The final session (game turns 14-15) featured a surrounded Sened Station Italian garrison fighting for its life. American units poured into the town from the north and east edges and bitterly contested close assaults began in town hexes 79-0611 & 79-0511, along with clear terrain hex 79-0410. The American vise continued to tighten in spite of some very poor combat and morale recovery die rolls. The last step of Italian tanks we finally eliminated by close-range AT fire and a last-ditch Italian air strike proved ineffective. At the mid-point in game turn 15, step losses for the defending Italian garrison had reached: 20, as compared to the American loss of 14. The final victory point tally was: 14 for the Italians and 23 for the victorious American side, in this hard fought battle. The house rules that we tried worked very well in this play through. I give this slight unbalanced scenario, in favor of the attacking Americans, a solid 4 and recommend it for both SOLO and SHARED play. |
||||||||||||||
| 0 Comments |