
|
Half Measures An Army at Dawn #19 |
||
|---|---|---|
| (Defender) Germany | vs | United States (Attacker) |
| Formations Involved | ||
|---|---|---|
| Germany |  |
5th Light Panzer Division |
| United States |  |
1st "Old Ironsides" Armored Division |
| United States |  |
26th Infantry Regiment |

| Total | |
|---|---|
| Side 1 | 2 |
| Draw | 2 |
| Side 2 | 4 |


| Overall Rating, 9 votes |
|---|
|
4.11
|
| Scenario Rank: 76 of 913 |
| Parent Game | An Army at Dawn |
|---|---|
| Historicity | Historical |
| Date | 1943-01-31 |
| Start Time | 07:00 |
| Turn Count | 24 |
| Visibility | Day & Night |
| Counters | 60 |
| Net Morale | 1 |
| Net Initiative | 1 |
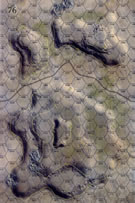
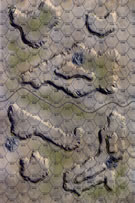
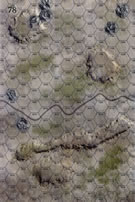
| Maps | 3: 76, 77, 78 |
| Layout Dimensions | 84 x 43 cm 33 x 17 in |
| Play Bounty | 144 |
| AAR Bounty | 153 |
| Total Plays | 8 |
| Total AARs | 4 |
| Battle Types |
|---|
| Exit the Battle Area |
| Hill Control |
| Inflict Enemy Casualties |
| Road Control |
| Conditions |
|---|
| Off-board Artillery |
| Randomly-drawn Aircraft |
| Smoke |
| Illumination |
| Scenario Requirements & Playability | |
|---|---|
| An Army at Dawn | Base Game |
| Introduction |
|---|
|
Combat Command A had received orders to counterattack Faid Pass on the previous day but assembled slowly and advanced tentatively. Than at 1430 they unexplainably went into bivouac for the night, still seven miles short of the jump-off point for the attack. The Americans finally went forward at 0700. |
| Conclusion |
|---|
|
So far the Americans had botched the whole battle. II Corps commander Lloyd Fredendall had more interest in raiding Maknassy than in addressing the situation at Faid. It would soon cost him his command. The combat command commander now compounded his dawdling of the previous day by displaying no sense of urgency, and didn’t attack until the rising sun was directly in his troops face. Then he ordered his Shermans to advance straight ahead. Within ten minutes half of them were brightly blazing under the rising sun. He was soon gone as well. In the meantime, the infantry methodically advanced to within a mile of the pass and then worked their way northward in an effort to outflank it. After taking two ridges the advance stalled under heavy enemy fire. After dark the Americans retired to friendly lines. Gen. Dwight Eisenhower soon lost faith in the task force commander too, and replaced him as well. War is a harsh teacher, and the Americans were determined to get it right, despite having to sack a number of commanders. |

|
|
|---|
| AFV Rules Pertaining to this Scenario's Order of Battle |
|---|
|
| Heer |
|---|
|


| Army |
|---|
|


| 2 Errata Items | |
|---|---|

|
The reduced direct fire value of the Heer HMG became 5-5 starting with Fall of France. (plloyd1010
on 2015 Jul 31)
|

|
The morale and combat modifiers of German Sergeant #1614 should be "0", not "8". (Shad
on 2010 Dec 15)
|
| Task Force not up to the Task | ||||||||||||
|---|---|---|---|---|---|---|---|---|---|---|---|---|
A task force led by Colonel Alexander Stark was ordered forward to support the beleaguered French troops at Faid Pass. However, they moved slowly and bivouacked before reaching the pass on January 30, 1943. When they arrived on the morning of the 31st, the pass was already held by German troops that were well entrenched on both hills surrounding the main road. The US moved east towards the pass with most of the strength on the south flank, except for mortar placement on the northwest hilltop. By 0830 hours, fire was being exchanged on the south central hill. The Germans moved quickly to reinforce the sector, and a major combined arms skirmish occurred. The US units had difficulty taking control due to the continued bombardment by a mortar/88mm group on the north hilltop. The 88mm platoon was finally eliminated by OBA at 1230 hours, much too late to salvage the battle for the Americans. The Germans had a major victory by 1300 hours. This scenario portrays the actual battle fairly well. The Americans have a decided advantage in numbers but lack the morale to sustain the attack. The 7/6 morale is a definite disadvantage, and the presence of the 88mm unit, if placed strategically on one of the 40m hills allows a strong command of the battlefield. In this case, the 88 was adjacent to a pair of mortars and commanded by an 11-1-2 Lt. Thus, the base morale of the units was 10 with the morale modifier, and they were extremely difficult to take out. Although the Germans have a limited number of units, their superior morale and the MM of their leaders provide real strength beyond the numbers. The US ended up with 14 VP’s to 32 for the Germans (step losses were 23 and 13 respectively) resulting in a major German victory. |
||||||||||||
| 0 Comments |
| Americans pull the upset | ||||||||||||
|---|---|---|---|---|---|---|---|---|---|---|---|---|
The situation: The Americans and Germans play king of the hill in a three-map scenario, and the Americans get bonuses for exiting units and keeping Germans off the westernmost map. Historically, the U.S. lost this one. . . . The setup: The U.S. enters from the west. The Germans can set up anywhere on the middle (board 77) and eastern (76) maps. I pile the Germans into the middle, blocking the road and siting the 88 for maximum coverage of the area in front of the main defense line. The panzers hide behind a hill, ready to pounce. Summary: The G.I.s come on and, thanks to their low morale, start piling up disruptions and demoralizations all over the place. The threat of the 88 keeps the Americans from using most of their mobile forces. Early on it looks bad, with three INF and two Sherman steps lost to only one German INF. But this is a long game, and the U.S. is able to pull back and reorganize, and a company-size strike force is able to work its way onto the 20m hill in the northwest corner of board 77, flanking the German line and providing sighting for the off-board artillery. On turn 12 they hit pay dirt as the OBA takes out the 88mm, and one turn later a couple INF platoons take out the 75, and the remaining Shermans team up and take out the Panzers. This completely flips the situation, and the Yanks proceed to break up the German line and shake some armor loose for a breakthrough. Eventually nine steps exit, the Americans control most of the high ground on board 77, and they get the bonus for keeping the westernmost board (78) clear. Step losses slightly favored Germany, but it wasn’t enough. 44-22 United States. Analysis: A good mid-size battle with a lot of real estate. It runs a bit long, but that provides time for the sides to develop a plan instead of just lumbering forward and blasting each other. Fun game. |
||||||||||||
| 0 Comments |
| Spread Out and Move East! | ||||||||||||||
|---|---|---|---|---|---|---|---|---|---|---|---|---|---|---|
This was a 4-session play-through with the aggressive and determined, Wayne Baumber, leading the overextended – but well-dug-in – German side. I led the very green and poorly organized attacking US Task Force Stark. We used FOW, smoke/illum, excess initiative, consolidation optional rules. We also experimentally used the following three house rules: 1) Road Movement for Mechanized & Foot Units All FOOT & MECHANIZED units may move on roads at the rate of 1/2 a Movement Point (MP) per road hex, just like MOTORIZED units 2) Standard Movement for Mechanized Units All mechanized units may move through clear hexes at a movement cost of only 1 movement point (MP) per hex, instead of 1 1/2. Add one to this cost if moving up or down slopes hexes. 3) Dug In Units are Automatically in Limiting Terrain in Desert Games Unless prohibited by special scenario rules, ALL units that are dug-in on hill, slope or wadi & gully hexes are considered to be in limiting terrain and are spotted if enemy units approach to within 3 hexes, or 4 hexes for reconnaissance units – unless they fire or move. The initial session (game turns 1-6) included a lengthy American movement-to-contact from the west edge of Map 78, with the bulk of the force moving across the southern margin of the battle map and an infantry company scouting east along the single road. The majority of the US tanks and tank destroyers scuttled across the length of the battle map, taking long-range AT hits on the way. The long east-west ridge on Map 78 was occupied by the advancing Americans as the Germans redeployed south and west from their initial positions. The sole Luftwaffe air support sortie called for in the scenario failed miserably. Casualties were limited to 1 German step and 5 US steps in this session, Only a single American combat 7-die roll was recorded. The second session (game turns 7-12) was a rather grim one for both sides with a costly German counter attack in the hilly southern portion of Map 77, that blunted and chewed up the leading edge of the US force. This counter attack was eventually repulsed. In the center, the German advance adjacent to the road was halted and slowly reversed owing to a large number of morale breakdowns that affected both sides. The first 6 steps of American armored units scuttled off the east edge of the battle map. This bloody session’s casualties were; 7 steps for the German side, and 10 for the Americans, which resulted in both side’s initiative falling to 0. The victory point tally was 20 for the Germans, and 14 for the Americans at the mid-point of the scenario. The German Commander managed to throw FIVE combat 7-die roll, to only one for the US. The extended 3rd session (game turns 13-20) was a fairly dismal one for the defending Americans that saw the elimination of the last M-4 tank platoon, the collapse of a weak GI infantry attack in the south, and a vigorously-renewed German counter attack in the southernmost portion of Map 77. The only good news for the American defenders was the final destruction of the last German mortar and 88mm AT gun platoon – both by accurate OBA strikes. At the end of the session, the victory point total was: 32 for the Germans and 18 for the Americans. There were a combined TWELVE combat 7-die rolls in this session! It looks like this one will come down to the wire in the remaining 4 turns! The fourth session (game turns 21-24) was very exciting that included some miserably poor combat and morale-related die rolling for both sides. There were a combined NINE combat 7-die rolls. The Nazi counter attack in the south collapsed, with the loss of the last German tank platoon and another step of infantry eliminated in close assaults. However, clever German moves in game turns 23-24 placed units on the road in Map 78. Both sides' OBA was unusually ineffective during this session. The final score was Germans 29, to 26 for the Americans, which resulted in a hard-fought, slightly frustrating, draw. The Germans were only a single victory short of a minor victory, WHEW! There were 10 FOW-shortened turns, out of 24 played. I give this well-balanced scenario an enthusiastic 4, and recommend it for both SOLO & SHARED play. |
||||||||||||||
| 0 Comments |
| Draw snatched from the jaws of victory or defeat | ||||||||||||||
|---|---|---|---|---|---|---|---|---|---|---|---|---|---|---|
This excellent scenario has a German force defending a pass during the Kasserine campaign. The American attacking force has good armour support and reasonable OBDA however the VC's have the American commander having to decide whether to bypass the German defense's and go for exit VPs, or take the high hills overlooking the valley. The battle opens with the American forces pushing east, the German units remain dug in on the hills, first blood falls to the American when accurate OBDA destroy the German MTR platoon, however the following turn the sole German tank platoon (PzIII's) engages in a tank duel with M4's and T20 and inflicts 3 step loss with any loss to themselves. This puts the German commander on the front foot and he (ie me) gets overconfident and advances forward to contest the wadi area in the middle of the board and a smaller ridge line in the south. A tremendous struggle starts over the ridge line with losses for both sides, although the US troops are pushed off the ridge, the Germans cannot afford the losses and now look very thin on the ground. After some desultory tank exchanges the American AFV's move off the board. The US artillery takes out the German 88's and in a very luck shot disrupt the PzIII platoon who were moving to threaten the US line of communication. The last few turns of the game are very pro US with INF destroying the German tanks and pushing hard for the Northern hills, however a German counterattack with really their one remaining good order unit stope the US forces from taking more than one small section of the hill. At the end of the game we had no real idea what the final VP score would be, and we had to count them very carefully. As it happened the German had amassed more VP's but not enough to claim the win. Well this one was close all the way through with the battle ebbing and flowing very nicely. Old Treadhead managed his initial assault well but probably should have kept his tank units on the board to take hill hexes in the last few turns however he would have not got 6 VP's for exiting those units so it is a moot point. During out final session I nearly threw in the towel as I got DEM with my die rolls but struggled on to claim a draw. Good scenario played in great spirit, most enjoyable. |
||||||||||||||
| 1 Comment |