
|
Ousseltia Seesaw An Army at Dawn #14 |
||
|---|---|---|
| (Defender) Germany | vs | United States (Attacker) |
| Formations Involved | ||
|---|---|---|
| Germany |  |
10th Panzer Division |
| United States |  |
1st "Old Ironsides" Armored Division |

| Total | |
|---|---|
| Side 1 | 6 |
| Draw | 1 |
| Side 2 | 1 |


| Overall Rating, 9 votes |
|---|
|
3.56
|
| Scenario Rank: 376 of 913 |
| Parent Game | An Army at Dawn |
|---|---|
| Historicity | Historical |
| Date | 1943-01-23 |
| Start Time | 14:30 |
| Turn Count | 16 |
| Visibility | Day & Night |
| Counters | 72 |
| Net Morale | 1 |
| Net Initiative | 0 |
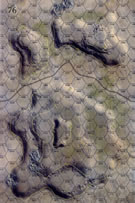
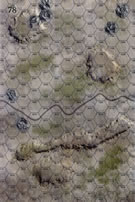
| Maps | 2: 76, 78 |
| Layout Dimensions | 56 x 43 cm 22 x 17 in |
| Play Bounty | 141 |
| AAR Bounty | 153 |
| Total Plays | 8 |
| Total AARs | 4 |
| Battle Types |
|---|
| Breakout |
| Hill Control |
| Inflict Enemy Casualties |
| Conditions |
|---|
| Off-board Artillery |
| Smoke |
| Terrain Mods |
| Illumination |
| Scenario Requirements & Playability | |
|---|---|
| An Army at Dawn | Base Game |
| Introduction |
|---|
|
On the previous day, Combat Command B forced Kampfgruppe Lueder over to the defensive but failed to defeat them. With Axis forces very active in the area, Combat Command B was ordered to attack northward at dawn and make contact with the British fighting at Djebel Bargou. Due to supply difficulties the attack didn’t start until mid-afternoon. |
| Conclusion |
|---|
|
The attack stalled against determined German resistance. That evening Combat Command B received orders from their assigned French XIX Corps headquarters to continue the attack come morning. However, the American II Corps assumed they now commanded Combat Command B and wished to pull them back to Ousseltia until the enemy was driven from the hills. After much debate Combat Command B pulled back. |

|
|
|---|
| AFV Rules Pertaining to this Scenario's Order of Battle |
|---|
|
| Heer |
|---|
|


| Army |
|---|
|


| 3 Errata Items | |
|---|---|

|
The reduced direct fire value of the Heer HMG became 5-5 starting with Fall of France. (plloyd1010
on 2015 Jul 31)
|

|
The morale and combat modifiers of German Sergeant #1614 should be "0", not "8". (Shad
on 2010 Dec 15)
|

|
All SPW 251s have an armor value of 0. (Shad
on 2010 Dec 15)
|
| Punch Drunk Brawling | ||||||||||||
|---|---|---|---|---|---|---|---|---|---|---|---|---|
This one is something of a reverse of rolls from the AAAD game I played earlier this week, with Germans defending against an American attack. Both sides are much weaker in this one, the Germans are defending the hills on board 76, some of them up to the 60M mark. Germans have 2 companies of infantry plus a motorcycle platoon, 2 mortars, 2 HMGs, AT guns in the 28 and 50mm calibres, a 20mm AA gun, 2 Mk IIINs and a StuG IIIG, with 3 halftracks and 4 trucks to transport anything that needs or wants to be moved. Germans have 1 more leader than the US does, and OBA is 2x16 for the Germans and 3x18 for the US. US has 10 infantry, 3 HMGs, 1 Engineer, 2 mortars, a towed 37mm AT, an M6 tank destroyer, 2 M3/75s, a T30, a Sherman, 4 Lees, 10 M3s and 3 trucks. I set up the German guns and most of the infantry on the south edge of the hills on board 76, with the Mk IIIs and the motorcycle outposts on the north-south ridge on board 78 and 2 infantry with halftracks dug in on the western hill and the StuGIII adjacent. The StuG could range in well on any US armor coming up the center or on the eastern ridge, while the Mk IIIs planned to shoot and scoot, hoping to hit something and then fall back, overwatching each other. The US didn't have transport for everyone, so I made up 2 infantry stacks with LTs as scouts, bringing them in to the small southwestern hill and on a rocky hex just west of the eastern ridge. They would grab the German attention, call in OBA on anything they could see, and basically absorb fire for a few turns while the mounted US troops and armor came on the eastern side of the board, with the Sherman and Lees trading shots with the MkIIIs. The halftracks and trucks could move forward for several turns without being fired on, and the Germans didn't waste any OBA on them until they could get a shot at some loaded trucks, choosing instead to try to pound the two US infantry elements for several turns. The Lees and Sherman managed to take out both Mk IIIs and chase off the motorcycle infantry, but started taking serious losses from the StuG across the valley. Surviving US armor moved over the eastern edge of the ridge to prevent he StuG getting any more kill rings on his gun, and the StuG withdrew to avoid becoming assaulted by the US infantry, who had now recovered and were heading across the valley towards the hill. The US armored infantry managed to flank the Germans left and started assaults against the easternmost German position and also against another position holding the 60m hilltop. These assaults drew in more troops from both sides and soon stagnated, each side taking a step loss or demoralizing nearly the entire stack and then recovering while another tank battle grew in the valley. The StuG had moved back far enough that the Lees were able to engage again from the north edge of the ridge, and this time the StuG's luck ran out. It took 2 turns for the Lees, but they managed to eliminate the StuG and turn their attention to the center of the German infantry line. The German AT guns were nasty, but didn't have the range to prevent a two-hex shot at a dug-in German post of a Captain, an HMG and an Infantry, and the post was no longer able to support the two mortars dug in just behind and uphill of them. The Germans were out of armor, but the infantry were holding well, and as it started to get dark, the US saw themselves as unable to move anything off the north edge of the board, but had quite a bit of good order troops and armor on board 76. US got points for having good order troops on the 40m hill, double for the 60m hill, and for every good order step on board 76 at the end, as well as the usual casualty points and points for anything that could get off the north end. With daylight failing, they were happy to consolidate their gains and not risk trying to assault dug-in Germans in the dark. When the butcher's bill was counted up, the US had 55 points, the Germans 53, leaving this game a draw. The casualty points were pretty high for both sides, but hurt the Germans a bit more having lost all their tanks. But both sides were in a trading of casualty mode in the assaults. Between running out of time to continue and the appearance of a stalemate in the assaults, I called it a day. Great game. |
||||||||||||
| 0 Comments |
| Head for the Hills! | ||||||||||||
|---|---|---|---|---|---|---|---|---|---|---|---|---|
By midafternoon of January 23, 1943, units from USA Combat Command B, 1st Armored Division moved north to join their British allies. However, remnants of the Battle Group Lueder, 10th Panzer Division remaining in the Ousseltia area were dug in on the hills east and west of the main trail, blocking their path. The Americans sent pickets to the rocky ground near the road to reconnoiter and spot for artillery. Then, Allied units advanced to the SW hill and the tip of the SE ridge. By 1500 hours, intense fighting was occurring on both east and west flanks in the south. By 1530, an armor battle had resulted in both a Lee and Pz.IIIn platoons being decimated while the Americans advanced slowly on both flanks. A Lee platoon accompanied by an M3/75 group penetrated the eastern flank and moved north. By 1630 hours, all Axis armor had been destroyed while the Allies still had Lee and Sherman platoons in operation. As dusk set in, the Americans moved to the south edge of the northern hills, but they were unable to advance any further. The Americans were awarded a major victory despite not being able to displace the German artillery from the 60-meter NE hilltop. Capt. Weitel received the Iron Cross, 2nd Class, for holding the southeast ridge with his infantry platoon for two hours despite repeated Allied attacks. This objectives for this skirmish include hill control, Allied unit map control and exit, and step loss VP’s. The US has an advantage in the sheer numbers of armor and can use the range of their tanks and TD’s to hit the Panzer III’s; however, they need to use the hills and move judiciously to avoid the StuG IIIG until such time as it can be swarmed and vectored. In this playthrough, the US could have scored better but their leaders were consistently compromised and slow to recover, which limited night-time movement to gain points at game end for occupying the northern map. Nonetheless, the Americans ended up with 67 VP’s to 49 for the Germans, a major American victory, with the difference coming primarily from northern map occupancy (17 VP’s) and exit (6 VP’s). The step losses were pretty even with US (23) and German (25), and hill control yielded 19 VP’s to the US compared to 26 for the Germans. |
||||||||||||
| 2 Comments |
Not really, I just keep an eye on the units that surmount all odds while I'm logging the game; in rare instances, a unit will consistently beat the odds of elimination and tie up enemy units. Then they become a character :-)
| More See Than Saw | ||||||||||||||
|---|---|---|---|---|---|---|---|---|---|---|---|---|---|---|
This one may be a scenario where the more experienced player should be the Americans. (We determined the side randomly; I am more experienced.) The German player starts out with the positional advantage - dug in, on elevation, and holding the target terrain - and with the Stug and the Panzer IIIN (plus a 75mm dug in on a hilltop) it's a daunting prospect for the relatively thin-skinned US armor. Still, the US has the numbers and the combat power, and early on the German armor took a few step losses, albeit they also took out more than their share of American tanks. The terrain on the "forward" board did allow the US to make multiple approaches, and the German armor had to spend part of the time switching between the different enemy thrusts. The Americans did gradually throw their weight around, inexorably taking out some of the German forward positions and putting others on the edge of collapse. But in the game's second half, any chance the Americans may have had of pressing on to victory was torpedoed by one of the worst dice rolling streaks I've ever seen. Morale checks were just about guaranteed to fail, recovery was futile, and if an attack had a decent chance of success a "7" was sure to show up. With a few turns left, the newbie Americans had zero chance to win, and we called it. But it was still a solid scenario - I do think it is much tougher on the Yanks though. |
||||||||||||||
| 0 Comments |
| Combat Command B Fails to Overpower Battle Group Lueder | ||||||||||||||
|---|---|---|---|---|---|---|---|---|---|---|---|---|---|---|
This was a 3-session play-through with the bold and redoubtable, goosebrown, as the German Commander holding a pass and several adjacent hills on both Maps 76 and 78. We used the optional smoke, consolidation, excess initiative, extended assault, strategic movement, but not the dreaded Fog of War rules. The German Force was setup in mutually supporting positions on the two central 40-and-60-meter hills, just north of the main pass, with a company of supporting armor nearby. I played the American side with the newly-arrived and very green, Combat Command B of the 1st Armored Division. The US Force began with a spread out movement-to-contact in two columns between the westernmost, two 20-meter hill masses on Map 78. Germans OBA and long-range AT fire began targeting the advancing (skirmisher) elements almost immediately in our first session (game turns 1-4). American forward observers climbed up two of the closest of the 2 hills to provide OBA fire direction. It was not long before a pair of M-3 halftrack units were eliminated by long-range German AT fire in the second turn, as the US force paused to dismount infantry and begin climbing the first 20-meter that was shielding the bulk of the advancing elements. Surprisingly, a left flank counter move by a company of German tanks, an accompanying mechanized infantry platoon and a scout platoon of motorcycles led off in the 2nd turn. These were met by close range infantry supported by an assortment of tank destroyer halftracks and a unit of light AT guns on the ridge east of the US right wing column. The German motorcycle platoon was halved as it crossed the ridge top while chasing the forward observer to the hill’s western margin. In the center, US armor moved forward into a storm of German AT fire, and it was not long before the first (overwatch) section of Lee tanks brewed up on the north slope of the northwest hill mass on Map 78. Advancing US infantry deployed to the same hill and veered left to get a foothold at the bottom of the hill crowned by German AT guns and dug in HMG and INF units. This was prepatory to getting into position to close assault the German positions on this bi-level hill. In another surprise move, two German infantry platoons that had been dug in on the lower slopes, suddenly moved to the rear to avoid being decisively engaged, leaving the remaining HMG and AT platoons to their respective fates. Heavy OBA destroyed the dug-in German 28mm “squeeze-bore” AT gun platoon on the crest of the opposite hilltop at the start of the 4th turn, when we ran out time. The 2nd session (game turns 4-7) was characterized by substantial German successes in all areas of the map thanks to accurate AT fire; exceptional morale recovery & initiative die rolls; and excessive American zeal in attempting to press home close assaults on the summit of the southwestern 40-meter hill on Map 76. A series of American APC units were destroyed, as well as 3 platoons of ill-fated tank destroyers that were attempting to setup AT crossfires on the right flank. The German Commander withdrew the bulk of his left flank feint, after successfully drawing 2 companies of American infantry off their intended attack on the large, eastern hill mass on Map 76. The STG-IIIG platoon in a dug-in position on that hill mass, proved itself to be a major thorn in the side of the US Commander throughout this play-through. It was beginning to look like the US left flank thrust had been rushed prematurely into combat, before proper OBA fire was brought to bear on the defending German positions. By the beginning of turn 7, step losses stood at 10 for the German side and a startling, 28 for the Americans, who had lost a number of key assets! This noticeably reduced the combat effectiveness of the remaining US units, and ultimately would prove decisive. The third session (game turns 7-9) was marked by very bad luck for the struggling Americans that were stymied at every turn by the combination of poor morale, the loss of initiative, well-placed Axis OBA, and well-led German counterattacks. While the German side suffered a command decapitation when Major Lueder was killed leading a hilltop counter attack in Hex 76-0404, this event did not appreciably improve the situation for the Americans. In the end, Axis firepower proved overwhelming in nearly every close assault instance. We jointly decided to end the game at the end of turn nine when we figured that that was no way for the American side to achieve even a minor victory due primarily to the extent of their combat losses. The Final step loss counts were, 16 for the winning Germans and 49 for the US force. This assured a German minor victory. I give this unbalanced, but fun to play, scenario a solid 3, as there is very little chance for the American side to succeed against a skilled opponent. This one is probably best suited as a SOLO play option. |
||||||||||||||
| 0 Comments |