
|
Rebaa Oulad Yahia An Army at Dawn #11 |
||
|---|---|---|
| (Defender) Italy | vs | France (Attacker) |
| Formations Involved | ||
|---|---|---|
| Italy |  |
1ª Divisone Fanteria "Superga" |

| Total | |
|---|---|
| Side 1 | 3 |
| Draw | 3 |
| Side 2 | 7 |


| Overall Rating, 15 votes |
|---|
|
3.47
|
| Scenario Rank: 429 of 913 |
| Parent Game | An Army at Dawn |
|---|---|
| Historicity | Historical |
| Date | 1942-12-16 |
| Start Time | 08:00 |
| Turn Count | 18 |
| Visibility | Day |
| Counters | 40 |
| Net Morale | 0 |
| Net Initiative | 1 |
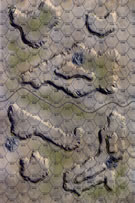
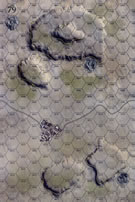
| Maps | 2: 77, 79 |
| Layout Dimensions | 56 x 43 cm 22 x 17 in |
| Play Bounty | 128 |
| AAR Bounty | 147 |
| Total Plays | 13 |
| Total AARs | 5 |
| Battle Types |
|---|
| Exit the Battle Area |
| Hill Control |
| Inflict Enemy Casualties |
| Urban Assault |
| Conditions |
|---|
| Off-board Artillery |
| Smoke |
| Scenario Requirements & Playability | |
|---|---|
| An Army at Dawn | Base Game |
| Introduction |
|---|
|
The Germans controlled the dominating high ground where the Eastern and Western Dorsals met, giving them an excellent observation point overlooking any Allied drive on Tunis. To prepare for their main effort scheduled to go forth on Christmas, the Allies needed to clear and seize the heights. The 7th Moroccan Tirailleur Regiment drew the honor of occupying Rebaa Oulad Yahia to provide the base of operations to tackle the heights themselves. |
| Conclusion |
|---|
|
The Moroccans indeed secured Rebaa Oulad Yahia for a base of operations, but the push farther into the hills bogged down due to tough Italian resistance. On the 22nd headquarters called off the offensive without the heights being secured. A stronger attempt a few days later also failed. |

|
|
|---|
| AFV Rules Pertaining to this Scenario's Order of Battle |
|---|
| Armée de Terre |
|---|
|


| Regio Esercito |
|---|
|


| 1 Errata Item | |
|---|---|

|
In 1940: Fall of France, the units show Direct Fire. All units are Indirect Fire. (rerathbun
on 2015 Jun 06)
|
| le Guillotine | ||||||||||||
|---|---|---|---|---|---|---|---|---|---|---|---|---|
This small fight starts with a little more than an Italian infantry company with ATRs, 2 81mm Mortars, and a 47mm AT gun holding a town in the southern board and trying to stop the French Moroccan troops from exiting the north side of the board or occupying any one 40m hill top hex by the end of 18 turns. The Moroccans start with double the infantry (10 to the Italian 5), with 2 of those HMGs that have a move of 1, an Engineer platoon, 2 81mm mortars, 2 75mm guns with 2 wagons to tow them. The French have a slight advantage in OBA, but that didn't help much until later in the game. I set up the Italians with the Capitano, an INF and an HMG in the southern hex of the 3-hex town, the AT Rifle with another INF in the western hex, and another INF with the AT gun and truck in the western hex. The remaining 2 infantry I set up dug in, one each on the two 40m hilltops on the northern board, the mortars stacked and dug in on the southern edge of the central ridge where they could range in on just about anything that moved on the southern board and support the Italians in town. The French Moroccans entered in 3 groups, the slow-moving HMGs with 2 Infantry, a Captain and an Sous-LT on the eastern side of the road, the wagons towing the 75mm guns lead by the Sergeant coming up the road, and the big strike force of infantry with the Commandant and LT bringing up the large body of infantry ready to come down on the town from the southwest, staying on the hills where only the mortars could spot them for their own fire or the OBA. With no leaders stacked with the mortars, they could only spot for themselves, but their own fire with self-spotting was of more value than the OBA anyway. When the French actually prepared for their attack, the Italians were able to demoralize the stack lead by the French Captain, but the Comandant and the rest of the troops moved into position northwest of the town to start their assault next turn. It was then that the Italians got really lucky, or the French just ran out of their luck, as the stack lead by the Commandant was hit with a 12 result, followed by a 2 for leader loss, hence the title for this article. With the mediocre morale of the French force, this was one of the first times the decapitation, mixed with the loss of an officer equivalent to a Major, had an effect on my games. Half of the other leaders failed their morale checks, including the 7-0-0 LT that was adjacent to the Commandant, and while the Commandant hex got chewed up good, the LT's stack felt the wrath of adjacent hex fire from the Italian AT gun, which could have been far worse had another really high or low number have been rolled. The assault stalled, the French LT fled, leaving a bunch of leaderless troops milling about just outside the town until another leader could take over, and as that other LT came into play, things looked just for a few turns like the luck was turning around, as the French succeeded in taking the southern town hex, chasing the Italians back into the northeast town hex, where the Italians succeeded in regrouping. The force in the western town hex held and nibbled away at French forces until there was nothing left there, and the French in the southern hex became a bit foolhardy when OBA and mortar fire demoralized or disrupted the Commandante's force, charging in but losing the initial assault turn. The Italians regained their morale faster then the French, and the loss of French Moroccan troops began to make it nearly impossible for their ever taking the town. The Sergeant with the guns was hit fairly early as well, and another extremely lucky combination of rolls ended up killing off the wagon and gun that he was stacked with, leaving the other wagon and gun to sit and ponder their choices for a bit before they chose to skirt the visibility and range of the Italian mortars. To the east, the troops with the HMGs made slow progress, while the mortars set up in a good spot to cover the attempts of their comrades in town. The mortars of both sides ended up spending much of the game exchanging fire, and the Italians lost the duel, with both mortar units fleeing back out of cover and then being hit by a very good OBA shot, destroying both demoralized units in one shot. As the French in town were wearing down to nothing, and the number of turns left that it would take the HMGs and guns to move north and have any effect on trying to take a hill top showed that they couldn't get there in time, let along have an even chance of taking a hill, I called the game. No victory conditions were met by the French, and more than 5 steps were eliminated, for a major Italian victory. Great game. |
||||||||||||
| 0 Comments |
| the French attack and win |
|---|
|
This is a relatively quick play scenario, good for beginners. It's mostly infantry, has no special rules, no night, and lasts only 18 turns. Even better there is a fair amount of movement. The victory conditions have some spaghetti logic, but once you work it out you see that the French need to threaten two or three things, and the Italians likewise have to defend two or three things. But neither side is really strong enough to do that. The French must take or contest one town hex to avoid an Italian major. This is their toughest trick...you won't get very far on the 5 and 9 assault tables, so contesting a defended hex is more likely even with an engineer. The game will most likely boil down to rear-area movement and attacks on the 40m hills. Fortunately for the French the Italian force is really too small to do this, and with so much open terrain the French artillery advantage really shows itself. In my game the French won by taking some 40m hill/slopes around turn 13. The Italians had no hope of retaking them, and the contested town hexes were locked in stalemated melees. French win due to lack of Italian control of the entire town. It's not a great scenario but it's very solid and balanced and certainly a fine introductory scenario. |
| 0 Comments |
| Just in time for Christmas....a tie! | ||||||||||||
|---|---|---|---|---|---|---|---|---|---|---|---|---|
The 7th Moroccan Tirailleur Regiment was tasked with penetrating the Axis front lines holding the high ground of Rebaa Oulad Yahia, Their units moved north on the morning of December 16, 1942, engaging elements of the Italian 1st “Superga” Infantry Division. The Italians had the town well-fortified with 3 infantry, 2 AT and an HMG platoon(s) in the town itself. A battery of two mortar units was situated on the central ridge and two other infantry platoons were nearby, one on rocky ground and the other on a 40-meter hill. At 0800 hours, the French advanced with two 75mm artillery units being hauled by wagon to the southeast hill, two mortar platoons and four infantry units on the west flank, and both infantry and HMG platoons along the center road. In the first half hour of their advance, the French lost a 75mm unit to mortar fire, and OBA disrupted multiple units on the road. The deadly fire of the Italian mortar crews continued to cause further disruption on the road, and the French advance was slowed, except for a sous-lieutenant and his infantry units. The latter group had used smoke and the cover of the hills in the southwest to advance toward Rebaa Oulad Yahia from the west. After an hour of attempts, the French OBA finally disrupted the Italian mortar position, and by 0945 hours French units had entered the town from both the south and west in close combat assaults. Seeing the assaults, a tenente and infantry unit left the rocky ground and moved toward town to provide support; however, they were disrupted by French OBA, which had also eliminated one of the Italian mortar platoons. The assaults in both the south and west town areas continued for the next two plus hours, with the French continually reinforcing their disrupted and demoralized units while the Italians held on to their ground. At 1130 hours, the French finally dislodged a tenente and his infantry platoon from the south town sector, but other Italian units remained in the east and west areas. At noon, the Capitano Verselli and his infantry moved from the west side of town to reinforce the tenente/HMG/INF on the east side. That group proved too formidable for the French to overcome, even though the French sous-lieutenant and infantry had cleared the Italian 47mm team from the west side. The French even gambled with both mortar and OBA bombardment on the east side of town despite having adjacent units ready to charge the area, but the stalwart Italian defenders could not be compromised. The battle ended at 1230 in a draw. This is a nice short scenario with very few units and a fairly specific primary objective of controlling the town. Ancillary objectives are step elimination of French by the Italians and exit of steps off the north side of the board by the French. While these attributes would seem to make it a good introductory scenario, the low strength of the units and modest morale lead to extensive disruption and prolonged assaults, which in this case resulted in a protracted and repetitive experience, not exactly the environment to attract devotees to the game. It is difficult to get more than the 13 column of the Assault Table, so the -2 column modifier for the town, even when balanced with a leader and morale bonus (which were not common due to the placement of the Italian units giving some advantage back to the Italians) would max at 13. Most of the assaults that occurred in this game were on the 5 & 9 columns, and units did remarkably well on either morale or recovery, so the French had difficulty taking control of the town. In the end game, the Italians had consolidated 13 fire points and a leader in the remaining town hex, and the most the French could muster was 10 fire points (the 9 column), so there was no chance that they could dislodge the Italians. In fairness, the Italians benefitted from 6 fog-of-war rolls in the 18 turns, which moved the game along. Since neither side achieved an objective, it ended in a draw. The Italians had lost a total of 5 steps, and the French 3 steps. |
||||||||||||
| 0 Comments |
| He Who Fights and Runs Away...Will Likely See His Opponent Do the Same | ||||||||||||||
|---|---|---|---|---|---|---|---|---|---|---|---|---|---|---|
This scenario is a clash between two sides which each have 7/6 morale and limited combat power. As the French, I outnumbered the enemy, but the advance/attack burden was also on me. Key to victory was the three-hex town, so of course that was the focal point of much of the action. My French advanced in a spread-out group, no more than 2 combat units per hex, with the mortars and "French 75's" sheltered behind hills (and of course the Italians sheltered their mortars and dug in their support weapons on hills.) My French (actually Moroccans) reached the outskirts of town with only a little morale drama, and chased away the occupants of one hex almost immediately. Soon enough, more Italians were running...but as the French occupied the town (with one hex still contested), individual platoons were sent packing to the rear. Despite weak artillery on both sides (though at least the French do have 3 x 8 that can combine as 24), a fair amount of demoralization was achieved by bombardment on both sides. The strongest French units are two HMG platoons, but their moiasses-like speed (1 MP) made them lag behind the rest of the attack. (Maybe I should have put them in the wagons that hauled the 75's after those were emplaced.) They did get a nice position on a hill 4 hexes from spotted enemy units in the town, but then I started an assault in that town hex before they fired a shot...and Bombardment put them into a flee-and-recover cycle for most of the rest of the contest. By mid-game the Italian town occupation was down to one platoon - no leader - in one hex, and it held out for a long time. At one point a leader and a second platoon made it back to the outskirts, but were sent fleeing before they could reinforce the hex. As the battle went on, both sides spent a lot of time rallying, and my French had to periodically feed good platoons into the assault when units already involved would flee. Finally, with 5 or so turns left, the lone Italian platoon was overcome and its remnant fled. By then I had also rallied enough units to get a couple of stacks moving forward again - with no motor transport, there wasn't enough time to exit the six steps I'd need to improve my victory level, but maybe I could make it to a 40-elevation target hex. But the forward motion was almost immediately blunted by bombardment and subsequent morale trouble. It ended a French minor victory - but if the one Italian platoon had continued to hold out, or if the reinforcements had joined before being chased away, it could have wound up a draw. Losses, given the relatively low combat strengths, were light - 3 Fremch steps, maybe 4 or 5 Italian. |
||||||||||||||
| 0 Comments |
| Prends cette fichue ville! (Take that darn town!) | ||||||||||||||
|---|---|---|---|---|---|---|---|---|---|---|---|---|---|---|
This was a quick, 3-session play-through with the cunning and relentlessly entertaining, goosebrown, as the Italian Commander holding the town of Rebaa Oulad Yahia and adjacent hilltop areas on Map 79. We used the optional smoke, excess initiative rules; and happily dispensed with the fog of war. In our first session (game turns 1-6) the 7th Moroccan Tirailleurs moved to contact from the southwest corner of Map 79 where they were hidden from prying eyes by the two adjoining 20-meter hills. In general, French OBA and onboard artillery had a very good day and soon both platoons of Italian mortars were eliminated along with a truck and their-well-positioned Forward Observer. The Moroccans proceeded north up the western margin of the map and then turned east after clearing the second hill to form a left flank attack on the town. An early attempt at setting up a French OP on the second hill was stymied by an accurate Italian artillery barrage resulting in a mass demoralization that swept an infantry platoon and a Sergeant back off the second hill. During turn six, the rapidly advancing French colonial troops were menacing the northern margins of Rebaa Oulad Yahia (Hex 79-0512 & 79-0511) and a second Italian Tenente had become a casualty. At the end of the session; there were 4 Italian step losses, and 1 French loss. In addition, a column of Moroccan tirailleurs had made their way north and were scaling the largest 40-meter hill mass on Map 77. Our 2nd session (game turns 7-10) was focused on the bitter, close-quarter struggle for the 3-hex town of Rebaa Oulad Yahia as close assaults by the French Colonial troops slowly began to wear down the Italian defenders in the contested northwest hex of the town. However, Moroccan close assaults were repeatedly stymied, disrupted and disorganized by the reckless bravery and tenacity of the Italian defenders. In the meantime, accurate French artillery fire demoralized and eventually destroyed the equivalent of a company plus of infantry and half of the available Italian machine gun support, as well as eliminating a second leader. Outlying Italian positions east of the town were overrun. Deadly close-range fire from the Italian HMG unit the southwest sector of the town drove off and demoralized another menacing tirailleur company during turn 9. The northern tirailleur column occupied the 40-meter hill mass on Map 77, and this formation began returning to the battle on the town margins. By the end of game turn 10, there were 11 Italian step losses, and 3 French steps lost. The third session (game turns 11-13 ) continued the hard-fought, close-quarter fighting for Rebaa Oulad Yahia as close assaults by the 7th Moroccan Tirailleurs continued to slowly chew up the remaining Italian formations in the town. Down to only one town hex in Italian control, the Italian Commander mercifully conceded the scenario, thereby delivering a French major victory on the 13th game turn. At the end, there were 14 Italian step losses, and 3 French steps lost. |
||||||||||||||
| 0 Comments |