
|
Djebel el Guessa An Army at Dawn #8 |
||
|---|---|---|
| (Attacker) Germany | vs | United States (Defender) |
| Formations Involved | ||
|---|---|---|
| Germany |  |
10th Panzer Division |
| Germany |  |
Hermann Göring Panzer Division |
| United States |  |
1st "Old Ironsides" Armored Division |

| Total | |
|---|---|
| Side 1 | 9 |
| Draw | 3 |
| Side 2 | 2 |


| Overall Rating, 15 votes |
|---|
|
4.2
|
| Scenario Rank: 43 of 913 |
| Parent Game | An Army at Dawn |
|---|---|
| Historicity | Historical |
| Date | 1942-12-06 |
| Start Time | 10:00 |
| Turn Count | 20 |
| Visibility | Day |
| Counters | 123 |
| Net Morale | 1 |
| Net Initiative | 2 |
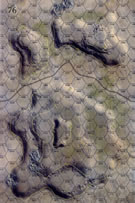
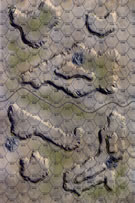
| Maps | 2: 76, 77 |
| Layout Dimensions | 56 x 43 cm 22 x 17 in |
| Play Bounty | 150 |
| AAR Bounty | 153 |
| Total Plays | 14 |
| Total AARs | 4 |
| Battle Types |
|---|
| Hill Control |
| Inflict Enemy Casualties |
| Road Control |
| Conditions |
|---|
| Off-board Artillery |
| Randomly-drawn Aircraft |
| Reinforcements |
| Smoke |
| Scenario Requirements & Playability | |
|---|---|
| An Army at Dawn | Base Game |
| Introduction |
|---|
|
The British infantry suffered severe damage defending Tebourba. Combat Command B from the 1st Armored Division took their place while the Tommies pulled back for rest and refitting. The Army’s official history states that CCB was “rankled by their recent setbacks” under British command, and sure they would do better under American leadership. Five new Sherman tanks bolstered their confidence as part of the replacements for the numerous Lees already lost. Enemy flares illuminated their positions well before dawn, signaling observant officers that their confidence would soon be tested. |
| Conclusion |
|---|
|
Combat Command B's confidence quickly slipped away and confusion reigned. It took the fallschirmjägers less than half an hour to turn the American flank. This left Battery C of the 27th Armored Field Artillery Battalion exposed. They engaged the panzers with their halftrack-mounted howitzers in an uneven duel for two hours waiting for help, radioing “For Christ's sake . . . please, please send help!” Unfortunately the medium tanks had rolled forward four hours before but foundered in the terrain, not making the six miles to the battlefield for another hour. By that time Battery C had ceased to exist. When the tanks showed up they split into two forces and charged through the valley at full speed with no reconnaissance. Fifteen minutes later all five of the confidence-building Shermans and 13 M3 Lees burned fiercely as German medics tried to save the survivors. Later, another American attack and heavy rain stabilized the situation but the Americans sustained substantial losses. |

|
|
|---|
| AFV Rules Pertaining to this Scenario's Order of Battle |
|---|
|
| Heer |
|---|
|


| Luftwaffe |
|---|
|


| Army |
|---|
|


| 5 Errata Items | |
|---|---|

|
The reduced direct fire value of the Heer HMG became 5-5 starting with Fall of France. (plloyd1010
on 2015 Jul 31)
|

|
All SS PzIVH tanks should have a movement of 8. (Shad
on 2010 Dec 15)
|

|
The morale and combat modifiers of German Sergeant #1614 should be "0", not "8". (Shad
on 2010 Dec 15)
|

|
All SPW 251s have an armor value of 0. (Shad
on 2010 Dec 15)
|

|
Reduce strength direct fire value be came 5-5 in Army at Dawn. (plloyd1010
on 2015 Jul 31)
|
| Tough Gunners | ||||||||||||
|---|---|---|---|---|---|---|---|---|---|---|---|---|
Staying home today to help out after my wife had surgery on her hand, I had this scenario ready to run with impartial leader selection and scenario worksheet. The US has a battalion of armored infantry supported by an OBA of 18, a battery (2 platoons) of M-3/105s, an M-6 tank destroyer, a T-30 2 platoons of M-3/75s, spread out over the hills and wadis of 2 boards. A company of M-3 Lees and a platoon of Shermans will come at some point by random die result of 6, or 5 or 6 after the 6th turn. The Germans have 2 comanies of motorcycles, a battalion of panzer grenadiers, with trucks towing a 50mm and 28mm at guns and carrying the HMGs, and mortars, plus a good assortment of tanks, a Grille, a Marder, and have double the OBA plus may have air support. The Germans need to take the high ground on the western board, exit some troops and hold the east-west trail open at the end of 20 turns in addition to killing US units to win. The sneaky Fallschirmjaegers come in with a company from the north edge of the western board to tie down the rear troops and do as much damage as possible. The US started with 5 outposts on the eastern board, with 2 infantry and a good LT at north, south and center positions and 2 more with an infantry, HMG and a good Cpt in between and just a few hexes further west. The M-6 deployed on the soutwestern hill of the eastern board, two of the 3 mortars in the rocky ground 2 hexes northwest of that hill, and the M-3/75s on the crest of the southeastern hill on the western board, the M-3/105s on the crest of the large hill nmass north of the trail on the western board, and the rest of the US infantry with the Major on the eastern slope of the large hill mass with the 37mm AT gun and engineer platoon in an adjacent hex. The T-30 protected the northeast corner of the large hill mass, and the 37mm AA gun was stationed on the northeastern corner of the southeast hill overlooking the road. The Germans entered in 3 groups, with 6 platoons of panzer grenadiers accompanied by tanks and 1 truck loaded HMG platoon in the northeast, the motorcycle troops heading west as fast as possible on the trail, and the rest of the panzer grenadiers and the loaded trucks on the southeast flank. The company of fallschirmjaegers with their own mortars and PMGs moved in at the closest point to the hill mass, with the Major in the middle leading the mortars, a cpt with an FJ platoon and the PMG on the German right and the LT with the last 2 para platoons on the left. Things started well enough as the Germans got mulitple activations, enough to see the whole main force enter from the east. US fire had no effect until the FJs entered, when the M-3/105s crippled the German left stack, which remained in place the rest of the game failing to rally. The motorcyles moved west and then turned north to cut off the US troops in the center while 2 stacks of panzer grenadiers and tanks struck the northern outposts. The German LTC let his Prussian ancestry get the best of him and broke away from the northern group to try to push the central defenders back into the motorcycle troops. The report of his death did little to help as the assault force in the north froze in place trying to sort things out as the rest of the German force moved on with no loss of effectiveness, the Major taking charge right away. In a few more turns, the German north-east force was totally bogged down in assault with the majority of their tanks moving around the assault to try to get at the large hill mass just beyond. The motorcylcle troops lost nearly half their numbers in assault in the middle and the Germans succeeded in taking the southern flank. The fallschirmjaegers had gotten into assault with the M-3/105s, which bogged down, the gunners beating off attack after attack with their rifles and pistols as the FJs chased one platoon out of the dug-in position but just couldnt dislodge the other one. German tanks met up with the FJ major in the rocky ground on the hill mass, destroying the T-30 just in time to see the US armor arrive. The tank duel saw German armor failing to hit while losing a step of Mk IVs, the FJs continued to fight the gun crews, the German assaults in the north and in the central wadi continued to be bogged down as both sides first demoralized each other and then slowly rallied. The German southern group stalled on the southwestern hill of the east board when long range fire from the M-3/75s destroyed the two trucks towing the AT guns. Running out of time to continue the game and being unable to see an obvious advantage, both sides having run down their initiative and casualties at 21 German to 16 US, I had to call it a draw. German airpower was disappointing in it's response, only making an appearance a few times, but when it did arrive, it demoralized US stacks for a turn before they rallied with little or no problem. Great game and one I hope to play to completion with face-to-face play soon. |
||||||||||||
| 0 Comments |
| Djebel Trouble | ||||||||||||
|---|---|---|---|---|---|---|---|---|---|---|---|---|
The German Panzer Division Herman Göring continued to push west and engaged elements of the US Combat Command B, 1st Armored Division at Djebel el Guessa on December 6, 1942. A little past 1000 hours, 6 infantry platoons loaded on Hanomags joined two motorcycle platoons to reconnoiter the southern flank of the American lines. The US position was anchored on the northwest 60m hill by two M3/105 and three mortar platoons forming a bombardment group. They were protected on their left flank, center and right flank by infantry and HMG platoons placed with M3 units. A 37AT unit was placed directly east of the bombardment group, and a 37AA just west. An M-6 tank destroyer, a T-30 unit and two platoons of M-3/75s were positioned along with infantry on or behind the hills and wadis to the east, and on both the north and south sides of the trail. The Germans continued to press the east American pickets with infantry & panzer units in the center eliminating an M3/75, and panzer & motorcycle units to the north. A company of fallschirmjägers moved cautiously south toward the northwest 60m hill. By 1100, the German pressure on both the northern and southern flanks was building despite the loss of an SPW.251 and infantry platoon to an M6 on the US south flank. Shortly thereafter, a Sherman platoon accompanied by 6 platoons of Lees arrived from the west, but not in time to prevent a successful German assault on the southwest 40m ridge. The Lee platoons and the US battery on the 60m hill continued to wreak havoc on the Germans, the former eliminating both a Grille and a Marder, and the latter destroying a German Major and his three mortar units. Then, a Ju.88 and OBA disrupted the battery, effectively neutralizing it Both the M6 and a T-30 in the Allied center fell to German armor, and the German armor superiority began to tell as the Lee platoons on the south flank were incinerated. From 1215-1345 hours, the fighting centered along the trail southeast of the 60m hill. Eventually, the Sherman platoon was driven back in disarray, and the Allied position fell allowing the Germans to move up the hillside at approximately 1400 hours. The Germans broke through the limited resistance on the north flank at about the same time, and motorcycle troops had moved to a position west of the 60m hill. Thus, the Germans had the hill, which had limited Allied strength except for a strong line on the north side, effectively surrounded. With help from a Bf.109 squadron, the Germans foot units closed on the 40m ridge perimeter of the big hill, while a Pz.IVH and a Pz.IVF2 held the remaining Lee platoons at bay. As the battle ended at 1445 hours, the Germans had partial control of the summit, and it was clear that the Americans could not hold them off despite valiant efforts in close combat. The battle was declared a major German victory. The scenario is a long, tough one for the Americans, who are trying to ultimately hold the western hills and trail despite having weaker armor The reinforcement armor for the US entered on Turn 5, which is about the same time the Germans finally got all their units on the board. The artillery convoy was held back intentionally until the risk of destruction by Allied SPA was reduced. German airpower only came into play on six turns, and two of those were misses; however, the two Ju.88 attacks did some significant damage to the Allied battery even though it was protected by a 37AA. The Americans were able to hold a portion of the key 60m hill at the end due to the fog-of-war rolls on 12 of the 20 turns, which moved the game along more quickly. But, not quickly enough, since the Germans scored 83 VP’s (4 for 60m hills, 16 for 40m hills, 7 for trail control, and 56 US steps eliminated) to the American total of 56 (2 for 60m hills, 15 for 40m hills, and 39 German steps eliminated). |
||||||||||||
| 0 Comments |
| Rewriting History | ||||||||||||
|---|---|---|---|---|---|---|---|---|---|---|---|---|
This scenario played out about as counter-historically as you could imagine. As the Germans I've had great success in defeating American armor in Tunisia in the previous scenarios, so the plan was to charge directly into the American defenses, lever them apart with armor and finish them off with infantry. Unfortunately, the American armor reinforcements arrived immediately, and while the Shermans were dispatched immediately, the Grants took up positions in the hills and took the panzers out in an extended 2-hour engagement, supported by halftrack tank destroyers on the flanks. The German infantry spent themselves in taking a single American dugout, as they were pounded by artillery and sniped at from multiple directions. Few Sdkfz 251s survived to haul away the shattered battalion. The German paras on the flank were turned aside by the American defenders, and in the end not a single German unit was on board 76. Major American victory. |
||||||||||||
| 0 Comments |
| Take the Hilltops and Clear the Trail! | ||||||||||||||
|---|---|---|---|---|---|---|---|---|---|---|---|---|---|---|
This was an action-packed, 6-session play-through with the careful & wily, Col. Sonichu, commanding the lead elements of the US 1st Armored Division. I led two widely dispersed German battle groups with paratroopers on the far northwest corner and combined arms elements of the 10th Panzer Division entering the battle map from the east in two separate prongs. Both sides drew decent leaders We played with the FOW, consolidation, smoke/illum, extended assault, tank riders, strategic movement and excess initiative optional rules. The final result was a major German victory. In addition, we experimentally used the following four house rules: 1)Road Movement for Mechanized & Foot Units All FOOT & MECHANIZED units may move on roads at the rate of 1/2 a Movement Point (MP) per road hex, just like MOTORIZED units, 2) Standardized Movement for Mechanized Units All mechanized units may move through clear hexes at a movement cost of only 1 movement point (MP) per hex, instead of 1 1/2. Add one to this cost if moving up or down slopes hexes, 3) Dug In Units are Automatically in Limiting Terrain in Desert GamesUnless prohibited by special scenario rules, ALL units that are dug-in on slope hexes are considered to be in limiting terrain and are spotted if enemy units approach to within 3 hexes, or 4 hexes for reconnaissance units – – unless they are marked with a spotted marker, see 8.22, and 4) Tank Leader Forward Observation Efficient tank leaders (full strength only) may spot for ALL artillery & air strikes in accordance with the normal spotting rules (8.0, page 19). Just as in the case of leader units spotting, this action does not require an activation. Nonefficient tank leaders may also attempt to spot for ON BOARD ARTILLERY ONLY by throwing a single die per attempt to spot a target. This action does require an activation. They spot the intended target on a die roll of 4-6. The initial session (game turns 1-2) featured the beginning of a relatively lengthy German movement-to-contact from the eastern edge of Map 77, and the paratrooper column approaching from the NW corner of Map 76 onto the 60-meter high, Djebel el Guessa hill mass. The 10th Panzer elements came on the map with a strong-side, left flank (southern) thrust and a much lighter right flank (northern) thrust. A series of long-range shots resulted in only a single American step loss to an M-6/37mm portee unit. The Germans were much less lucky and lost 2 steps of paratroopers, plus their airborne Major, who deserted in game turn 2. No US reinforcements arrived and there were no Axis air strikes in the first 2 turns. There were FIVE combat 7-die rolls thrown by the Americans. The end of the session saw the Americans in dominant positions and holding a substantial lead of 40 to 12 victory points. Our second session (game turns 3-5) was an action-packed and exciting episode with a significant amount of combined arms maneuver for both sides. A brisk & well-led American counterattack & redeployment against the German paratroopers on Djebel el Guessa in the northwest quadrant, pushed back the Germans and almost resulted in a leader capture. This was in spite of a successful Luftwaffe airstrike, remarkably accurate Allied OBA, and very lucky long-range HMG fire on the set of US mortar emplacements on the eastern slopes of the Djebel. In the center and northeast, the German right flank advance began washing over the banks of the large wadi and into decisive contact with the remaining American units. Two platoon of US SPAT guns were able to escape this area, as another pincer from the German center peeled off and overran the southern margin of the wadi in an attempt to outflank the already pinned down GIs. In the south, the strong-side German advance continued with their mobile forces probing along the map margins and beginning to isolate the US infantry reserve that was digging-in on the 40-meter hill in the southeast quadrant of Map 79. Step losses at the end of game turn 5, were still 2, for the attacking Huns, and 9 for the defending GIs. Four combat 7-die rolls were thrown in this session. The updated victory points were now: 42 for the Yanks, and only 16 for the Germans. The third session (game turns 6-7) was another action-packed, but grim episode (14 step losses) for the defending GIs as the two sides continued to grapple at decisive range in three different areas of the battle map. Starting in the big wadi on Map 77, the pinned American mechanized infantry company lost their accompanying M-3 halftracks, and an infantry platoon to a combination of AT fire and adjacent-hex, direct fire. In the north half of Map 76, the large, 60-meter hill mass was still mostly in American hands, although two Pz-IVH platoons were able to dispatch the last remaining American Self-propelled 105mm artillery platoon and a tank destroyer unit. In the south half of Map 76, probing German mobile units and their armored spearhead eliminated the remaining US tank destroyers, but were too late to prevent the bulk of the combined arms American reserve force from digging in on the smaller & easternmost of the 40-meter hills. This hilltop was now fiercely-contested ground, as the Landsers and their armored escorts closed to decisive range. The Americans had the misfortune of throwing SIX combat 7-die rolls, and lost a pair of truck platoons in this session. No Luftwaffe air strikes occurred, and the reinforcing US armor still did not show up on the west edge of the battle map. The step loss tally was now 23 for the Americans, and still a mere 2 for the fast-moving, Germans. The updated victory points were now: 36 for the Yanks, and 34 for the surging German side. Our delayed fourth session (game turns 8-9) was another action-packed maneuver-fest across the hilly Tunisian terrain. There were intense, adjacent-hex firefights on the same hills in the north and south on Map 76, and a costly close assault in the big eastern wadi on Map 77. Once again, American reinforcements and Luftwaffe air support failed to show up. The fiercest fighting was in the south, were the combined arms German force surged into decisive range, while their supporting AT fire resulted for the loss of four M-3 halftrack platoons. On the northwest hill mass, multiple maneuvers & heavy short-range fire exchanges continued as the German slowly encroached on the eastern and northern hill margins. The step loss tally ended at: 32 for the Americans, and 2 for the rapidly-moving, German side. By session end, US armor was reduced to only 3 steps of halftracks on the battle map. A combined SIX combat 7-die rolls were thrown. Updated victory point total was: 31 for the Yanks, and 56 for the surging German side. The fifth session (game turns 10-12) was yet another costly episode for the defending Americans who lost 22 steps, but their armored reinforcements finally arrived during game turn 10. In the south, the Germans were able to overcome an American position in one close assault, but were repeatedly stymied in the other, and lost 2 SPW platoons in the process. In the north, a pair of American counterattacks and some well-directed OBA was able to slow, but not stop, the German onslaught on the Djebel. Accurate tank fire on this hill mass eliminated 4 steps of Lee and Sherman tanks shortly after their debut on the map. In the east wadi, the German close assault, slowly ground down the remaining US infantry company. In the meantime, the last few Axis reserves move steadily to the west. The step loss tally ended at: 54 for the Americans, and 6 for burgeoning German side. As before, a combined SIX combat 7-die rolls were again thrown. The revised victory point total was now: 34 for the Yanks, and 75 for the surging German side. Our sixth session (game turns 13-16 ) was a very grim one for the advancing Germans who suffered an additional 7 steps and a leader less. The final victory point tally was 97 for the Germans, and 39 for the defending Yanks. By mutual agreement the American commander conceded at the start of game turn 16. I give this a rating of 4, and recommend it for SHARED and SOLO play. |
||||||||||||||
| 0 Comments |