
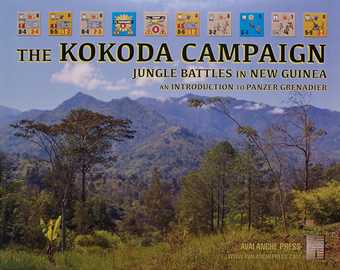
The Kokoda Campaign
| AP Series | Panzer Grenadier |
|---|---|
| Designers | Cheever, Rouleau, Ward |
| Game Type | Standalone |
| Format | Boxed |
| Release Date | 2015-12 |
| Availability | In Print |
| Scenarios | 30 |
| Counters | 428 |
| Counter Type | Die-cut |
| Maps | 2 |

| Overall Rating, 139 votes |
|---|
|
3.55
|
| Standalone Rank: 17 of 38 |
| Popularity: Ownership & Activity | ||||
|---|---|---|---|---|
| Status | Owned by 12% | Played by 7% | AAR'd by 6% | Medaled by 1% |
| Rank | 72nd of 163 | 38th of 152 | 39th of 150 | 44th of 92 |

| Total | |
|---|---|
| Side 1 | 57 |
| Draw | 18 |
| Side 2 | 54 |


|
Japanese troops landed in northeastern New Guinea in July 1942, and quickly began a march over the Owen Stanley Mountains toward the anchorage and airfield at Port Moresby on the southern coast. Australian troops plunged into the jungles and finally stopped them in one of the war's most brutal campaigns. THE KOKODA CAMPAIGN is a complete introductory boxed game in the Panzer Grenadier series based on these battles, your gateway to the dozens of books and games and thousands of scenarios that make up this fascinating game series. Pick up the box, and join the adventure. |
|---|

|
|
|---|
| Army |
|---|
|


| Imperial Japanese Army |
|---|
|


| Imperial Japanese Navy |
|---|
|


| AFV Rules Pertaining to this Game's Order of Battle |
|---|
|
| 10 Errata Items | |
|---|---|
| Scen 6 |
Board orientation should be as noted in the "Additional Notes" (Matt W
on 2017 Mar 11)
|
| Scen 7 |
Board orientation should be as noted in the Additional Notes (Matt W
on 2017 Mar 11)
|
| Scen 7 |
Japanese setup calls for 2 Lt Colonels but my counter mix only has 1. Substituted with a Colonel. (Juiceman
on 2020 Dec 19)
|
| Scen 8 |
Note board orientation should be as noted in the Additional Noes (Matt W
on 2017 Mar 11)
|
| Scen 8 |
Japanese setup calls for 2 Lt Colonels but my counter mix only has 1. Substituted with a Colonel. (Juiceman
on 2020 Dec 19)
|
| Scen 16 |
Ignore the "no units in hexes adjacent to any other unit" condition for the Australian 2/31st and the 2/33rd. The non-adjacency condition still applies to the Composite 2/14 and 2/16 Battalion. (Daniel Rouleau clarification) (rerathbun
on 2016 Jan 16)
|
| Scen 18 |
The second Victory Condition for the Australians should Read: Minor Victory for Control of one village. (Juiceman
on 2021 Sep 30)
|
| Scen 26 |
The Australians set up first. (rerathbun
on 2015 Dec 30)
|
| Scen 27 |
Japanese set up lists 10 x SER (army) but there is only 9x in the counter mix with the game. (Juiceman
on 2021 Jun 13)
|
| Scen 27 |
Victory Conditions Typo: For the Aussies there are two Minor Victory Conditions listed, guessing the the second or more difficult is the Major Victory condition for the Australians. (Juiceman
on 2021 Jun 14)
|
| Nations at War - Scenario Appearance Percentages | ||
|---|---|---|
| Australia |
100%
|
Australia |
| Japan |
100%
|
Japan |
| United States |
3%
|
United States |
| Battle Types - Scenario Appearance Percentages | ||
|---|---|---|
| Inflict Enemy Casualties |
83%
|
Inflict Enemy Casualties |
| Urban Assault |
67%
|
Urban Assault |
| Road Control |
43%
|
Road Control |
| Hill Control |
20%
|
Hill Control |
| Delaying Action |
13%
|
Delaying Action |
| Airfield Control |
10%
|
Airfield Control |
| Exit the Battle Area |
10%
|
Exit the Battle Area |
| Ambush |
7%
|
Ambush |
| Breakout |
3%
|
Breakout |
| Meeting Engagement |
3%
|
Meeting Engagement |
| Rear Guard |
3%
|
Rear Guard |
| Surprise Attack |
3%
|
Surprise Attack |
| Bridge Control |
3%
|
Bridge Control |
| Conditions - Scenario Appearance Percentages | ||
|---|---|---|
| Terrain Mods |
73%
|
Terrain Mods |
| Hidden Units |
43%
|
Hidden Units |
| Off-board Artillery |
13%
|
Off-board Artillery |
| Reinforcements |
7%
|
Reinforcements |
| Randomly-drawn Aircraft |
3%
|
Randomly-drawn Aircraft |
| Illumination |
3%
|
Illumination |