
|
Jebel Mukaber and “The Sausage” Sword of Israel #24 |
||
|---|---|---|
| (Attacker) State of Israel | vs | Kingdom of Jordan (Defender) |
| Formations Involved |
|---|

| Total | |
|---|---|
| Side 1 | 0 |
| Draw | 1 |
| Side 2 | 1 |


| Overall Rating, 2 votes |
|---|
|
3.5
|
| Scenario Rank: --- of 913 |
| Parent Game | Sword of Israel |
|---|---|
| Historicity | Historical |
| Date | 1967-06-05 |
| Start Time | 15:30 |
| Turn Count | 8 |
| Visibility | Day |
| Counters | 52 |
| Net Morale | 1 |
| Net Initiative | 3 |
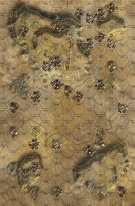
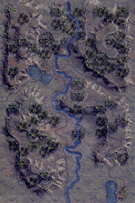
| Maps | 1: 64, 95 |
| Layout Dimensions | 43 x 28 cm 17 x 11 in |
| Play Bounty | 153 |
| AAR Bounty | 171 |
| Total Plays | 2 |
| Total AARs | 1 |
| Battle Types |
|---|
| Inflict Enemy Casualties |
| Entrenchment Control |
| Conditions |
|---|
| Anti-infantry Wire |
| Anti-tank Ditches |
| Entrenchments |
| Minefields |
| Off-board Artillery |
| Smoke |
| Scenario Requirements & Playability | |
|---|---|
| Sword of Israel | Base Game |
| Introduction |
|---|
|
Jordan pre-emptively occupied Jebel Mukaber and its environs by sending Ra’Ed Awad and his two infantry companies from the 27th Imam Ali Infantry Brigade to take key positions around Jerusalem including Antenna Hill and Government House which was UN neutral ground. This also linked up with Hittin Infantry Brigade troops in a trench sector to the south called “The Sausage.” The threat to nearby Kibbutz Ramat Rachel could not be ignored by the Israelis, and they sent the 16th Etzioni Jerusalem Infantry Brigade’s Battalion 161 to capture the heights, and if successful, to attempt to clear the other Jordanian positions. |
| Conclusion |
|---|
|
Some of the Israeli tanks bogged down in the mud preparing for the attack, but the remainder and the infantry quickly captured Government Hill. Surprisingly, the Jordanian recoilless rifle units stayed out of the fght, but then launched a counterattack under cover of the artillery on Abu Tor to the north. After initial success, the Jordanians were thrown off the hill and retreated. The Israelis then swept down on The Sausage and cleaned out the trenches where the infantry had quietly awaited their fate. Many Jordanians fought to the death, but as the Israeli commander noted, “they fought stupidly. The Jordanian fghting positions were badly planned. They expected us only from one direction.” |

|
|
|---|
| AFV Rules Pertaining to this Scenario's Order of Battle |
|---|
|
| Royal Jordanian Army |
|---|
|


| Army |
|---|
|


| 1967: Sword of Israel, scenario Twenty Four: Jebel Muksber and “The Sausage” | ||||||||||||
|---|---|---|---|---|---|---|---|---|---|---|---|---|
1967: Sword of Israel, scenario Twenty Four: Jebel Muksber and “The Sausage” This scenario was a real chisel to rock, as the Jordanians were embedded in the terrain, entrenchments, minefields, AT Ditches and Barbwire, not to mention dug-in and the Israeli player only has 8 turns to clear them out. The Israelis player decided to use a sweeping around from the north approach and trying to get to the rear of the Jordanian player’s forces but easier said than done. The Jordanians have a weak morale and the Israeli player fights tooth and nail eliminating most of the Jordanians from the entrenchments but one full strength Infantry unit at the far southern end of the line. The Israeli player needed maybe one more turn to clear the enemy but they still lost more than four steps, in fact 10 steps, as they have no off-board artillery support and only 8 turns to try and achieve a lot but not in this scenario, the Jordanians win a hollow major victory, as most of their forces are destroyed. |
||||||||||||
| 0 Comments |