
|
Road to Damascus Intervention #2 |
||
|---|---|---|
| (Attacker) State of Israel | vs |
Soviet Union
(Defender)
Syrian Arab Republic (Defender) |
| Formations Involved | ||
|---|---|---|
| Soviet Union |  |
357th Airborne Regimen |
| State of Israel |  |
37th “Ream” Armoured Brigade |
| Syrian Arab Republic |  |
12th Group Brigade |

| Total | |
|---|---|
| Side 1 | 1 |
| Draw | 0 |
| Side 2 | 0 |


| Overall Rating, 1 vote |
|---|
|
4
|
| Scenario Rank: --- of 913 |
| Parent Game | Intervention |
|---|---|
| Historicity | Alt-History |
| Date | 1967-06-10 |
| Start Time | 10:00 |
| Turn Count | 22 |
| Visibility | Day |
| Counters | 79 |
| Net Morale | 0 |
| Net Initiative | 1 |
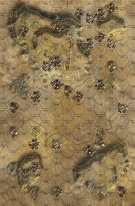
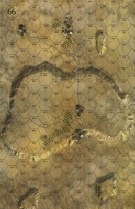
| Maps | 2: 64, 66 |
| Layout Dimensions | 56 x 43 cm 22 x 17 in |
| Play Bounty | 182 |
| AAR Bounty | 171 |
| Total Plays | 1 |
| Total AARs | 1 |
| Battle Types |
|---|
| Exit the Battle Area |
| Inflict Enemy Casualties |
| Conditions |
|---|
| Off-board Artillery |
| Scenario Requirements & Playability | |
|---|---|
| Intervention | Base Game |
| Sword of Israel | Maps + Counters |
| Introduction |
|---|
|
While speculation in the decades after the war would focus on Soviet desires to destroy the nuclear facility in the Negev, at the time it seemed more likely that if the Soviets intervened at all it would be to stave off a catastrophic defeat of their Syrian clients. The Israeli drive on Damascus alarmed the Soviet leadership, which like much of the Syrian Army was misled by an inaccurate report from Syrian government radio that the key road junction of al-Qunaytarah had fallen to the Israelis. The Syrian Army collapsed on the news, which was not true, and both sides soon accepted a cease-fire agreement. |
| Conclusion |
|---|
|
While speculation in the decades after the war would focus on Soviet desires to destroy the nuclear facility in the Negev, at the time it seemed more likely that if the Soviets intervened at all it would be to stave off a catastrophic defeat of their Syrian clients. The Israeli drive on Damascus alarmed the Soviet leadership, which like much of the Syrian Army was misled by an inaccurate report from Syrian government radio that the key road junction of al-Qunaytarah had fallen to the Israelis. The Syrian Army collapsed on the news, which was not true, and both sides soon accepted a cease-fire agreement |

|
|
|---|
| AFV Rules Pertaining to this Scenario's Order of Battle |
|---|
|
| Guards |
|---|
|


| Army |
|---|
|


| Army |
|---|
|


| Intervention: scenario #2: Road to Damascus | ||||||||||||
|---|---|---|---|---|---|---|---|---|---|---|---|---|
Intervention: scenario #2: Road to Damascus I must have played the first scenario one or two years ago and I have had this one on my must play list for that long. Finally this weekend it has been played! Kind of an interesting scenario to play, the Syrian defend on the first line of defense on map 64 and the Soviets defend on the second line defense on map 66 and the Israel forces enter on the western edge of map 64 and must blast through these two defensive lines and get points for exiting units off the eastern edge of the of map 66. Both sides get the standard points for eliminating enemy units but the Syrian steps are only worth 1/2 the normal points. The Israeli forces enter the map and at first the progress is very slow against these dug-in enemy positions and I had forgotten how easily Sherman tanks are destroyed even by Infantry units in PG Modern. Losses started to mount until I realized I needed to start leading with my Infantry units. The Israeli forces started to clear a large section on their right flank almost to the middle of the map from the Syrian force even into the Soviets second line of defense. At this point I realized I wasn’t winning by points as the Israeli play as the Soviet/Syrians had a clear lead, so I poured all my Israeli forces into the right flank and the very large hole and off the eastern edge of the map, gathering a ton of points. The Soviets and Syrians had too much ground to defend once their lines were broken and even after shifting forces it was too late. The Israeli side won a Major Victory, 60 to 30 in points. Interesting however, if the Israel side doesn’t break through, they would have lost in the step count 30 to 20 as they received 40 points in exited steps. If the Soviets and Syrian forces could have worked together in their setup, I doubt the Israeli forces could have broken through but with the Syrian morale at 6/5 they needed close Soviet support with a nice 8/8 morale. So I should have setup the Syrian and Soviet defenses closer together. Maybe put the Syrian line on the far eastern side of map 64 and the Soviet line on the far western side of map 66 and then they could have supported each other better and I doubt the Israel side would have won. Something to try next time. A fun scenario to play, as at first I thought one side had the victory and later in play the other side had the clear victory. |
||||||||||||
| 0 Comments |