
|
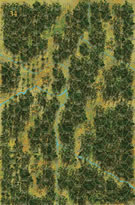
Ioribaiwa, Day One Kokoda Trail #18 |
||
|---|---|---|
| (Defender) Australia | vs | Japan (Attacker) |
| Formations Involved | ||
|---|---|---|
| Australia |  |
21st Infantry Brigade |
| Japan |  |
41st Infantry Regiment |

| Total | |
|---|---|
| Side 1 | 1 |
| Draw | 4 |
| Side 2 | 2 |


| Overall Rating, 6 votes |
|---|
|
4.17
|
| Scenario Rank: 51 of 913 |
| Parent Game | Kokoda Trail |
|---|---|
| Historicity | Historical |
| Date | 1942-09-13 |
| Start Time | 14:00 |
| Turn Count | 9 |
| Visibility | Day |
| Counters | 33 |
| Net Morale | 1 |
| Net Initiative | 2 |
| Maps | 1: 34 |
| Layout Dimensions | 43 x 28 cm 17 x 11 in |
| Play Bounty | 126 |
| AAR Bounty | 159 |
| Total Plays | 7 |
| Total AARs | 3 |
| Battle Types |
|---|
| Ambush |
| Road Control |
| Rural Assault |
| Conditions |
|---|
| Hidden Units |
| Terrain Mods |
| Scenario Requirements & Playability | |
|---|---|
| Afrika Korps | Counters |
| Guadalcanal | Counters |
| Kokoda Trail | Base Game |
| Introduction |
|---|
|
After several days of delaying attacks and ambushes against the advancing Japanese by the tattered remnants of 21st Brigade, the battle approached Ioribaiwa Ridge where Brigadier Eather had assembled all three battalions of 25th Brigade as well as the reserve 3rd Battalion from Maroubra Force. The Australians were set to counterattack on September 14th, but Maj. Gen. Horii acted first and ordered the depleted II Battalion of 41st Regiment to attack across the creek bottom. Unfortunately for him, the Japanese walked into an ambush manned by the remaining soldiers of the 2/14 and 2/16th Battalions. |
| Conclusion |
|---|
|
In the final battle of the long withdrawal from Efogi, the composite 2/14th and 2/16th Battallion held the creek crossing until nightfall allowing Brigadier Eather to proceed with his planned counterattacks the next day. Meanwhile, Maj. Gen. Horii ordered all his remaining troops into a renewed offensive on the next day as well. |

|
|
|---|
| Army |
|---|
|


| Imperial Japanese Army |
|---|
|


| Honor And Sacrifice Didn't Save the Day | ||||||||||||
|---|---|---|---|---|---|---|---|---|---|---|---|---|
Skipping scenario 16 for the moment, I got this short 9-turn fight on the table today. Japanese enter from the north and need to take a specified route of trail hexes while eliminating as many Australians as possible, the Australians need to hang on to those trail hexes and eliminate more Japanese units. Looked simple. Australians defend forward and lock up the Japanese as much as possible, giving ground grudgingly while depending on their marksmanship and nearly equal morale to survive long enough to keep trail hexes and kill Japanese units. Japanese enter, the Major, a Captain and 2 LTs in 3 stacks taking advantage of chain of command and moving south down the trail, while the rest, a Captain and 2 LTs enter in line further east and slog through the jungle to flank the Australian defenders and take trail hexes with little or no contest. Australian luck failed them for the most part and Japanese plans worked well. The forward defense got hung up immediately with assaults and failed time after time to do any damage in DF but disrupting assaults while taking occasional casualties. The Australian commander and 2 infantry units were holding the one village hex to the rear, thinking to act as a stop gap to anything that got through the forward defense, but the Japanese line got to the trail before him and started taking hex after hex. On turn 8, the LTC and his men valiantly threw themselves into an assault, trying to keep the last trail hex in friendly hands, but he died when the Japanese got a 2X result followed by a 2 result for leader loss. His surviving troops died on the final turn to another 2X result that cleared all but one contested hex, which fell in a last turn of assault, with another leader loss taking the LT after the single HMG step he still lead died. Japanese held the entire trail and took 6 steps of Australians in the process to only 2 steps of Japanese who died for thier emporer. Great little game. |
||||||||||||
| 0 Comments |
| Hold Your Fire |
|---|
|
The action in this scenario centers around control of the trail leading through the eastern section of the mapboard. The Australians have been able to set up their defense in hidden ambush. The Japanese have numerical and the usual morale superiority but the short scenario length and the need to attack to gain control of the trail will require them to advance quickly and potentially recklessly if they are delayed (as usual, the previous note is foreshadowing...) The Australians set up a first ambush in the second trail hex and put the remaining two companies in the jungle south of the trail immediately behind the ambush. With the reserves (which can be seen by the Japanese player) is the Australian commader a 10-1-1 behemoth. The Japanese are led capably by a 9-0-0 Major. The Japanese advance straight up the trail with two infantry platoons which unfortunately find the ambush forcing it to do Op Fire instead of get the nasty ambush bonus. The Op Fire kills a step but the remaining Japanese quickly advance to surround the INF and HMG. This assault only resolves on turn 5 after losses on both sides. Meanwhile the remainder of the Japanese force sidesteps the assault hex and gains the trail behind it and runs into 4 INF platoons led by the Australian commander who pours 16 DF into Op Fire and kills a step and demoralizes an INF. This leads to a subsequent turn assault which kills yet another step while the remainder of the Australian force contests the Japanese control of the trail further on. The Japanese Major knows that his losses have been significant and that control of trail hexes will ultimately determine the scenario so he takes a 1 step INF and advances quickly down the trail with the intention of controlling hexes and taking them away from the Australians...and runs headlong into the second ambush which this time comes off beautifully, eliminating the INF and killing the Major, decapitating most of the Japanese force and effectively ending the scenario. This is the first time I have had an ambush come off as planned and had a wonderful time of it. I give this one a "4". |
| 0 Comments |
| So much to do, so little time |
|---|
|
In this scenario, the Japanese are sending a small force forward in advance right into an Australian ambush. Victory is based on number of trail hexes controlled and number of casualties inflicted. The Australians set up most of their units just south of the trail where it runs east-west, many of the units hidden. A small detachment guards the trail where the stream acts as a path of approach. The Japanese do send a force down the stream, with the rest coming in on the trail. The Japanese don’t spot the Australians lying in ambush until they are adjacent. A huge firefight between the small forces begins, with some Japanese HMGs trying to move around the Australian flank. Unfortunately the short length of the scenario makes the HMGs less of a factor as they had to spend too long moving. The Australians beat up the Japanese pretty bad, but take some hits themselves. As the end of the scenario approaches, the Australians assault weaker Japanese forces holding trail hexes. Unfortunately, a small stack of Japanese does move down the trail. But the Inf is disrupted, so moves at one hex per turn. Once again, the short length of the scenario means moving disrupted may be faster than failing a recovery effort. The Japanese moving down the stream make the trail, and spread out to occupy hexes before the scenario ends. The Australians blow away one step and then launch an assault on another trail hex to contest it. In the end, the Japanese suffer five steps, but control eight hexes of trail. The Australians suffer only two steps, but only control four hexes. Final score, Japanese 10, Australians 9, a draw. Neat little scenario. Perhaps the Aussies should have defended a little more forward, but they did not want to get caught in assaults while small Japanese forces move around them. Not much time to do anything, so both sides are suffering significant time pressure. Very tense for a small scenario. I rate this a 4. |
| 0 Comments |