
|
Ioribaiwa Scenario 2: Ioribaiwa, Day Two Kokoda Campaign #15 |
||
|---|---|---|
| (Defender) Australia | vs | Japan (Attacker) |
| Formations Involved | ||
|---|---|---|
| Australia |  |
21st Infantry Brigade |
| Australia |  |
25th Infantry Brigade |
| Japan |  |
144th Infantry Regiment |
| Japan |  |
41st Infantry Regiment |

| Total | |
|---|---|
| Side 1 | 1 |
| Draw | 1 |
| Side 2 | 3 |


| Overall Rating, 6 votes |
|---|
|
3.67
|
| Scenario Rank: 293 of 913 |
| Parent Game | Kokoda Campaign |
|---|---|
| Historicity | Historical |
| Date | 1942-09-14 |
| Start Time | 08:00 |
| Turn Count | 24 |
| Visibility | Day |
| Counters | 131 |
| Net Morale | 0 |
| Net Initiative | 0 |
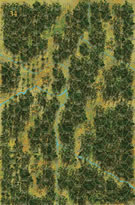
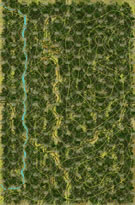
| Maps | 2: 34, 35 |
| Layout Dimensions | 56 x 43 cm 22 x 17 in |
| Play Bounty | 178 |
| AAR Bounty | 165 |
| Total Plays | 5 |
| Total AARs | 2 |
| Battle Types |
|---|
| Hill Control |
| Inflict Enemy Casualties |
| Road Control |
| Conditions |
|---|
| Terrain Mods |
| Scenario Requirements & Playability | |
|---|---|
| Kokoda Campaign | Base Game |
| Introduction |
|---|
|
Promptly at 0800 on the 14th of September the Australian 25th Brigade launched its flanking attack down Ioribaiwa Ridge, the 2/31st on the left flank and the 2/33rd on the right. The composite 2/14th and 2/16th in the center was ordered to slowly retreat back up onto the ridge and draw the advancing Japanese into the trap. The Japanese had plans of their own, however, and launched a broad frontal attack at the same time using all of their remaining troops. |
| Conclusion |
|---|
|
Before even reaching the bottom of the ridge, the 2/31st and 2/33rd encountered strong Japanese forces attacking toward them. The battle quickly changed into a desperate defense of the ridgeline by the Australians. At close of day the Australians were still holding a line across the face of the ridge but the battle was undecided. |

|
|
|---|
| Army |
|---|
|


| Imperial Japanese Army |
|---|
|


| Ioribaiwa Battle game / scenario 2 and end : Jap assault on the hills | ||||||||||||||
|---|---|---|---|---|---|---|---|---|---|---|---|---|---|---|
The first scenario of this battle game was bad for the Japanese : they lost the scenario with no possibility to win the battle game in the end. The only thing they can fight for, in this second scenario, is to force the draw. The second scenario is rather large with a full scale assault of two 80m high hills separated by the Kokoda trail running in the valley between them. The Australians set up is aligned transversaly on the length of the board they defend. Since the board is 17 hexes long, there no more than 1 or 2 platoons and max one leader in every hex on that line. The Japanese approach is rather quick in the center thanks to the trail : this is the schwerpunkt, right between the hills. On the aisles, Japanese movement is slow due to jungle everywhere and disorientation. 5 japanese 81mm mortars give some bombardment power but there's a low ammo rule : whenever a mortar fires, you have to roll one die. If the result is 1, the mortar is removed. On the first bombardment of 3 of my mortars, I've rolled 1 - 1 - 1. All out !!! On the first shot !!! All we can do now is to assault, assault and assault again ! The Japanese tactic was simple : send one inf platoon in assault and hope for the best (one part of that platoon has to remain alive...). After this, send the rest of the stack in the same assault, as reinforcement, without attacking. Later you can exit the assault hex with a part of the same stack and reinforce again with a new stack. The Japs played that game again and again with much success so that the Australians got completely stuck on their front line with a lot a Japanese behind him. Soon, they were even divided into two separate half-contingents. When the Aussies tried to recover from that tactic, they began to initiate the assaults to liberate their forces. However, most of these daring assaults against Japanese infantry in the jungle brought many losses to the Australians. In the end : overwhelming victory for the Japanese with 80-90 victory points. As a consequence, there is no more any possibility for the Australians to win the battlegame neither. The Battlegame is a draw. No need to play the third scenario in the campaign. Good fun with the highest number of assaults I've ever made in a PG scenario. |
||||||||||||||
| 0 Comments |
| Assault & Jungle Practice | ||||||||||||||
|---|---|---|---|---|---|---|---|---|---|---|---|---|---|---|
After playing a few PG scenarios online, my able and more experienced opponents have politely suggested that I need practice leading infantry probes, making assaults and in sequencing attacks, so I chose this big scenario as the Japanese side and played face-to face with an a hard-fighting, rookie PG opponent. I figured that I could afford major losses in units and still have at least a chance of achieving a draw. After reading the available AAR, I thought that I would be very lucky to fight to a draw, but for once, I had -- for me -- remarkably good luck with initiative, morale and assault die rolls. Play took place over 3 days and I got to experience moving troops in steep hills and jungle along the dreaded Kokoda Trail. Learned a number of new things from the Australians in the bargain, in what turned out to be a real challenge for a newbie like me. Slow-moving infantry units in constrained (limiting terrain) valley settings and coping with the disorientation rule was good practice, and underlines the need for patience, deliberate moves and flexibility in approach when playing PG. On the other hand, not having to fiddle with transport units, air support and OBA was a relief. I did have to throw for mortar ammo depletion, but somehow managed to avoided throwing the lethal 1-die roll that results in removing the mortar or 70mm artillery unit from play for 13 of the scenario's 24 turns. I certainly got a workout in close assaults! And thanks to superb Japanese morale, a mostly decent set of 25 (!) leaders, and some lucky die rolls, Japanese close assaults proved to be quite effective, though costly. As others have noted, one has to cycle assaulting units into -- and move through without engaging -- but still leave reinforcements in an assault hex to be able to extend the assault to adjacent hexes. This means that one's infantry platoons may exit assault hexes without getting slammed by the often-deadly Parthian shot, were all the defending units get a free parting shot at one's usually reduced and disrupted units. Wish that I could claim credit for this neat tactic, but the author of the previous AAR described this fine tactic in enough detail that I could successfully pull it off after some initial bumbling tries. When the Japanese Commander gradually got used to the required sequence and rhythm of attack, this method became the standard for the balance of the scenario. This method also led to a good deal of infiltration of Japanese units behind the general line of defense which ended up splitting the hard-fighting Australian forces into pockets of amazingly stout resistance These cut off hexes were hard for my opponent to reach and relieve. In the end, the Japanese scored an unexpected, major victory with very heavy casualties on both sides. I would like to play this one again as part of the full-3-scenario Ioribaiwa battle game, either online or face-to-face to see if this was simply beginner's luck on my part. |
||||||||||||||
| 0 Comments |