| Author |
Juiceman
|
| Method |
Solo |
| Victor |
Australia |
| Play Date |
2020-12-27 |
| Language |
English |
| Scenario |
KoCa011
|
This scenario is similar to the previous one, except for a different map and slightly different order of battle for the Australians, less three leaders. Japanese OOB is identical to part 1.
For this battle the Australians decided to change their strategy from part 1, they setup small delaying stacks along the trail with the idea of forcing the Japanese to stop and either assault the blocking force or try to go around thru the jungle. Each HMG was paired with an infantry platoon, no leaders and positioned near the first creek crossing. The rest of the force with the leaders would move down the trail and position themselves around the second creek crossing.
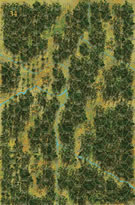
Since the trail on map 34 bends to the East near the top and is only 3 hexes from the North edge before it meanders back south, the Japanese player decided to tempt fate in the jungle once again. 2 companies of infantry would head south thru the jungle, if only one stack could reach the trail it would outflank the Aussie blocking forces further up the trail.
Unlike the previous scenario the Japanese had no luck moving thru the jungle, several units ended up going around in a circle the disorientation was that bad. Perhaps 25% of the Japanese forces got lost in the jungle and played no part in the battle. Several platoons stumbled into the Aussie Sergeant’s position (third blocking force) and were quickly dispatched, including 1 officer.
Meanwhile the rest of the Japanese headed down the trail with the Engineer Company in the vanguard (again). They cleared the first two blocking forces with minimal casualties but then ran into the Aussie Sergeant and his two platoons who extracted several steps and another Japanese officer before his force had to retreat (unfortunately the Sergeant was KIA directing the retreat). The pursuing Japanese then ran into the forces commanded by the Aussie Lt Colonel & the Captain. These forces put up a stiff fight and repulsed several assaults due to the Lt Colonels leadership (10-1-1).
In the end the Australians held the majority of trail hexes (which more than made up for their step losses) and extracted enough Japanese steps which resulted in an Australian Minor Victory.
Several factors contributed to the Japanese poor showing, the Aussie defense strategy, the lost units to the jungle, the Aussies won the initiative battle and the Japanese dice got cold, guess they used up all their good rolls during part 1.
|