
|
27th Regiment's Push to the Poha Jungle Fighting #34 |
||
|---|---|---|
| (Defender) Japan | vs | United States (Attacker) |
| Formations Involved | ||
|---|---|---|
| Japan |  |
2nd "Courageous" Infantry Division |
| United States |  |
27th Infantry Regiment |

| Total | |
|---|---|
| Side 1 | 3 |
| Draw | 0 |
| Side 2 | 1 |


| Overall Rating, 5 votes |
|---|
|
2.4
|
| Scenario Rank: 886 of 913 |
| Parent Game | Jungle Fighting |
|---|---|
| Historicity | Historical |
| Date | 1943-01-24 |
| Start Time | 12:15 |
| Turn Count | 21 |
| Visibility | Day |
| Counters | 69 |
| Net Morale | 0 |
| Net Initiative | 3 |
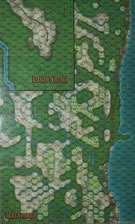
| Maps | 1: Guad-ME |
| Layout Dimensions | 84 x 55 cm 33 x 22 in |
| Play Bounty | 146 |
| AAR Bounty | 159 |
| Total Plays | 4 |
| Total AARs | 3 |
| Battle Types |
|---|
| Rear Guard |
| Rural Assault |
| Conditions |
|---|
| Off-board Artillery |
| Scenario Requirements & Playability | |
|---|---|
| Battle of the Bulge | Counters |
| Guadalcanal | Maps + Counters |
| Jungle Fighting | Base Game |
| Introduction |
|---|
|
With the elimination of the Japanese pocket on the 23rd, the forward battalion of the 27th Infantry Regiment was positioned to resume the advance to the Poha. By noon on the 24th sufficient supplies had been landed at Kokumbona for the offensive to be resumed. |
| Conclusion |
|---|
|
The Japanese coastal positions were too strong for the two-company assault to overcome. Inland the advance of Companies G and H was initially halted, but then the Americans bypassed and outflanked the Japanese position. |
| Additional Notes |
|---|
|
Elsenborn Ridge or Cassino '44 may be used for the U.S. units. |

|
|
|---|
| Imperial Japanese Army |
|---|
|


| Army |
|---|
|


| JF#34 27th's advance to the Poha |
|---|
|
The Japanese set up dug in at the victory hexes and around them. The U.S. advanced on both victory hexes at the same time one company committed to each. There was an exchange of fire that lasted till 1315 with both sides suffering disruptions and demoralizations, but it was the Japanese who also suffered two step losses. At this time the Japanese reenforcements were released and began making their way down the trail toward the sound of the guns. On the very next turn victory hex 1501 fell to the the U.S. and on the turn after that the other hex, 2022, fell also. Now it became a defensive battle for the Americans. Even though they had captured the victory hexes several hexes adjecent to them were still in Japanese hands. The Japanese used these hexes to launch assaults into the victory hexes. The Japanese were somewhat disorganized with all the disruptions and demorilaztions but were able to keep up constant pressure on the victory hexes. The Japanese tried with some success to combine half units in to full strength units so as to consentrate their power for the assaults. This worked but took time. So the Japanese found it hard to throw 3 full strength units into an assault with any kind of consistancy. Both sides were postitioned to feed reenforcements into the assault hexes dragging out the assault over many turns. Eventually the U.S. artillery took it's toll and the Japanese were driven out of assault positions next to and in the victory hex 2022. Hex 1501 had been secured earlier and the Japanese driven away. If it were not for the Japanese assault bonus they would have been defeated earlier. This special ability kept them in the game even after tremendous casulties of 31 steps. (There is no morale loss for the Japanese in this scenario. They begin at zero.) U.S. victory. Good game but the U.S. has to just about wipe out the Japanese to win. Because of the victory conditions of occuping just one of the two victory hexes for the Japanese with no concern for casulties it makes it very hard for the U.S. who can not loose more than 2 steps. Loose 3 steps and the best the U.S. could do is draw. |
| 0 Comments |
| Withstand the 27th & Push Them Back | ||||||||||||||
|---|---|---|---|---|---|---|---|---|---|---|---|---|---|---|
This was a 6-session bludgeoning in the jungle on Guadalcanal with PANISTA ably, leading the attacking American side, and me playing the Japanese defenders of 2, crucial hexes. We used the FOW, excess initiative, Smoke/illum,and consolidation optional rules in this infantry-heavy brawl. The US side has a much harder row to hoe in this, rather stilted scenario, as the Japanese basically just dig in around the 2 victory hexes, and then simply thwart every American push in the vicinity. We drew middling leaders, with the Japanese having slightly better combat modifiers. Others have described this battle in detail, so I will only highlight the general flow and a few instances of interest in what turned into a hard-fought and very costly victory for the Emperor's boys. Initially, a pair of GI companies were assigned to directly attack each of the victory hexes (2022 & 1501). This led to a very lengthy exchange of adjacent-hex fighting and then repeated close assaults, until Japanese reinforcements arrived after their hard slog down the trail. Before they arrived in the combat zone, a single victory hex was liberated by the GIs. Fierce Japanese counter attacks followed from the surrounding area, and eventually the same critical hex changed hands 3 times in our play-through! This was a very costly business for both sides with many morale failures and several leaders falling while leading their slowly-flagging, troops. A number of unit consolidations occurred in the mid-game and a disasterous American senior leader decapitation occurred during game turn 14. The Sons of Nippon had difficulty sequencing their attacks, as well as keeping sufficient reserves on hand to replace demoralized and reduced platoons. The GIs had similar problems and threw an inordinate number of combat 7-die rolls at key moments in this struggle, particularly in US OBA bombardments and ferocious close assaults. The Japanese assault bonus proved it worth again & again in the struggle for Hex 2022, and errant American shelling struck the attacking stacks several times, with deleterious morale results. Step losses steadily mounted throughout our game, with the eventual Japanese loss of 23 steps & 4 leaders, and a US loss of 13 steps & 3 leaders. There were 8 FOW-shortened game turns in our battle, out of the 21 played. This materially benefited the defending Japanese far more than the US side. To win this, nonplaytested scenario, the Americans must destroy darn near the entire Japanese force, with hardly any losses to themselves. Not really a realistic prospect with the flawed victory conditions, and the strength of the opposing force. The published victory conditions require control of only a single victory hexes for the Japanese to win, with no regard to the extent of their casualties, which makes it virtually impossible for the US side to prevail in this one. I give this frustrating episode, a generous, 3, and recommend it for SOLO play only. |
||||||||||||||
| 1 Comment |
I agree with my erstwhile, and well-written opponent, but think that we were too generous in our rating of this unfinished, scenario in serious need of a rewrite. I should have given it a 1 for shared play, and a 2 for its suitability as a solitaire play-through.
| Jungle Fighting #34 | ||||||||||||
|---|---|---|---|---|---|---|---|---|---|---|---|---|
This one has the used up Japanese holding onto two positions that the Americans must clear with limited forces themselves while limiting casualties. The southern position was no problem, as they are mostly already reduced, and aside from a "2" roll on OP fire, arent really a threat to cause step losses. There is enough time to clear this spot as well. The northern position is far denser, and has a pesky x3 INf counterattack stack. Although no longer morale 9, only needing 3 step losses or leader losses, this is likely their best chance for success. They will also be getting reinforcements later in the game. They start on the board but basically arent. Americans are kind of stuck for what to do in the north, if they advance it will be straight to the Japanese stack, which is what they need to avoid. They probably need to hustle up on the southern position and then reinforce the north with those units and hit it from both sides, but then time and the reinforcmeents are a concern. Americans thus move forward and face a t2 assault from the Japanese stack, which survives first fire and rolls a 6, and then kills 2 leaders on leader casualty rolls (lucky them). Luck aside, this is not likely to be an American win as the northern position just has too much, especially once the bodies swarm from the west. As an aside, it was really disappointing that once we drove further west than the map for historical terrain, the scenario is still using the same piece of map we fought over a dozen times already. Seeing as it is now a counts as area, we should be fighting over a different section of map so at least the terrain nuance is different. |
||||||||||||
| 0 Comments |