
|
South of Salzburg Hopeless, But Not Serious #4 |
||
|---|---|---|
| (Defender) Germany | vs | Austria (Attacker) |
| Formations Involved | ||
|---|---|---|
| Austria |  |
3rd Osttiroler "Andreas Hofer" Alpenjäger Bataillon |
| Germany |  |
SA Salzburg Brigade |

| Total | |
|---|---|
| Side 1 | 0 |
| Draw | 0 |
| Side 2 | 4 |


| Overall Rating, 4 votes |
|---|
|
1.75
|
| Scenario Rank: --- of 913 |
| Parent Game | Hopeless, But Not Serious |
|---|---|
| Historicity | Historical |
| Date | 1934-07-28 |
| Start Time | 06:00 |
| Turn Count | 12 |
| Visibility | Day |
| Counters | 27 |
| Net Morale | 1 |
| Net Initiative | 3 |
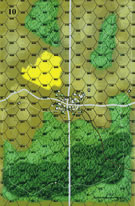
| Maps | 1: 10 |
| Layout Dimensions | 43 x 28 cm 17 x 11 in |
| Play Bounty | 141 |
| AAR Bounty | 165 |
| Total Plays | 4 |
| Total AARs | 2 |
| Battle Types |
|---|
| Urban Assault |
| Scenario Requirements & Playability | |
|---|---|
| Battle of the Bulge | Maps |
| Hopeless, But Not Serious | Base Game |
| Introduction |
|---|
|
Nazi sympathy existed in all of Austria, but less in the western provinces than in others. When Nazi rebels seized the village of Lamprechtshausen on the southern border of Salzburg province, the Federal Army responded with force. Locals refused to join the rising and called out their local Heimwehr units to help the Army expel the Nazis. |
| Conclusion |
|---|
|
The jäger assault on the town cleared the SA from all the buildings and took most of them prisoner. Two soldiers were killed in action, as were four SA men. Two other SA men also died under unclear circumstances; Nazi propagandists later claimed that all six "martyrs" had been lined up and shot. After the Nazis annexed Austria in 1938, all of the 3rd Battalion's officers were arrested and disappeared in the concentration camp system. |

|
|
|---|
| Army |
|---|
|


| Heimwehr |
|---|
|


| Sturmabteilung |
|---|
|


| Boo! |
|---|
|
So the Austrian jaegers walk up to the SA in the town and say "boo" and the SA runs away. Well, not exactly, the SA actually takes advantage of opportunity fire and gets 2 step losses on the jaegers and THEN they melt away in assaults. The Heimat were completely useless in this scenario but one wonders if that would have been a more interesting fight. I had thought that the short scenario (only 3 hours - 12 turns) would have caused a problem but nope. It took an hour to get into position and 45 minutes to crush the SA. The final scenario score was 26-2. The only thing I could think of to possibly get a better result as the SA would have been to burn a detachment in the woods delaying the jaegers. I would strongly suggest that and hope for some good morale rolls in the meantime. |
| 0 Comments |
| Run Away, The Austrians Are Coming! |
|---|
|
Played solo in less than 75 minutes. You can view the SA setup in post 4 of this thread. I followed the suggestion Matt made in his AAR and set up a HMG, INF, and a leader dug in on the road north of the town; the hope was it would slow down the Austrians. The Austrians match down the road and arrive next to the dug in units at 0630 (turn 3) with only one unit disrupted due to opportunity fire. They fire at the dug-in units the next turn and inflict one INF step loss, disrupt the leader and HMG, and the reduced INF is demoralized. The Austrians decide it is not worth investing Austrian regulars in the assault; they move their non-firing units next to the town while the Heimwehr move into position to assault the dug in units. The town assault starts at 0715 (turn 6) and while the SA only suffer only 1 step loss, only three of their units are now in good order. The Austrians inflict 6 more step losses in the next 30 minutes and with all the remaining SA units demoralized and fleeing, I put an end to the battle (the score was already 20-0 for the Austrians and would only get more lopsided). Austrian Major Victory! Casualties: The SA lost 8 steps of infantry (1 from Direct Fire and 7 in Austrian Assaults). I gave this scenario a “1” because while I enjoyed seeing political troops in action, I already gave a bonus point to scenario 2. I can’t see the SA ever winning this scenario with normal play. The town approach is through light wood and the Austrians have plenty of time to ensure the SA won’t get more than a couple of opportunity shots on the 16 column. Special rule: I did not apply the -1 column shift modifier for firing at units on a hill (if on same elevation) because I wanted the SA's opportunity fire to be more effective. |
| 0 Comments |